Answering your questions about bust cup size measurements used in Vikisews patterns.
- When we draft our patterns, we calculate the width and size of the dart by deducting the High Bust measurement from the Full Bust measurement.
- As we grade the sizes up, the darts become bigger. Generally speaking, we could say that size 34 corresponds to cup size A, sizes 36-38 to cup size B, and so on. However, we can’t guarantee this for every pattern, as it all depends on a particular pattern design and the wearing ease.
- As a rule, we recommend choosing a pattern based on your measurements:
- Bust measurement for top garments (dress, jacket, coat, etc.);
- Hip measurement for bottom garments (pants, skirts, shorts, etc.).
- You are also advised to make a toile.
- If you find any fit issues in your toile, you can adjust your pattern accordingly.
If your bust size is bigger than a C cup, then this post might be just what you are looking for! Keep reading to find out how to make a simple adjustment.
Our model Xenia wears size 42 in height group 3. It’s a classic example: her bust measurement is 96 cm and her back width is 35 cm (a standard back width measurement for this size is 37 cm).
You can always compare your back measurement to that in the standard sizes chart included in the pattern, but keep in mind that our patterns already include wearing and design ease allowances.
You’ve chosen the correct size according to your bust circumference, but the garment still doesn’t fit right, some examples of the ill fit are:
- tension and diagonal creases across the bust area;
- the garment is too tight in the bust and rides up;
- the garment creates extra space around the bust, forming an additional dart;
- the bust dart is in the wrong position and has shifted upwards;
- the front hem is shorter than the back hem;
- the back is too wide, the armscye seams shift towards the arms and create vertical creases.
Suggested pattern adjustments, assuming that you’ve made a toile:

- Measure the distance from the floor to the front and back hems.

- Add the difference (for example, 91-89 = 2cm) to the length of the front piece. To do this, cut the pattern along a horizontal line coming from the dart point. Place a strip of paper underneath and spread the sections by 2 cm.
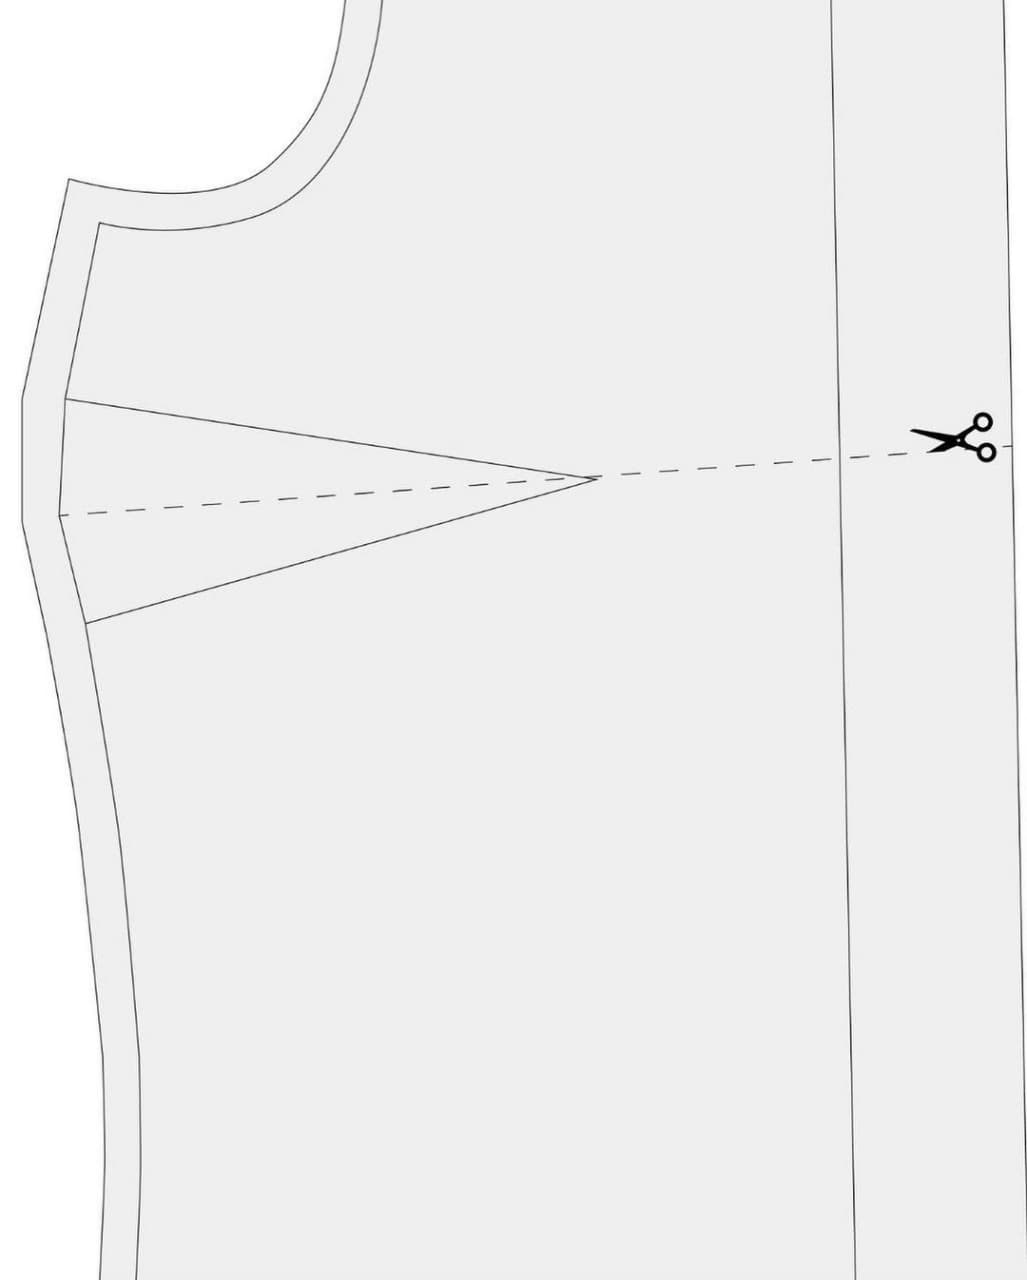
- Mark the new dart point in the middle between the two sections. Or you can find the apex centre in a different way — the main thing is to transfer it to your pattern.

- Connect the new dart point with the original dart legs. This way, the dart width is increased and the dart is lengthened by 2 cm. Since the fit was tight across the bust, the front pattern piece needs to be widened by 0.5-1 cm. Add this width to the side seam of the front pattern piece, right at the top.

- Fold the new dart closed and fold it upwards (or downwards, depending on how it will be pressed
in the garment) to ensure the dart legs match up.
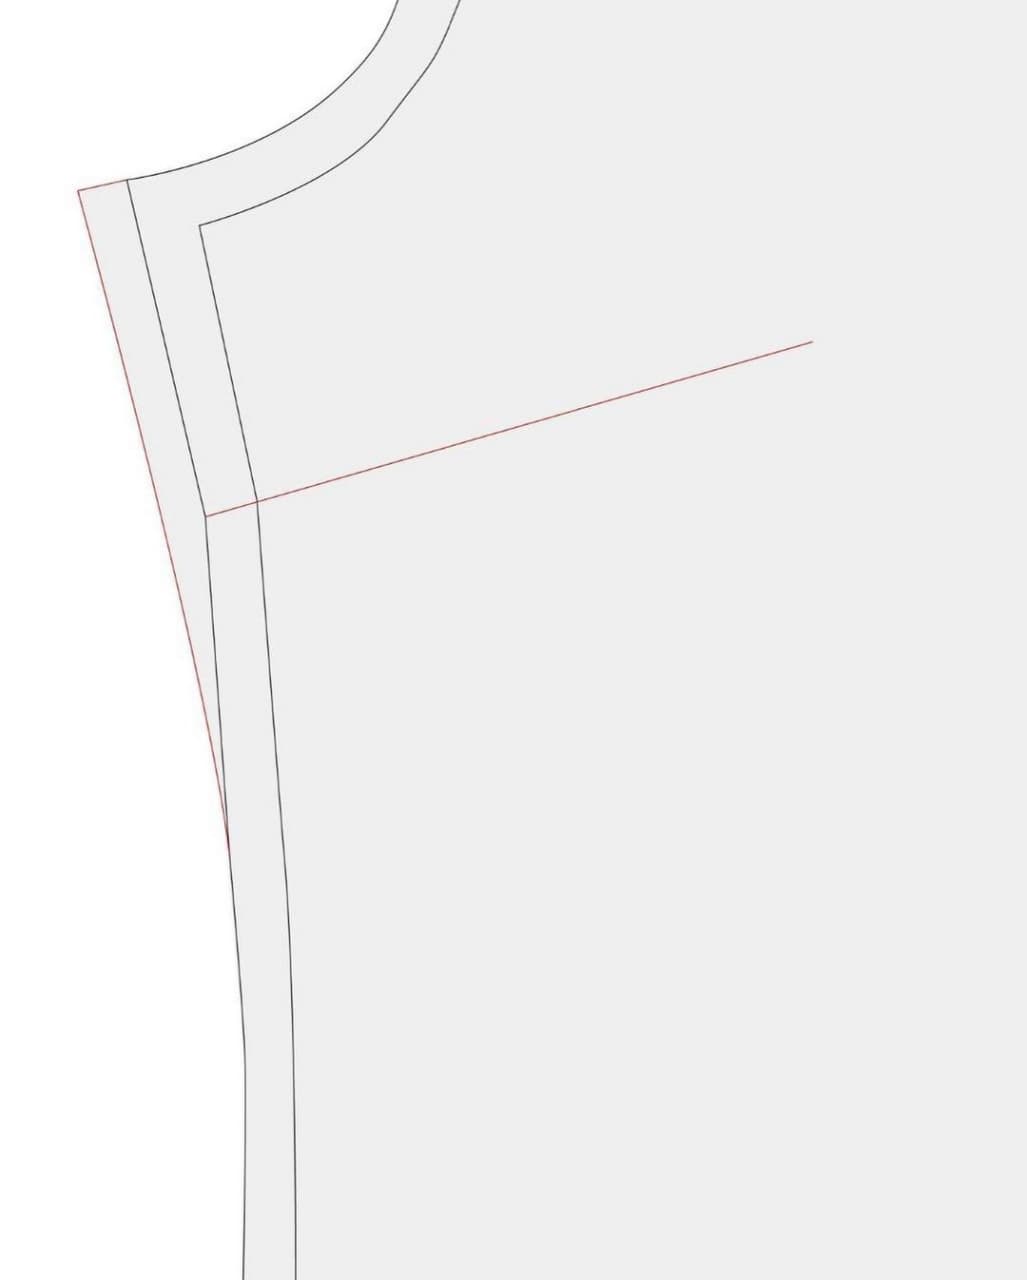
- Correct the side seam line and cut off the excess paper.
We’ll do the opposite on the back piece:

- Mark 1 cm from the left of the original armscye line (thus decreasing the width). Connect
the new line to the end of the shoulder, tapering it to nothing. The armscye line should be at 90 degrees to the shoulder line.
- Make the side seam narrower on top by reducing it by 1 cm.
- Make a new muslin incorporating the changes to the pattern. If it fits well, make a note of all the alterations for future reference.
This method will work for all of Vikisews patterns.
Wishing you the perfect fit!


I absolutely love this articel. It's always been a big problem for me that the garment are to wide in the back when it fits the bust in the front, and I could never find the right solution to fix the problem. So a big thank you from me for showing it so easily!