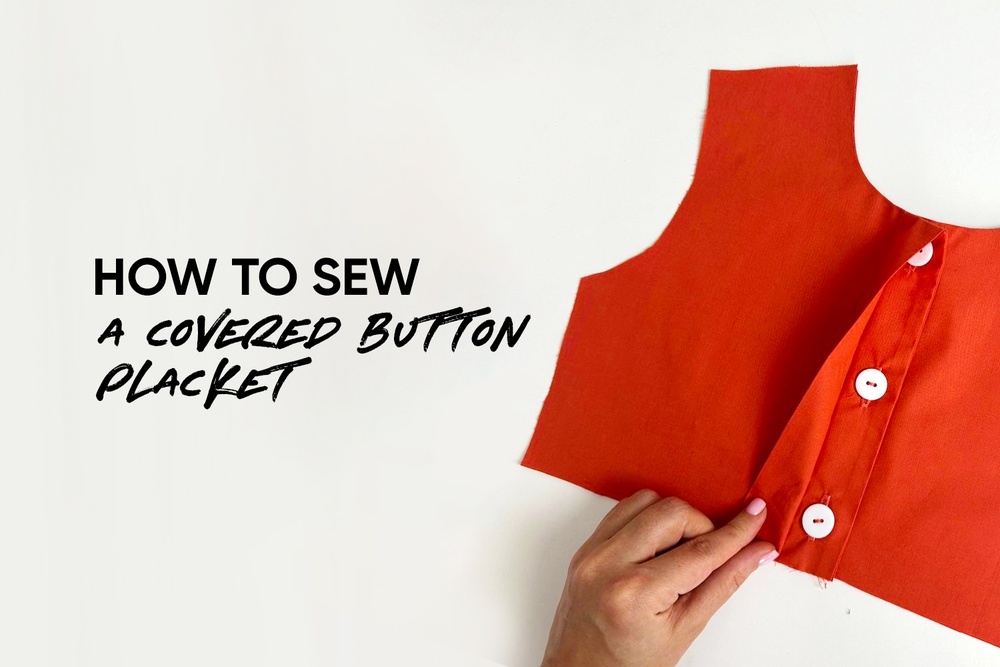
Have you ever sewed a covered button placket? This is a wonderful way to make your garment more chic. Follow along with our new video tutorial, part of the Vikisews sewing hacks series, and you'll learn how to construct a covered button placket easily.
Pattern preparation
1️. Add extra seam allowance to the center edge on the front pieces.
2️. On the right-hand front pattern piece, the extra seam allowance should be 8 cm (3 1/8"). Draw vertical reference lines from the center front edge as follows: 1 cm (3/8") away from the edge, two lines 3 cm (1 1/8") away from each of the previous lines, and lastly two lines 1.5 cm (5/8") away from each of the previous lines. Cut only one such front piece.
3️. On the left-hand front pattern piece, the extra seam allowance should be 2.5 cm (1"). Draw vertical reference lines from the center front edge as follows: 1 cm (3/8") away from the edge and two lines 1.5 cm (5/8") away from each of the previous lines. Cut three front pieces, following this pattern.
Construction of the right-hand front piece
1️. Form the placket on the outer right-hand front piece by folding the placket like an accordion, as shown in the video. The buttonholes will be stitched on this front piece.
2️. Fold the top part of the placket away and then machine-stitch, following the previously pressed foldline.
3️. Place the outer right-hand front piece right sides together with its inner layer (cut following the left-hand front pattern piece). Machine-stitch at 1 cm (3/8") from the edge. Press the seam flat. Fold the inner layer toward the wrong side.
4️. Mark the buttonhole placement on the bottom part of the placket, as shown in the video.
5️. Finish the neckline. To do so, place the front pieces right sides together and machine-stitch 1 cm (3/8") away from the edge. Clip the corner and the neckline edge seam allowances. Turn the piece right side out and press.
6️. Stitch the buttonholes on the bottom placket only, following the marking.
The right-hand front piece is now ready.
Construction of the left-hand front piece
1️. Place the two left-hand front pieces right sides together. Machine-stitch at 1 cm (3/8") from the center front edge.
2️. Continue working from the wrong side. Align the neckline edges of the pieces and machine-stitch, using a 1 cm (3/8") seam allowance. Clip the corner and the neckline edge seam allowances. Turn the piece right side out and press.
3️. Sew the buttons on.
Such a sewing technique can be applied to blouses, shirts, dresses, or blazers.
Give it a try!
Find more sewing tips here:
How to add a decorative zipper to a sleeve inset
How to sew buttons on without making a knot first
Trouser fitting issue: the crotch seam disappears up the bottom


Здесь пока нет комментариев