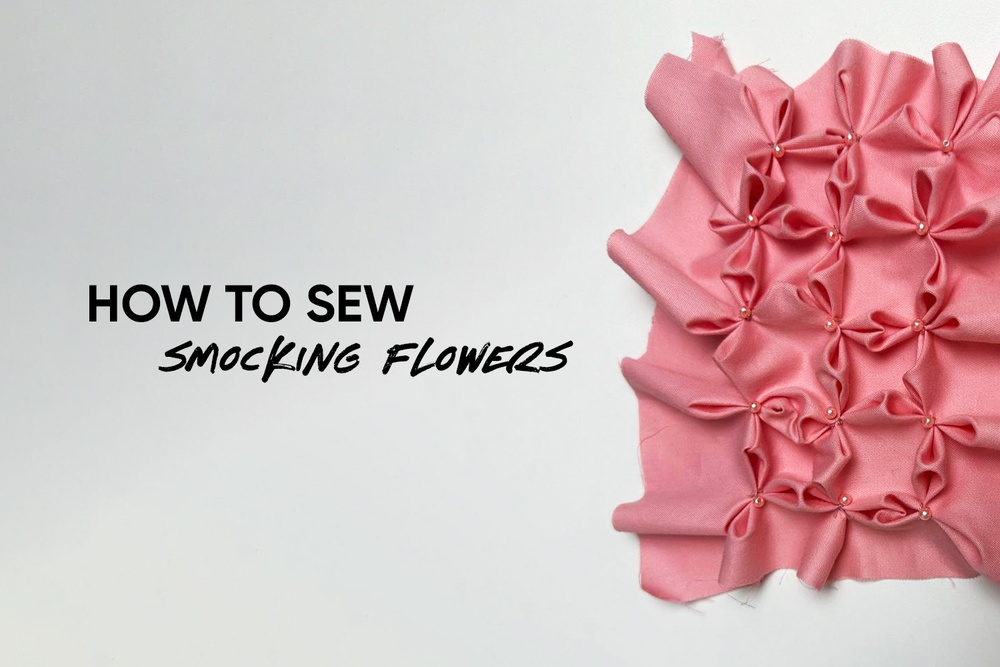
These smocking flowers are so cute, aren’t they? Let’s try this technique as part of Vikisews sewing hacks series!
Step-by-step on how to sew smocking flowers:
Draft the template that will be used to create the flower. To do so, draw the necessary amount of squares on a piece of paper. For this example, the squares are 3×3 cm (3 ⅛” × 3 ⅛”) big.
The smocking begins at one corner and moves toward the opposite one, crossing the center. When sewing, do not use all the squares, but only every other one. This step is best explained in the video.
Punch all the corners of the working squares with any sharp object. Then transfer the markings to the front side of your fabric piece. Keep in mind that when using this smocking technique, the fabric requirements increase by about 2 times.
For the sewing, use a fine needle and a double thread, matching your fabric. Along the outermost corner, sew a small stitch, ensuring the knot is on the wrong side of the fabric. Reach toward the opposite corner, grab a couple of threads, and pull to bring the corners together, creating two petals. Sew a backstitch to secure the center of the flower. Repeat to the remaining two opposite corners to complete the flower. You may use beads or rhinestones to decorate its center.
Repeat the same steps for the remainder of the marked area. This beautiful, hand-sewn technique may be applied to embellish belts or even home decor pieces. Where do you see it being used?
Check out more useful sewing tutorials:


Здесь пока нет комментариев