Fitting is one of the most exciting steps of sewing. Is the garment going to fit? Will it look good? Am I going to love it? You just can’t do without it. And that’s the step that helps you get a real gem as a result!
If your garment has been cut out of the main fabric and the seam allowances are close to minimal, the only thing you can do is to reduce the ease and lengths of the garment. To be able to increase some pieces, make sure to add some width/length to the following beforehand:
- side and shoulder seam allowances
- armscye and neckline edges
- waistline edge
- hem
If the pattern was drafted to be sewn out of the heavy fabric but you would like to use something lightweight to make it, add some width to the seam allowances.
Let’s see how it works. We will be using the silk Caroline dress as an example.
We basted the dress and put it on a wearer’s body. If the dress has a wrap design, pin it along the center front (this also applies to blouses, jackets, coats, etc.). The wearer has to be standing still during fitting.
Now, we check:
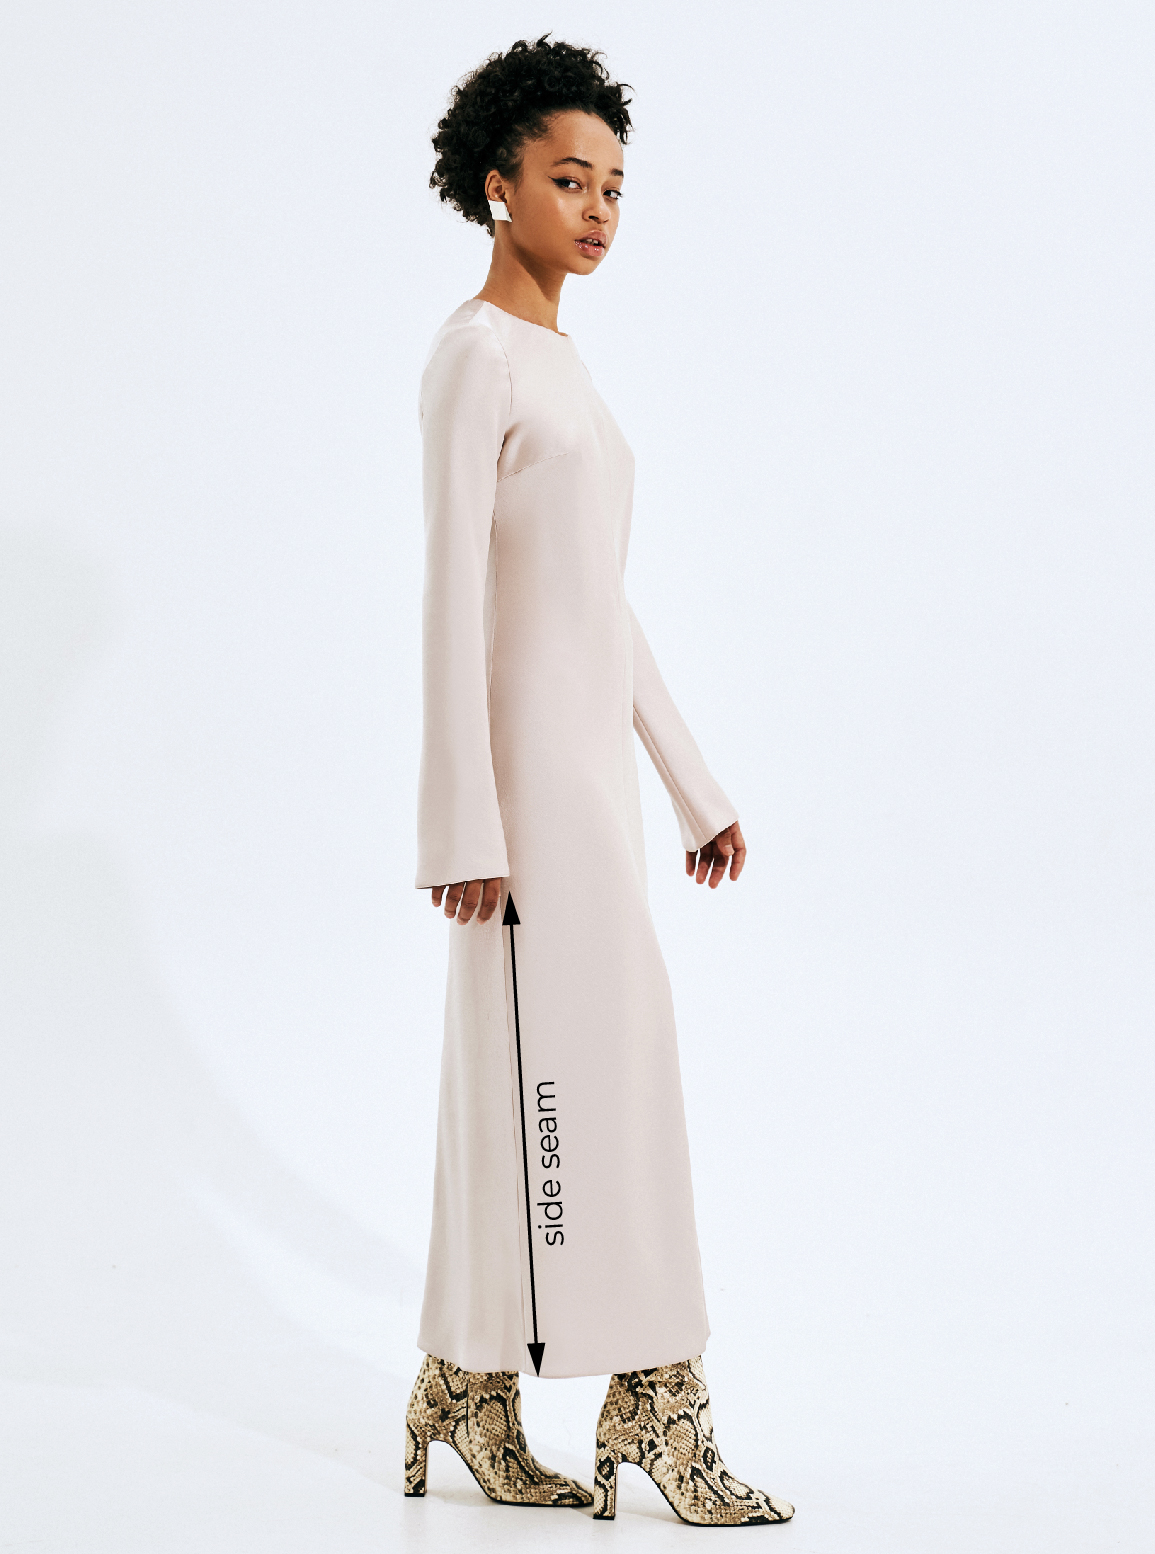
- The side seam
It is vertical and doesn’t slide to the front or back. The bottom edge of the dress is parallel to the floor.
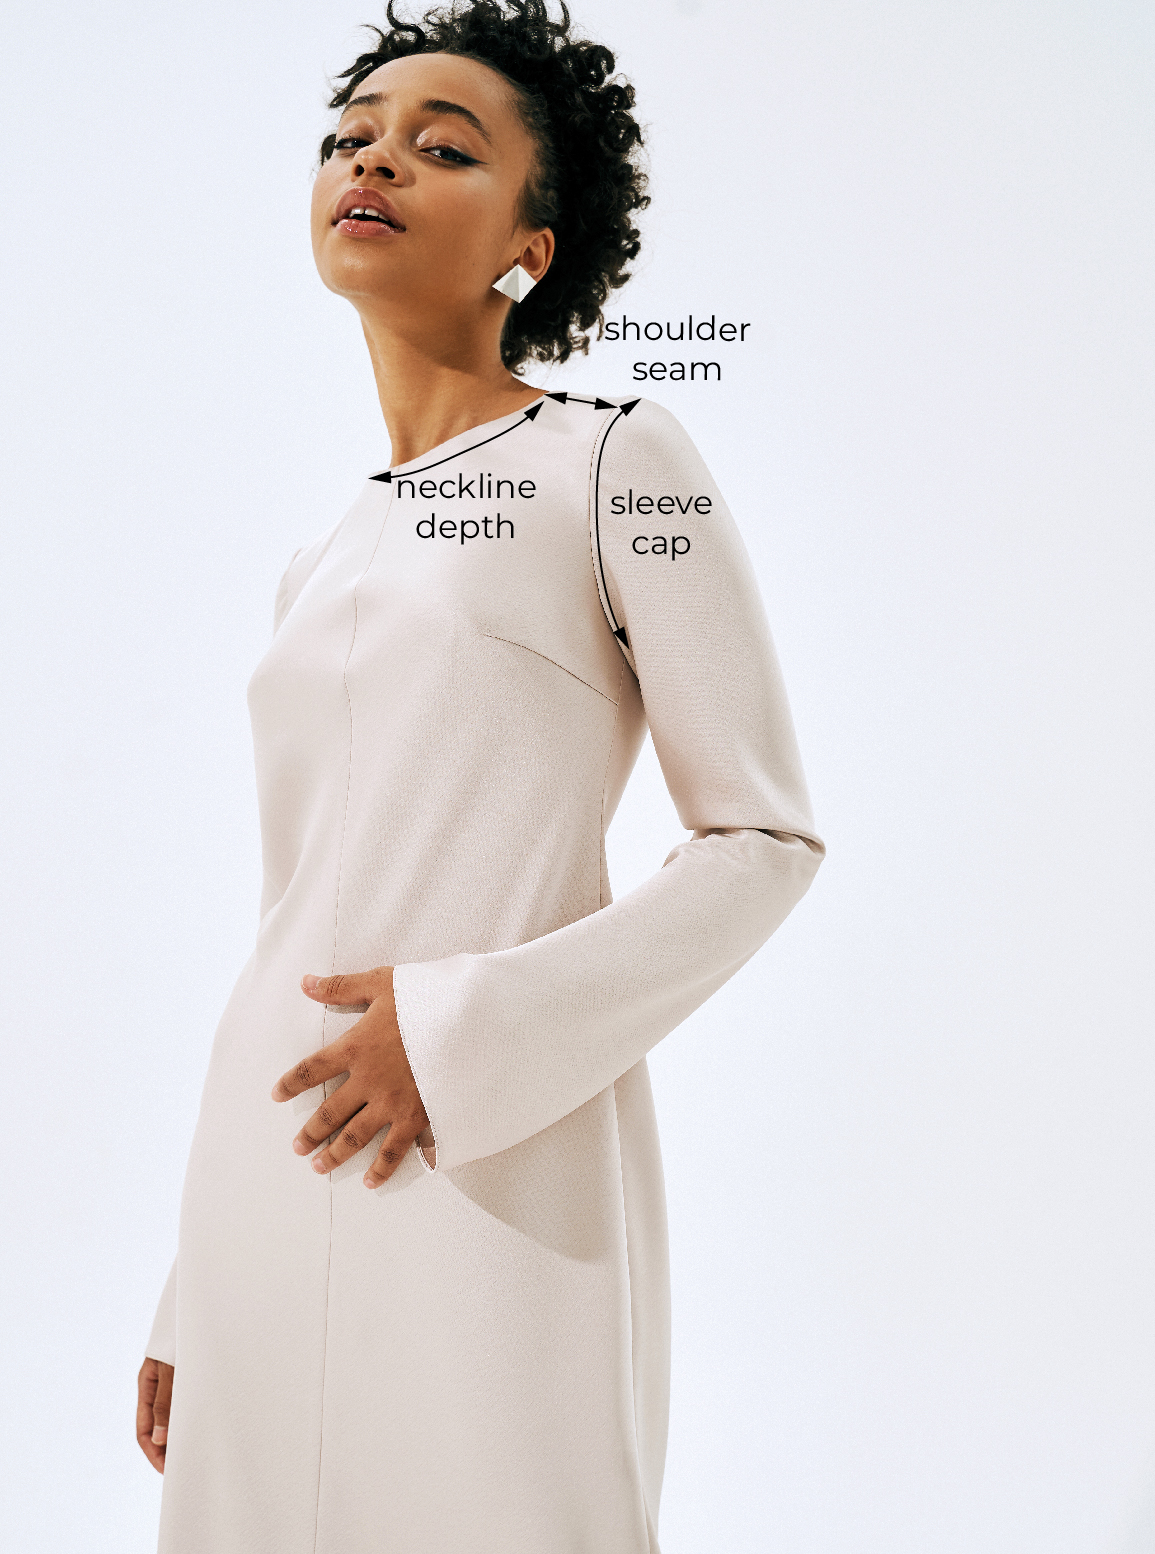
- The shoulder seam
The seam lies on the natural shoulder and doesn’t slide to the front or back. We also have to evaluate the length of the seam. The end of the shoulder seam has to be exactly at the shoulder point (if the sleeve is, like in this case, set-in). At the same time, the shoulder seam must not be short – there should be no tension at the shoulders. Pay attention to the shoulder slope, and check if there are any drag lines. If your shoulders are more sloped or square than average, there might be tension or folds at the shoulder point. Fix these issues if needed.
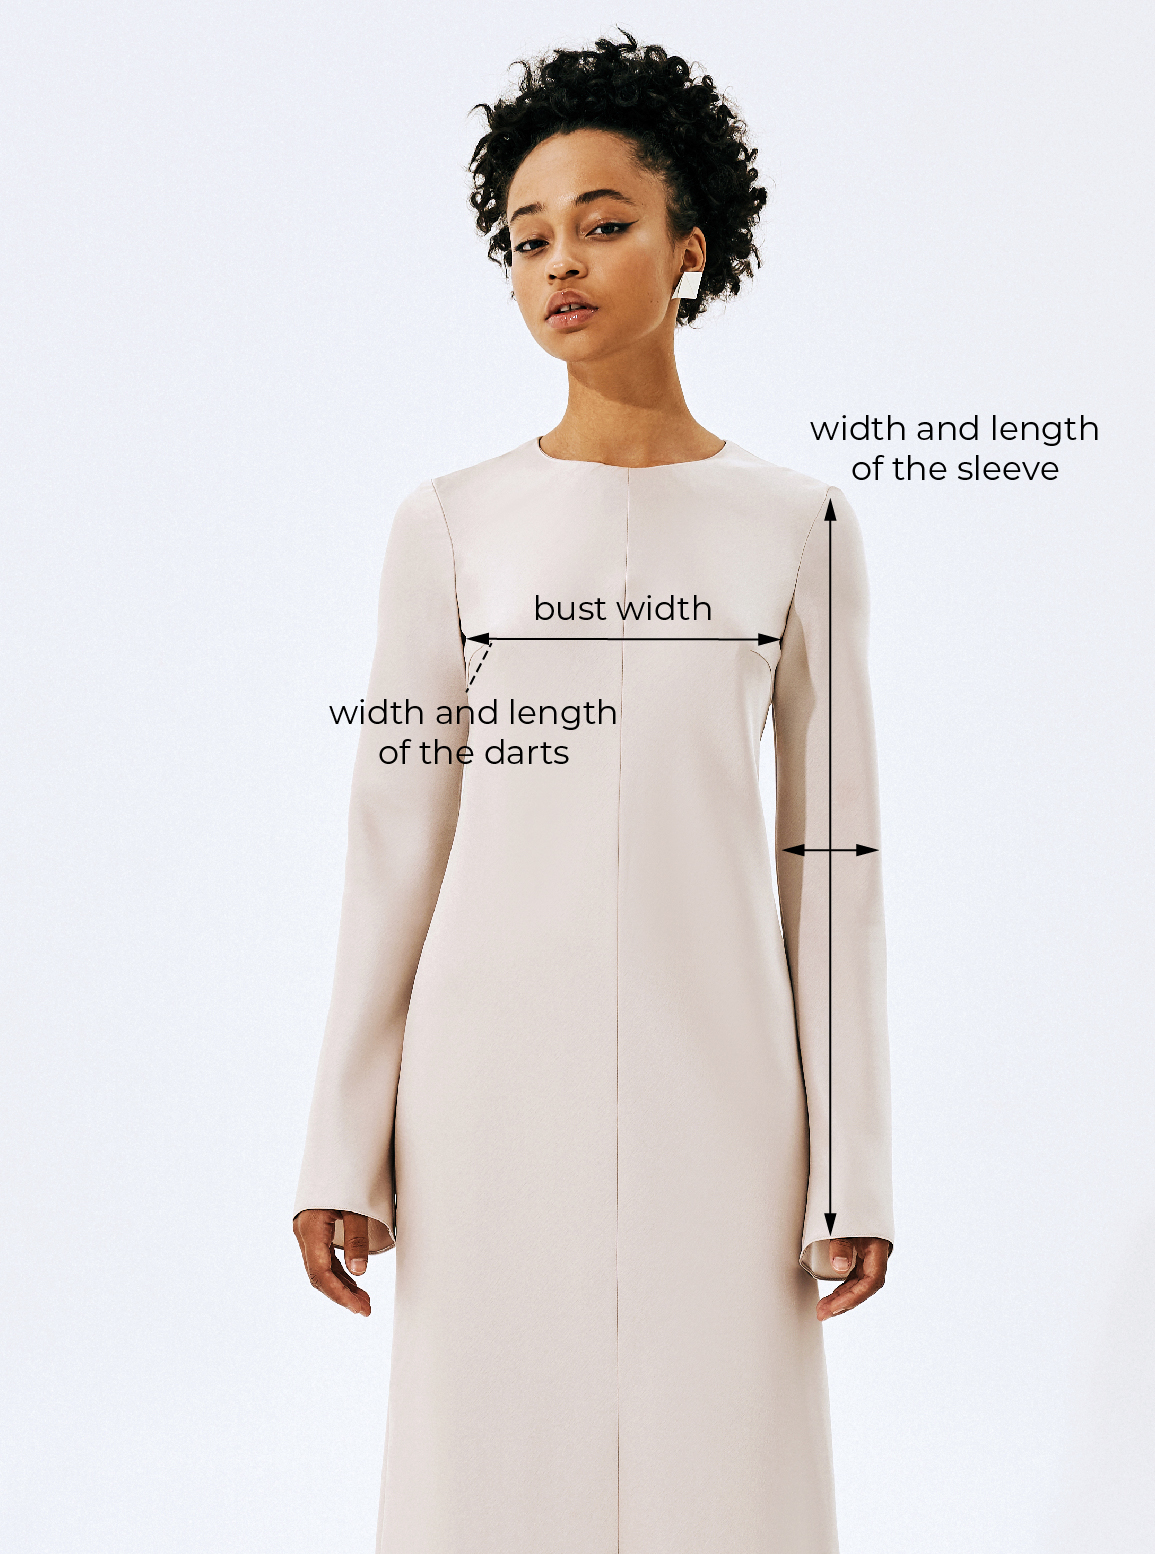
- The width and length of the darts
The bust dart should be pointing towards the bust apex. You can’t have more than two bust darts.
- The garment ease
Check if you need to take in or let out some volume using the additional seam allowance width.
- The waist seam placement (if there’s any)
- The shape and depth of the neckline
The neckline should lie smoothly on the body. Check if it’s riding up. If the neckline has stretched, gather the staystitching along the edge. If you don’t like the depth, alter the shape or width of the neckline. If the neckline feels too tight at the back of your neck, widen it at the back.
- The fit of the sleeve and armscye depth
The sleeve should be vertical, with no drag lines. If the armscye is too tight at the armpit, deepen it and then add the same number to the sleeve cap.
- The garment and sleeve length

That’s it! Make the needed changes to the pattern and to the garment.
Pay attention when you do the fitting, but don’t spend your time on issues that are simply not there. And don’t dodge the fittings!
Read more:


Здесь пока нет комментариев