
There are five cool techniques for finishing the shaped hem on a shirt.
- The faced hem method
For this method, ensure there is a 7 mm (just over 1/4") hem allowance on the garment.
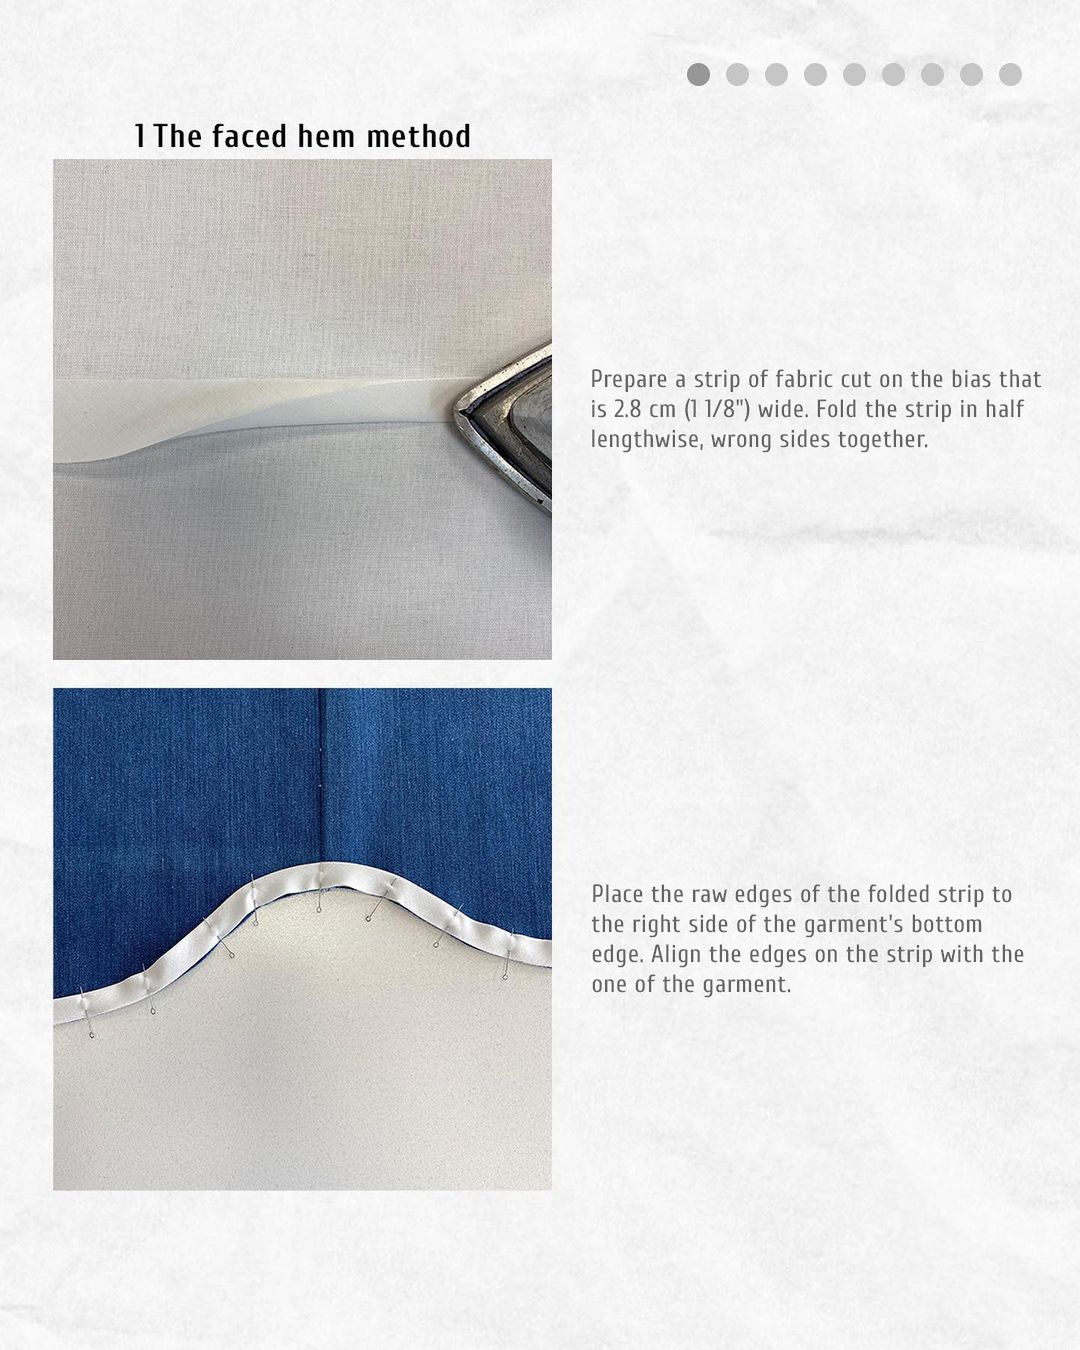
Prepare a strip of fabric cut on the bias that is 2.8 cm (1 1/8") wide. Fold the strip in half lengthwise, wrong sides together.
Place the raw edges of the folded strip to the right side of the garment's bottom edge. Align the edges on the strip with the one of the garment and pin.
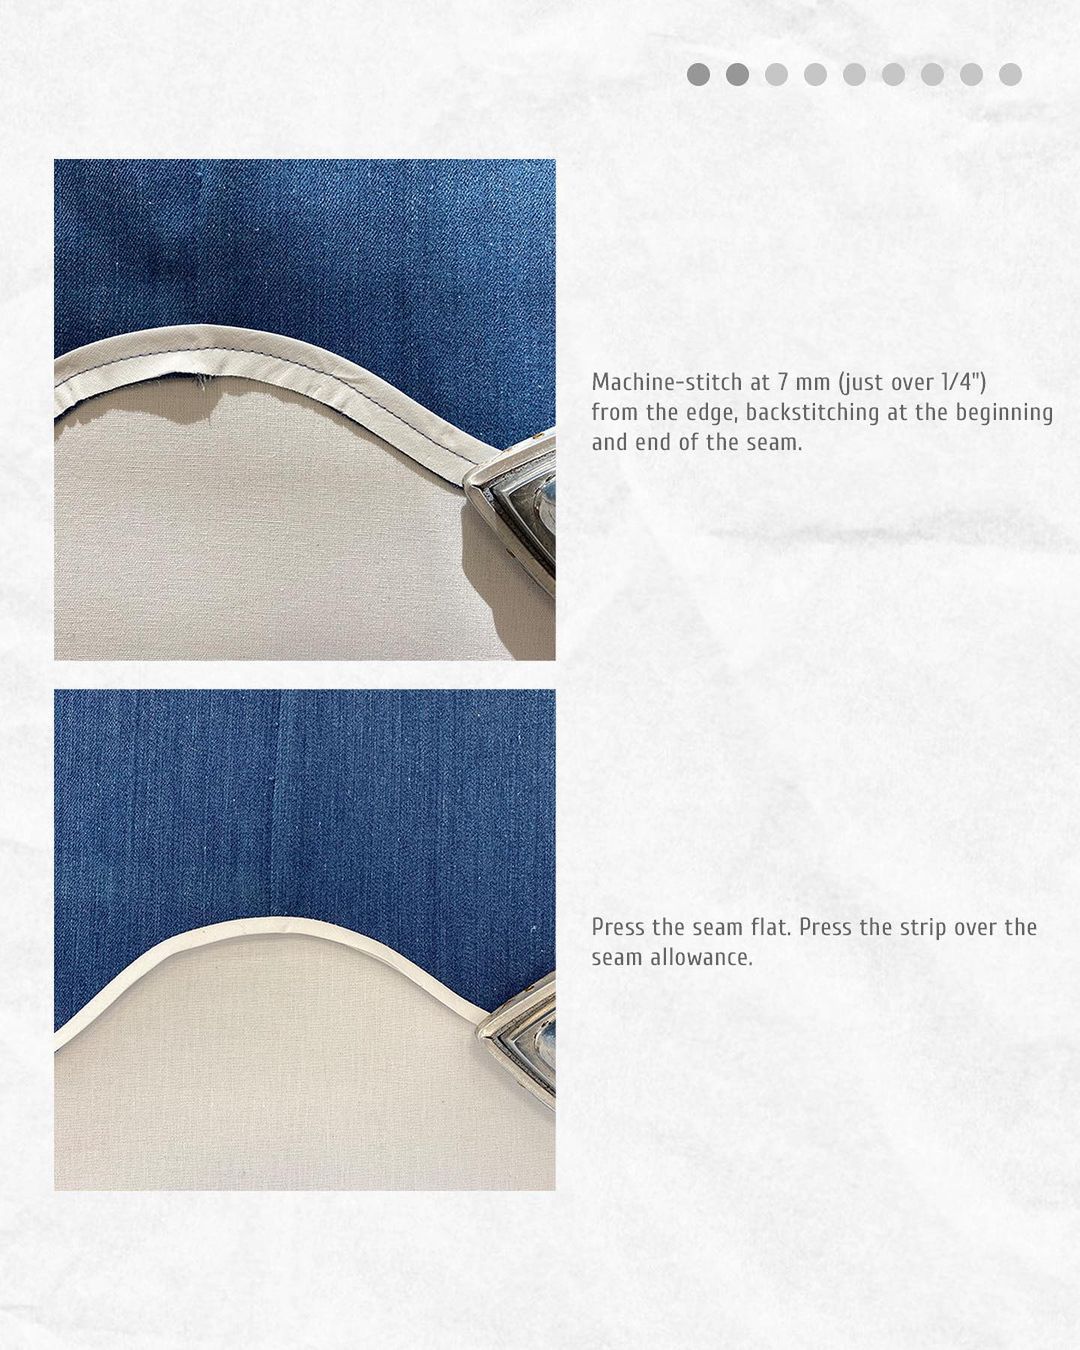
Machine-stitch at 7 mm (just over 1/4") from the edge, backstitching at the beginning and end of the seam.
Press the seam flat. Press the strip over the seam allowance.
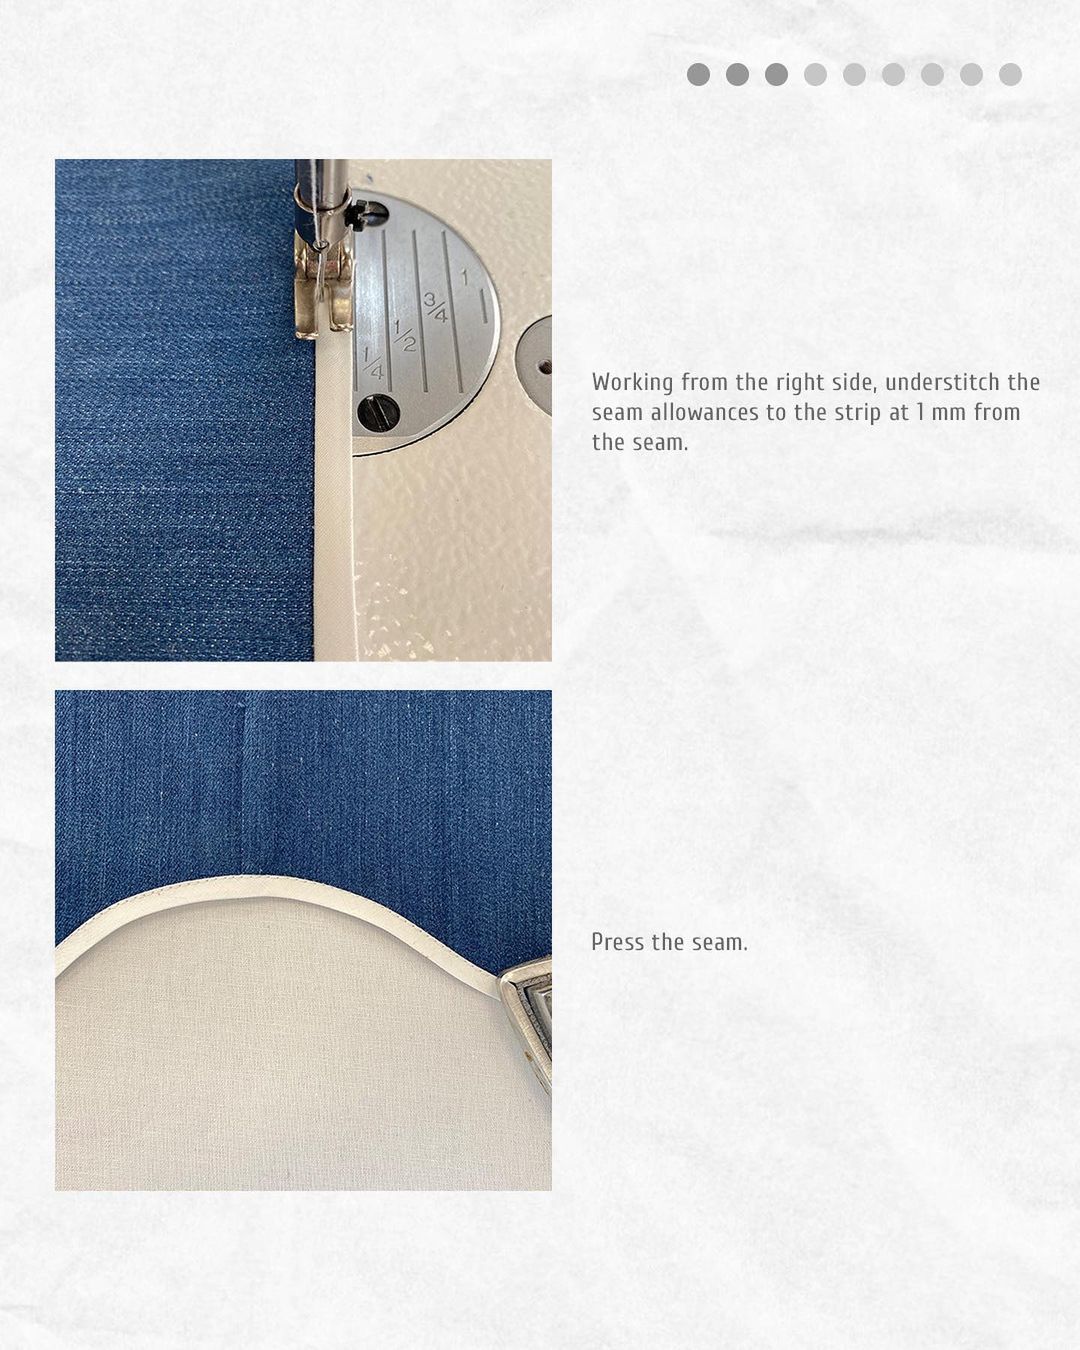
Working from the right side, understitch the seam allowances to the strip at 1 mm from the seam.
Press the seam.
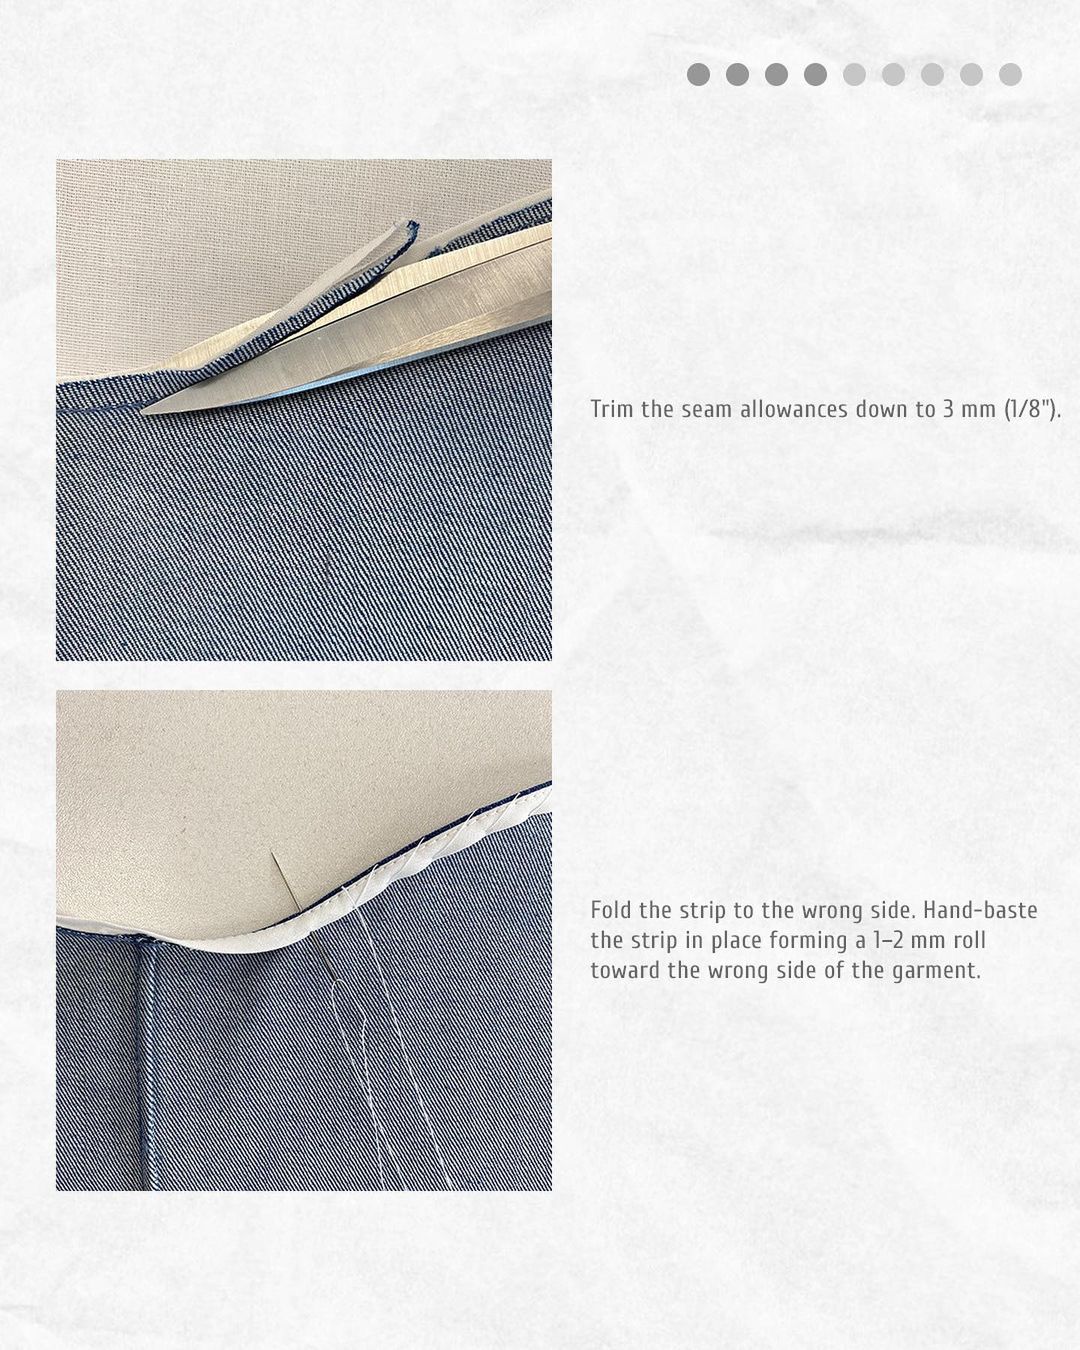
Trim the seam allowances down to 3 mm (1/8").
Fold the strip to the wrong side. Hand-baste the strip in place forming a 1-2 mm roll toward the wrong side of the garment.
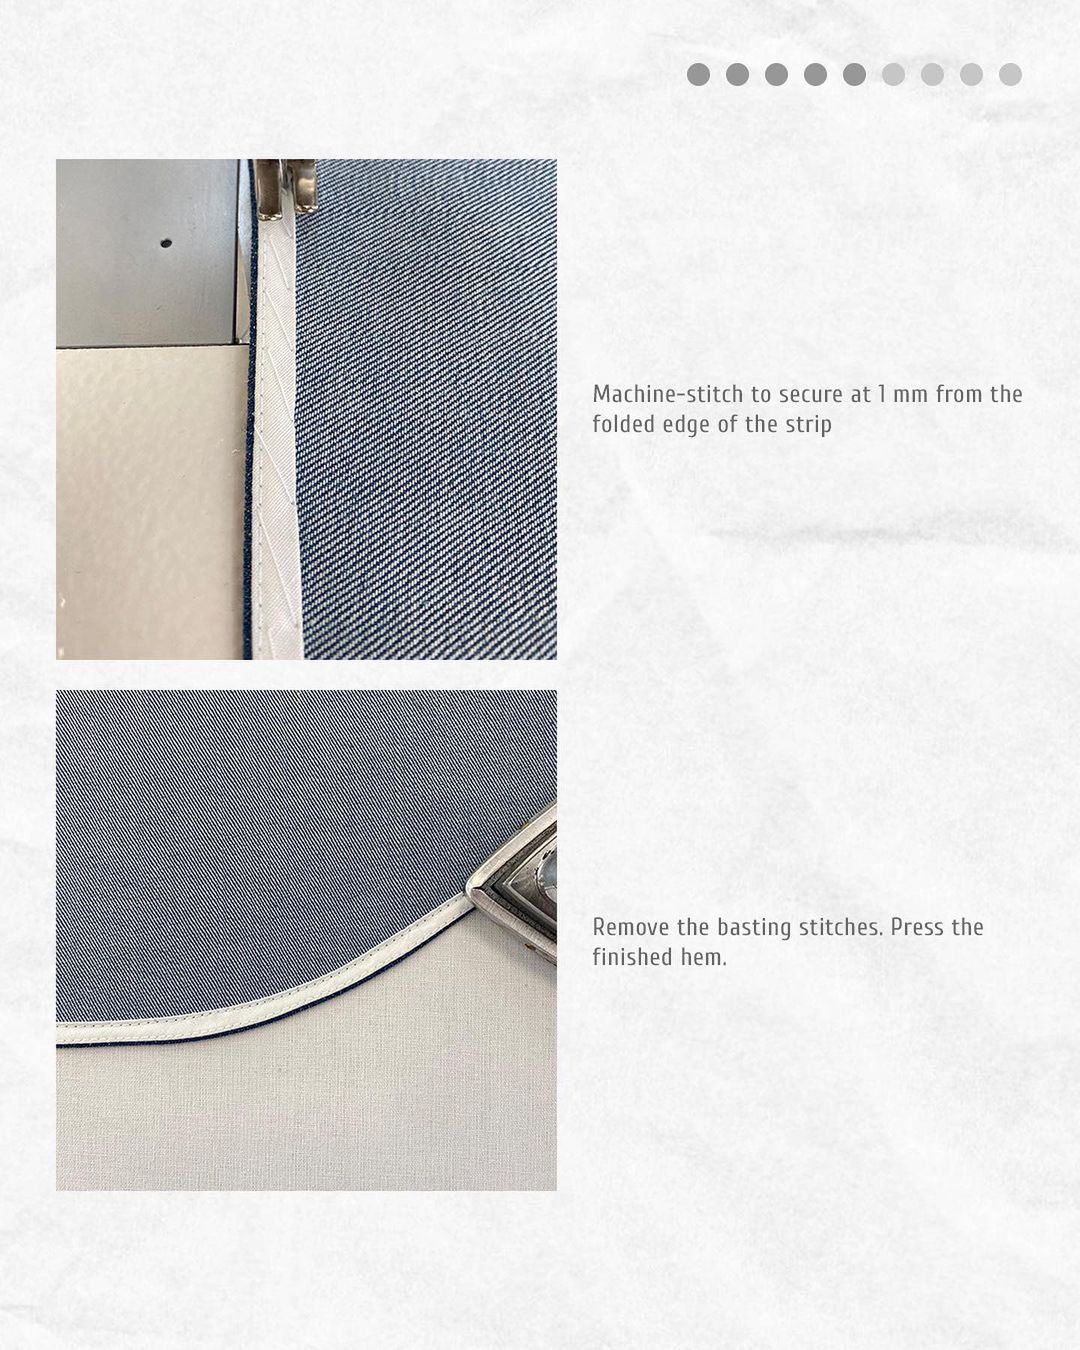
Machine-stitch to secure at 1 mm from the folded edge of the strip.
Remove the basting stitches. Press the finished hem.
2️. The bias-bound hem method
Please note that for this method you will also need a 7 mm (just over 1/4") hem allowance on the garment.
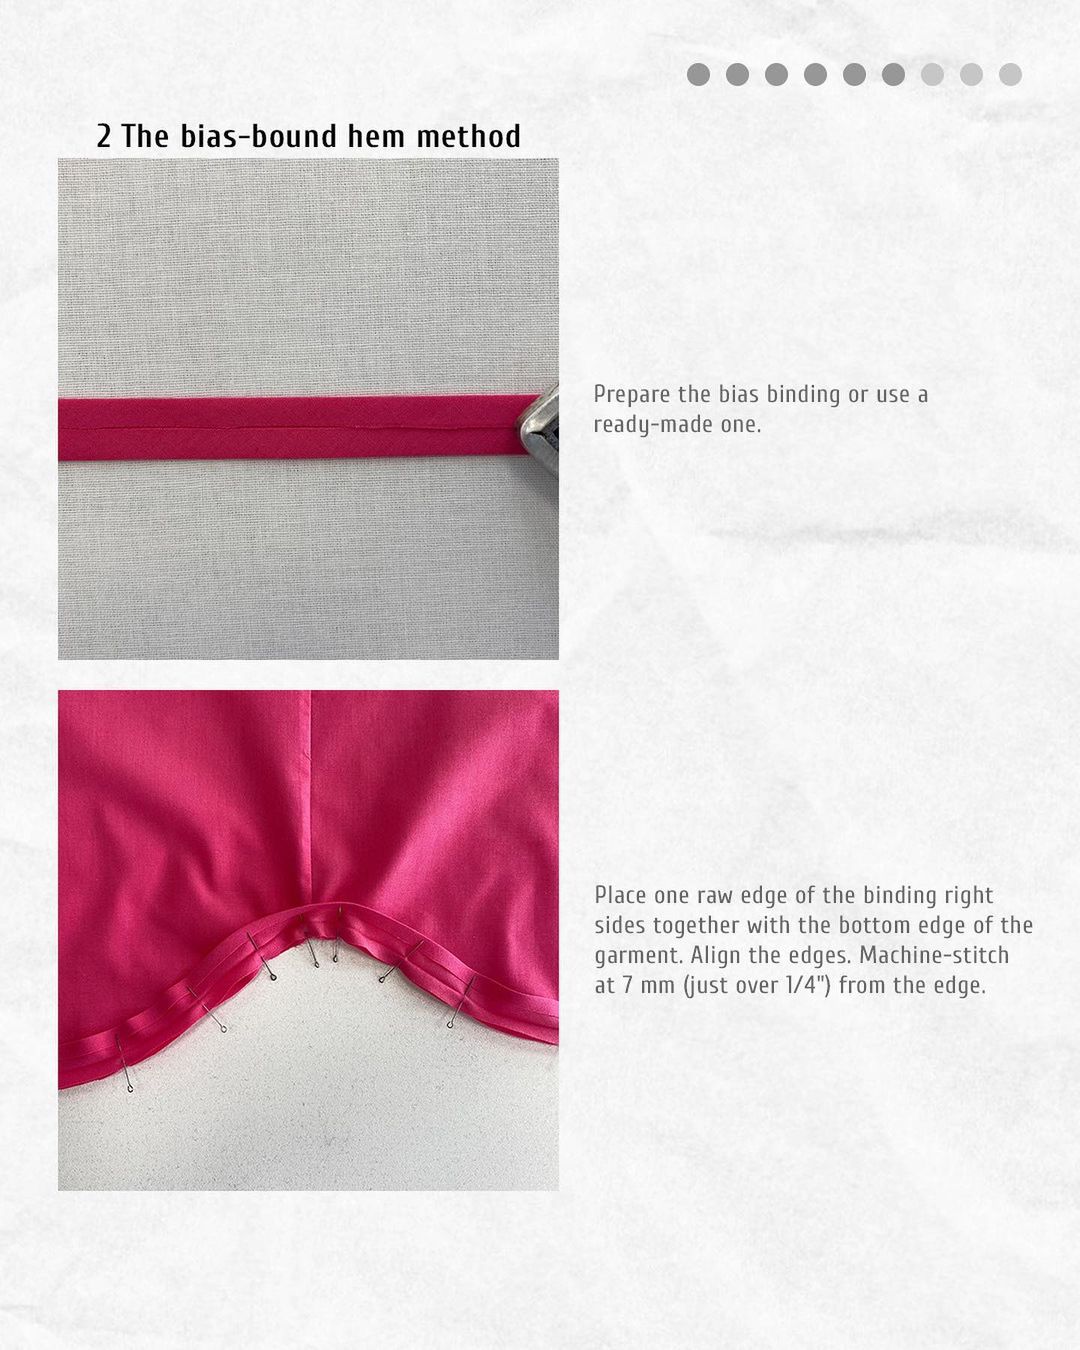
Prepare the bias binding or use a ready-made one.
Place one raw edge of the binding right sides together with the bottom edge of the garment. Align the edges. Machine-stitch at 7 mm (just over 1/4") from the edge.
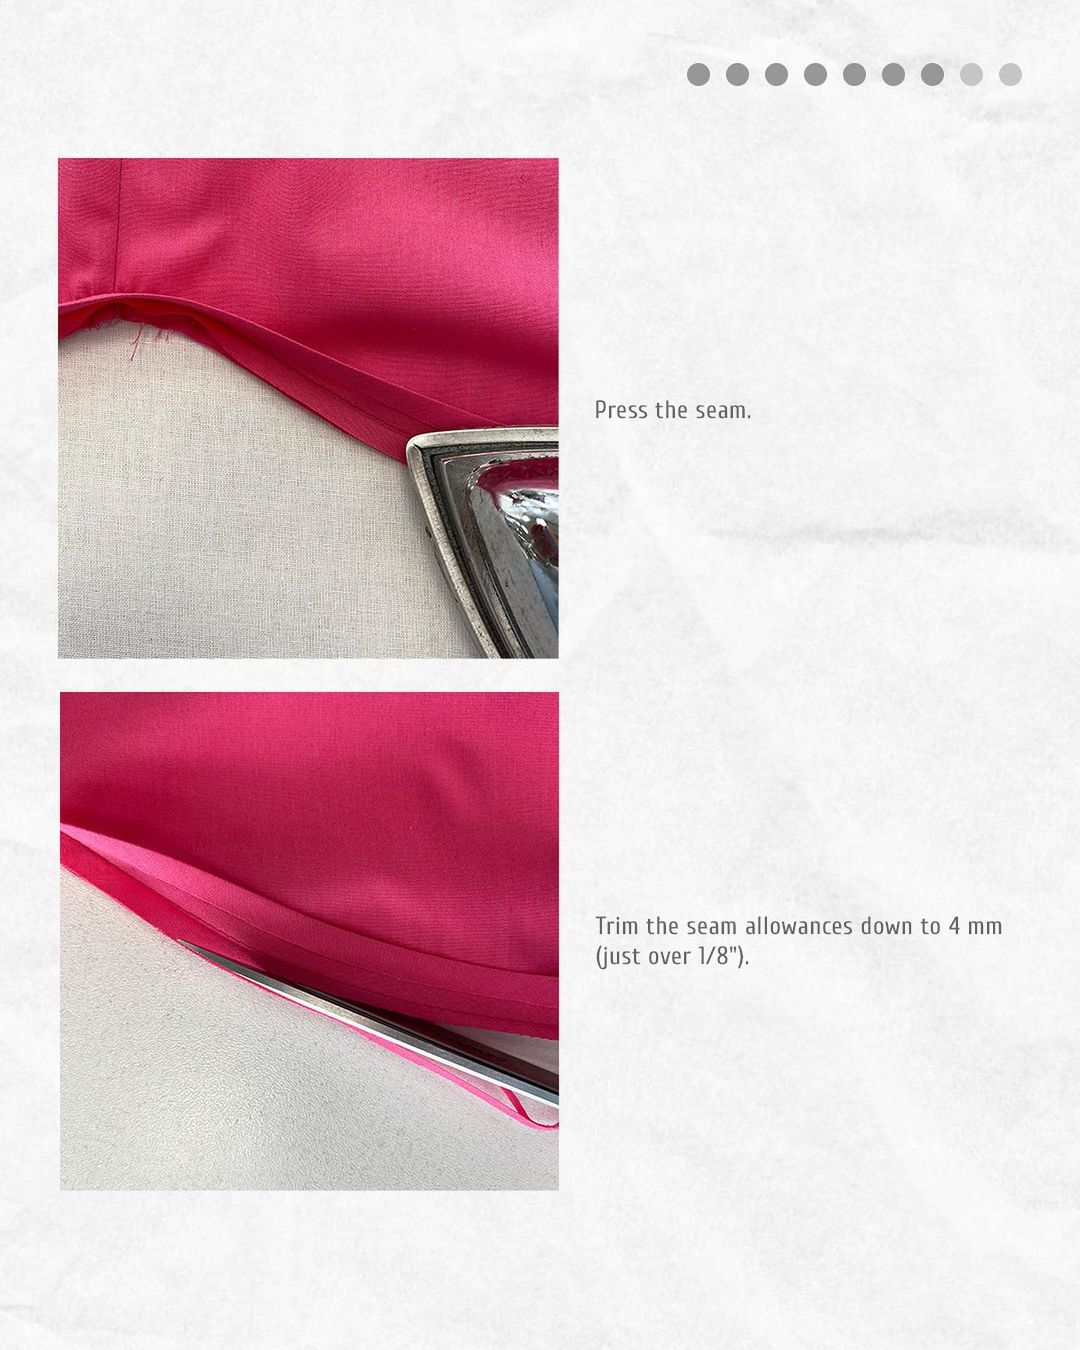
Press the seam.
Trim the seam allowances down to 4 mm (just over 1/8").
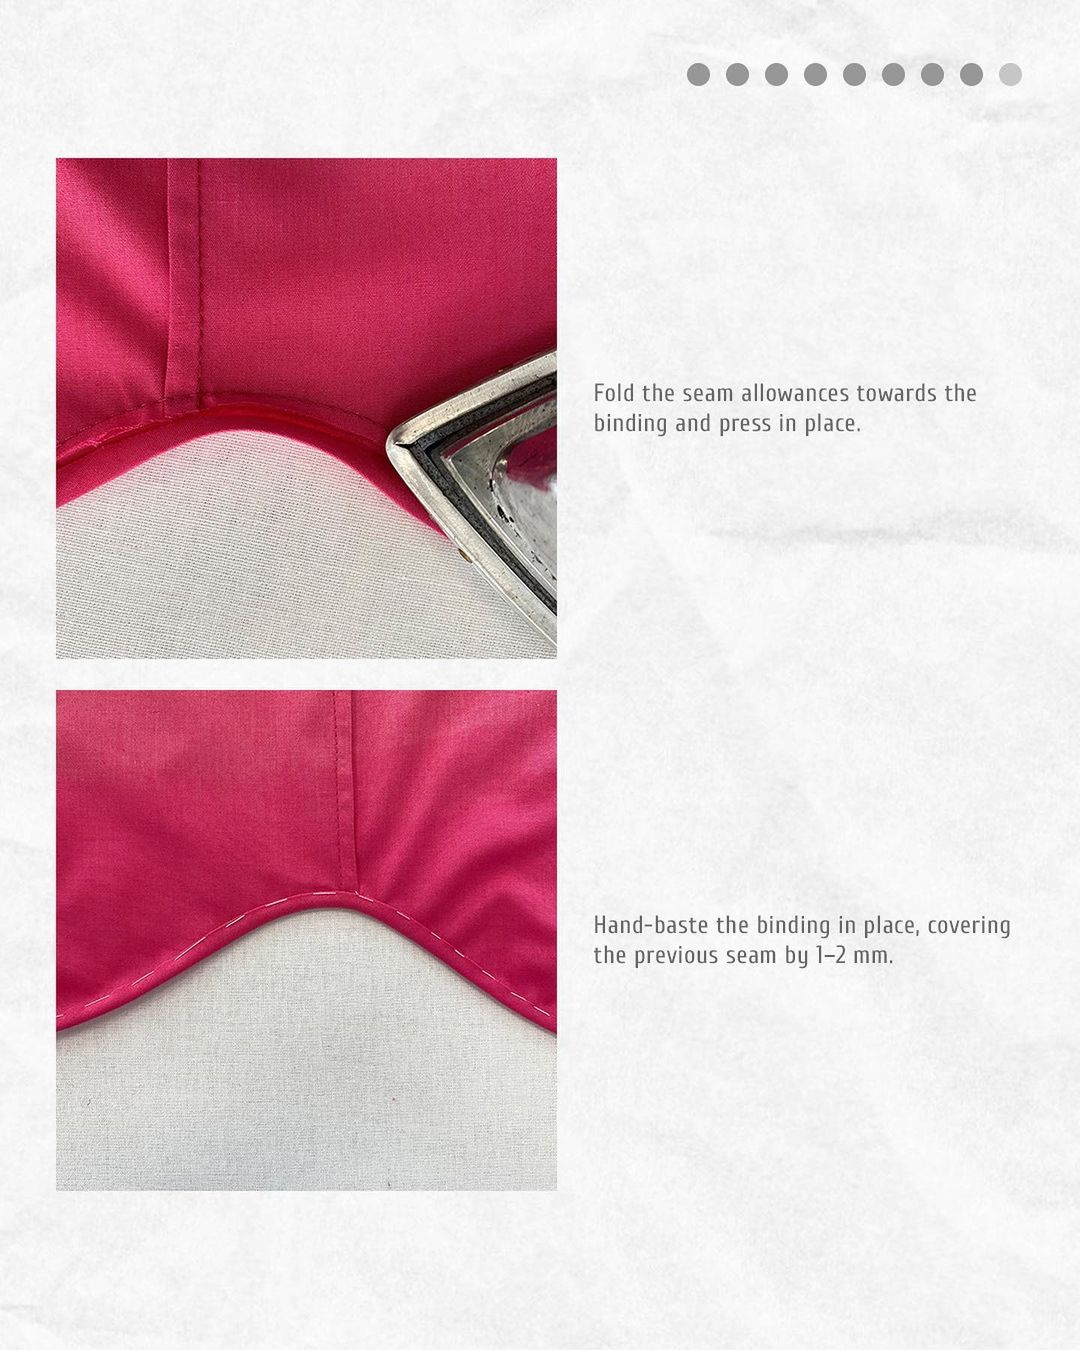
Fold the seam allowances towards the binding and press in place.
Hand-baste the binding in place, covering the previous seam by 1–2 mm.
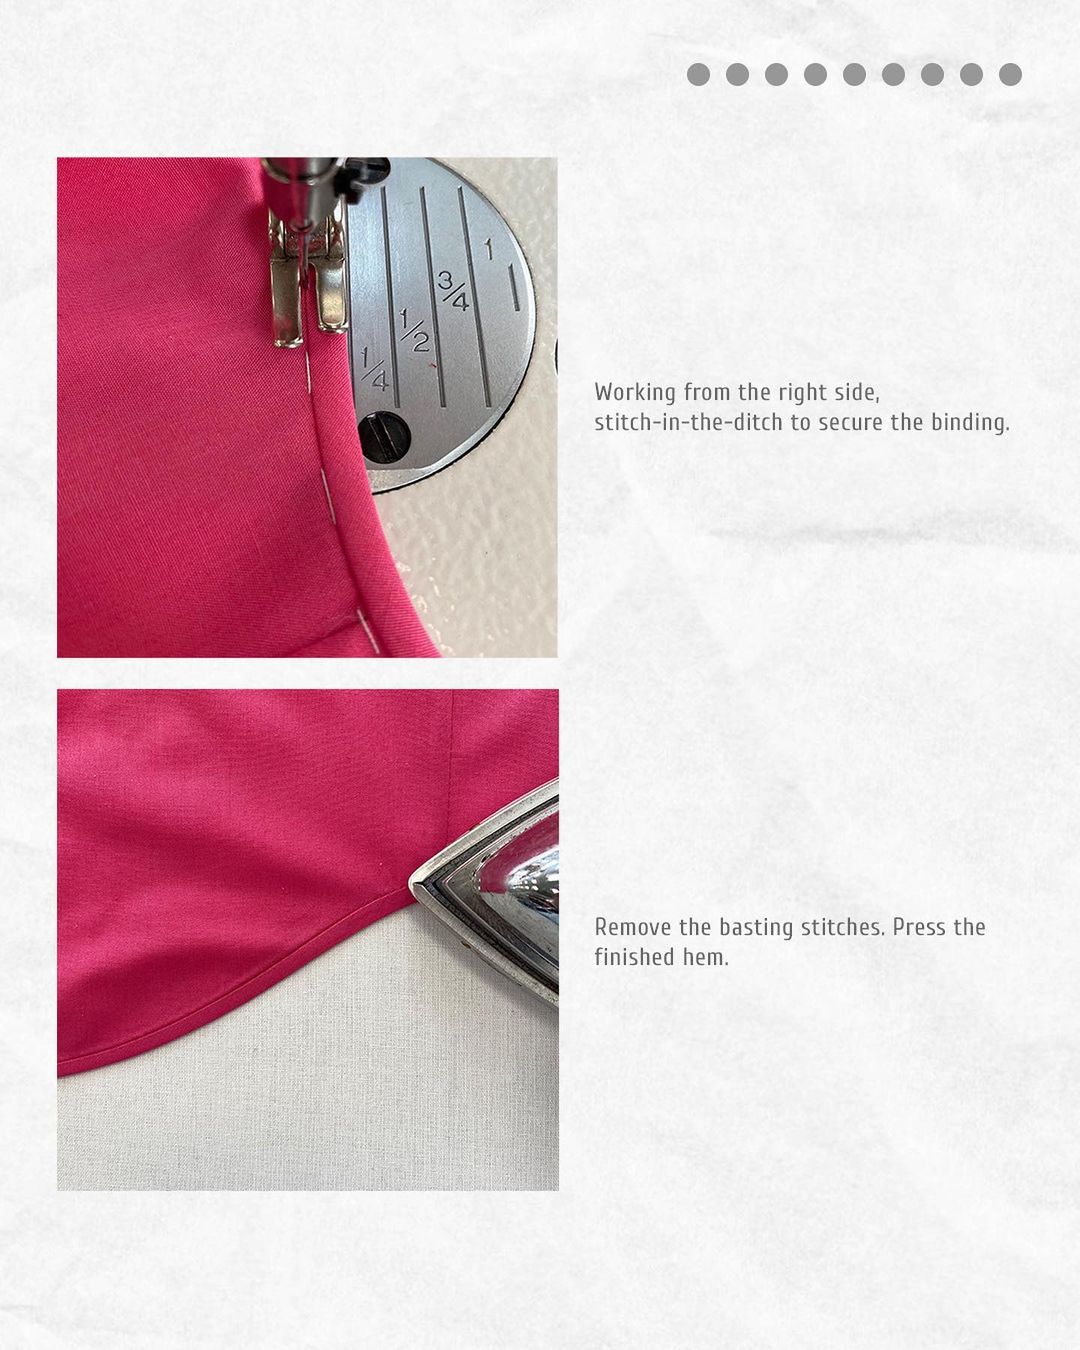
Working from the right side, stitch-in-the-ditch to secure the binding.
Remove the basting stitches. Press the finished hem.
3️. The double-turn hem method
Please note that for this method you will need a 1.5 cm (5/8") hem allowance on the garment.
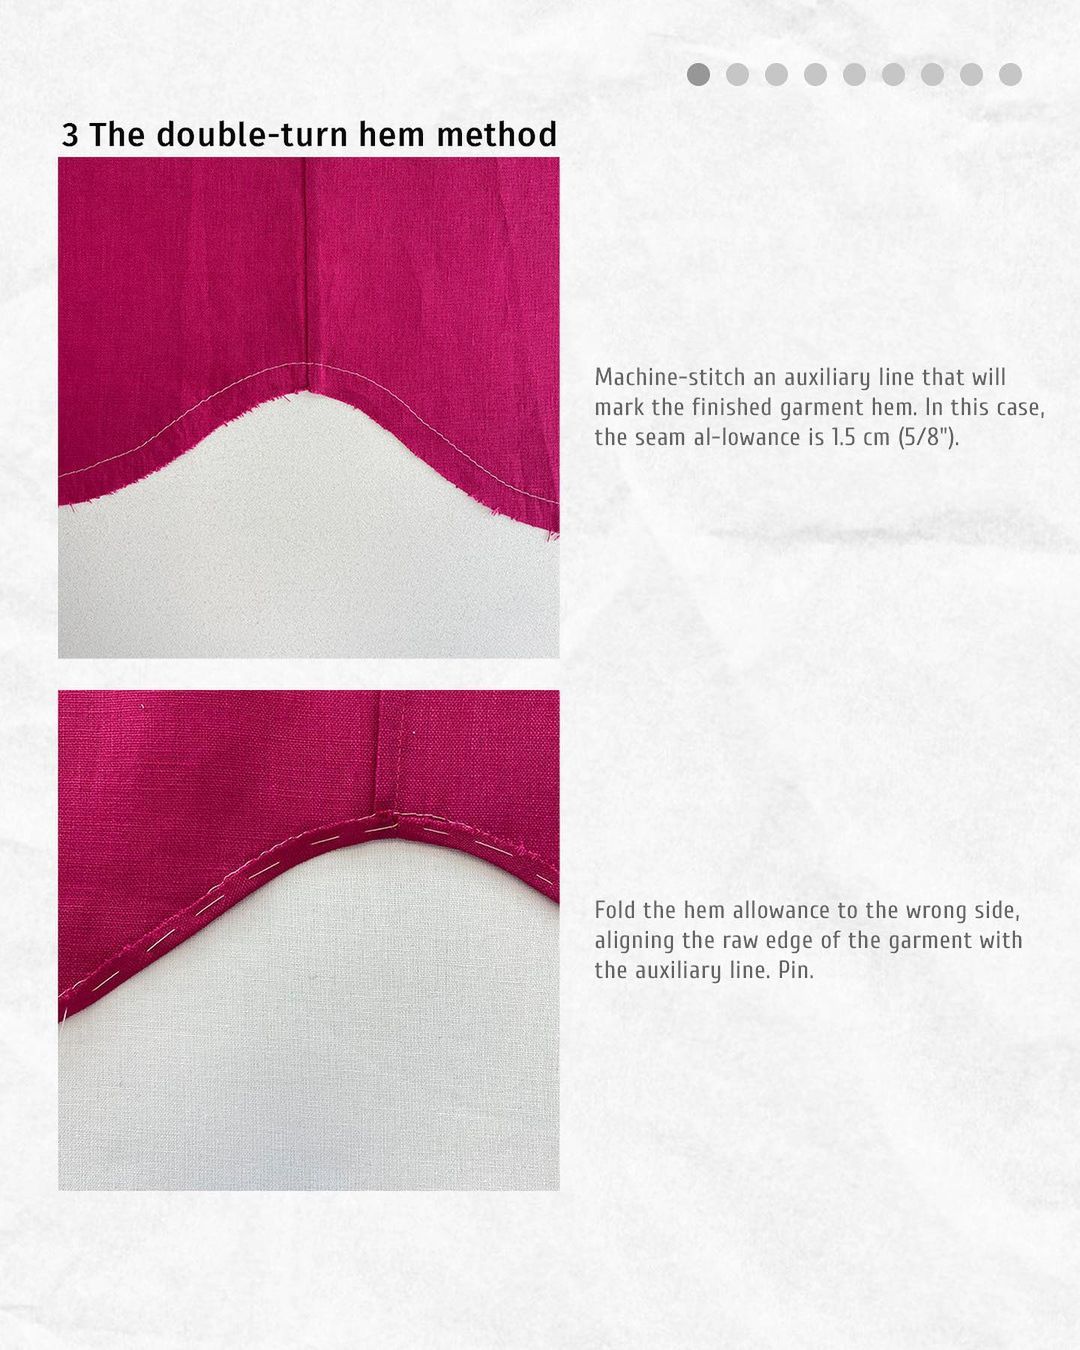
Machine-stitch an auxiliary line that will mark the finished garment hem. In this case, the seam allowance is 1.5 cm (5/8").
Fold the hem allowance to the wrong side, aligning the raw edge of the garment with the auxiliary line. Pin.
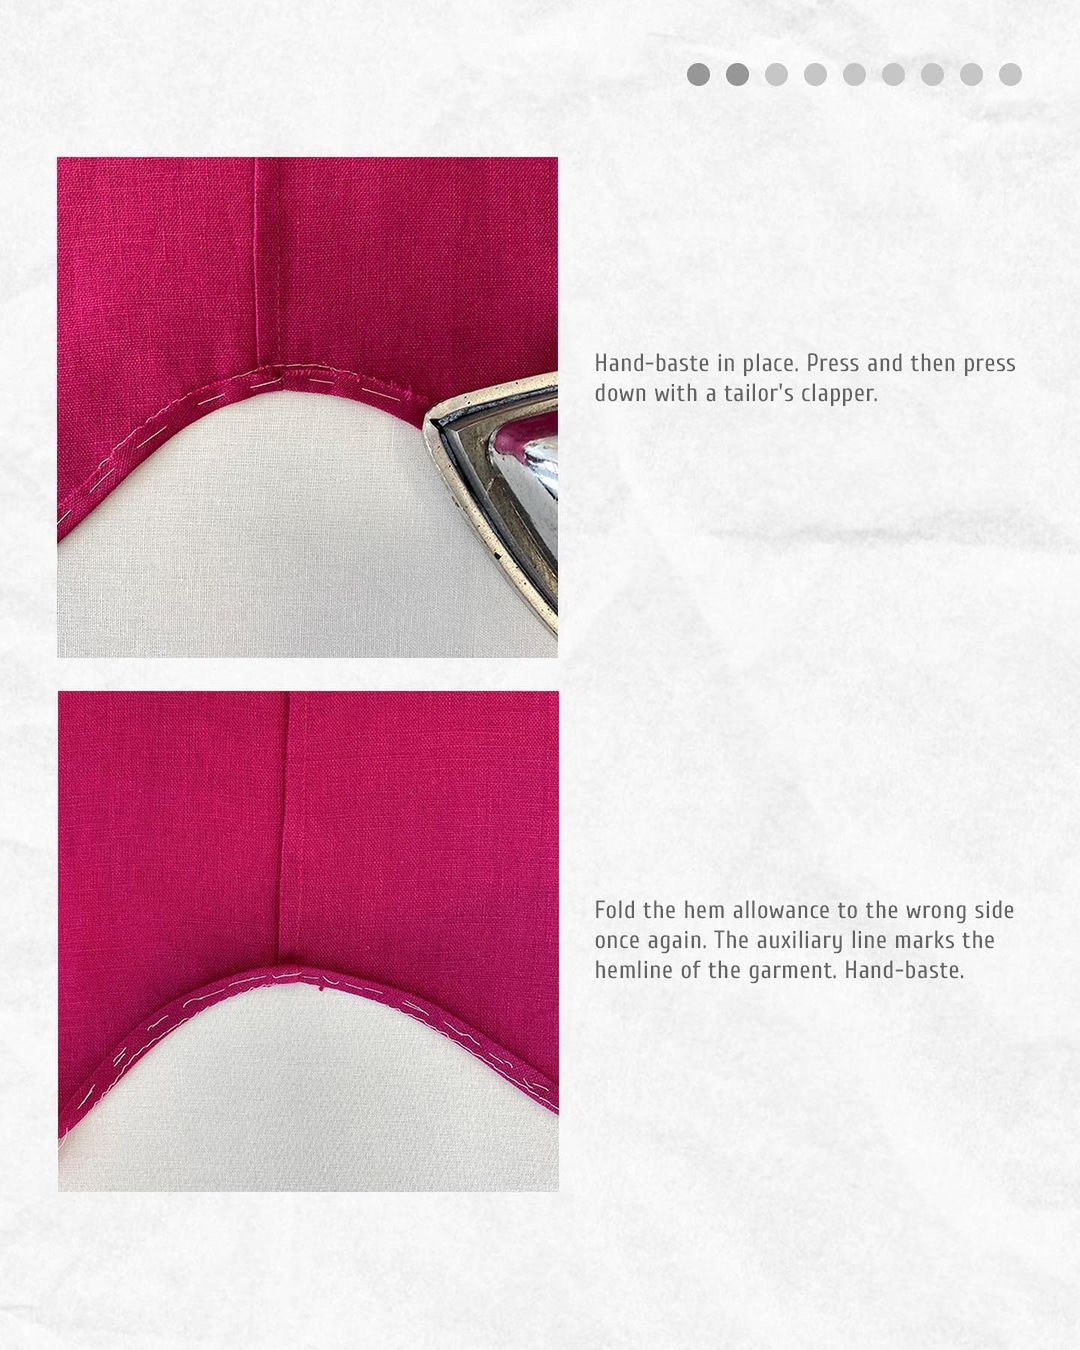
Hand-baste in place. Press and then press down with a tailor's clapper.
Fold the hem allowance to the wrong side once again. The auxiliary line marks the hemline of the garment. Hand-baste.
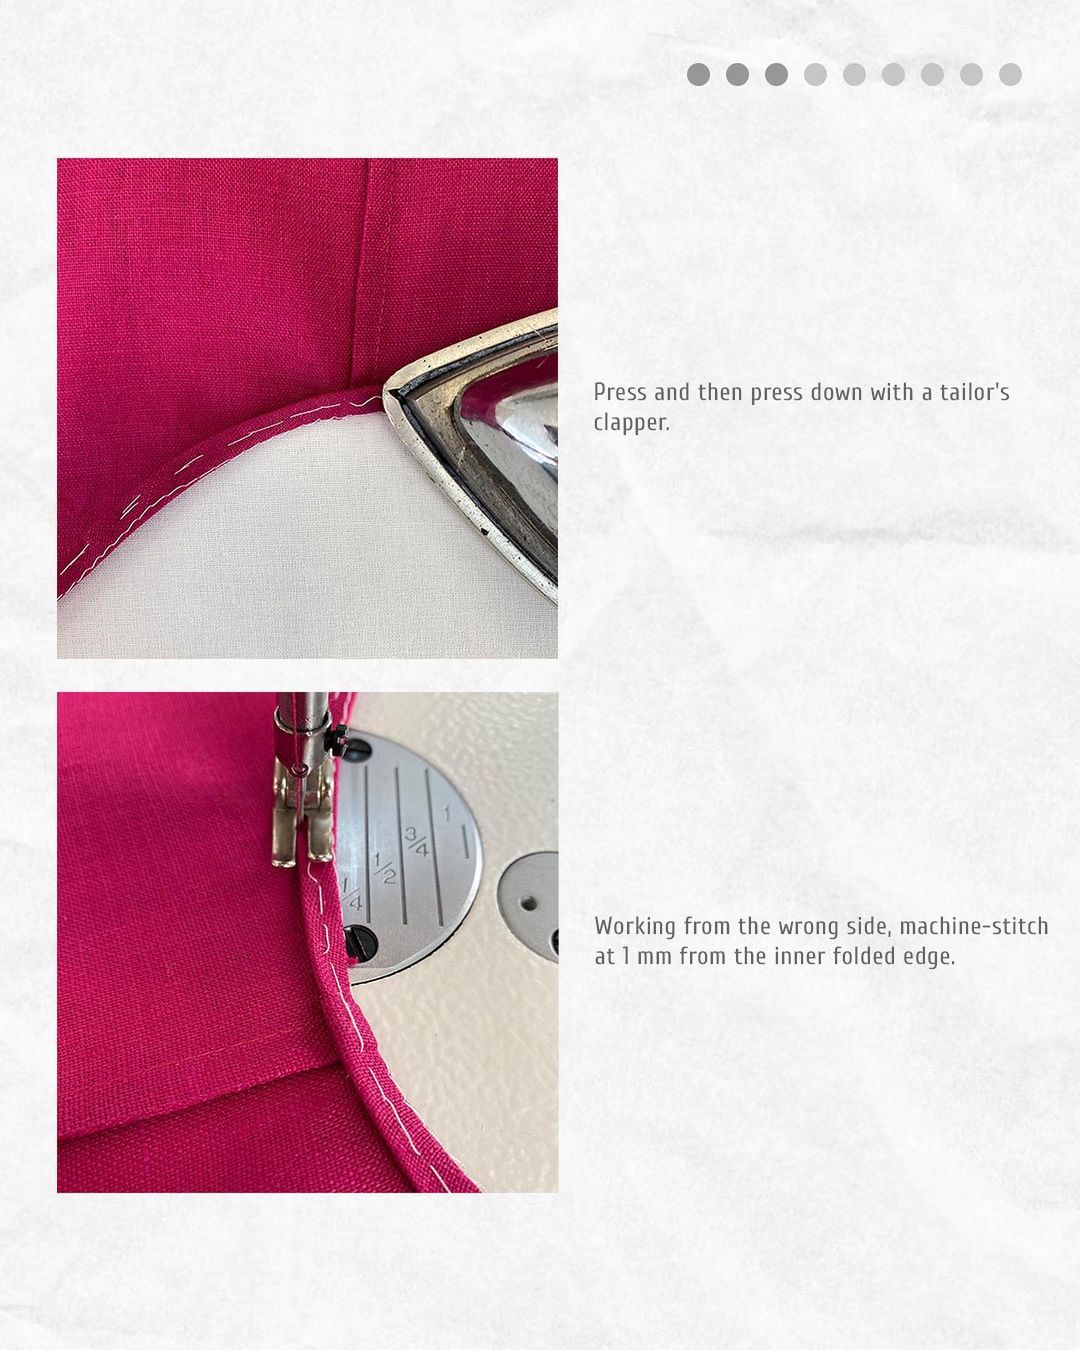
Press and then press down with a tailor's clapper.
Working from the wrong side, machine-stitch at 1 mm from the inner folded edge.
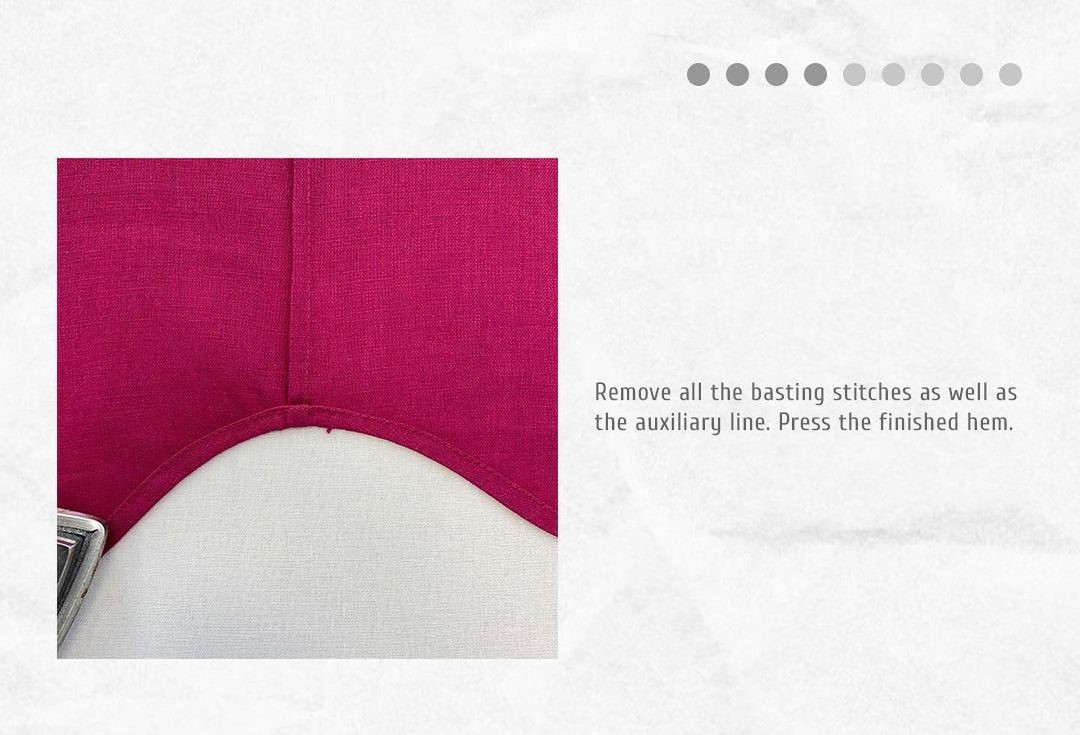
Remove all the basting stitches as well as the auxiliary line.
Press the finished hem.
4️. The narrow double-turn hem method
This method is more suitable for shirts and blouses made of silk.
Use should have a 1 cm (3/8") garment hem allowance.
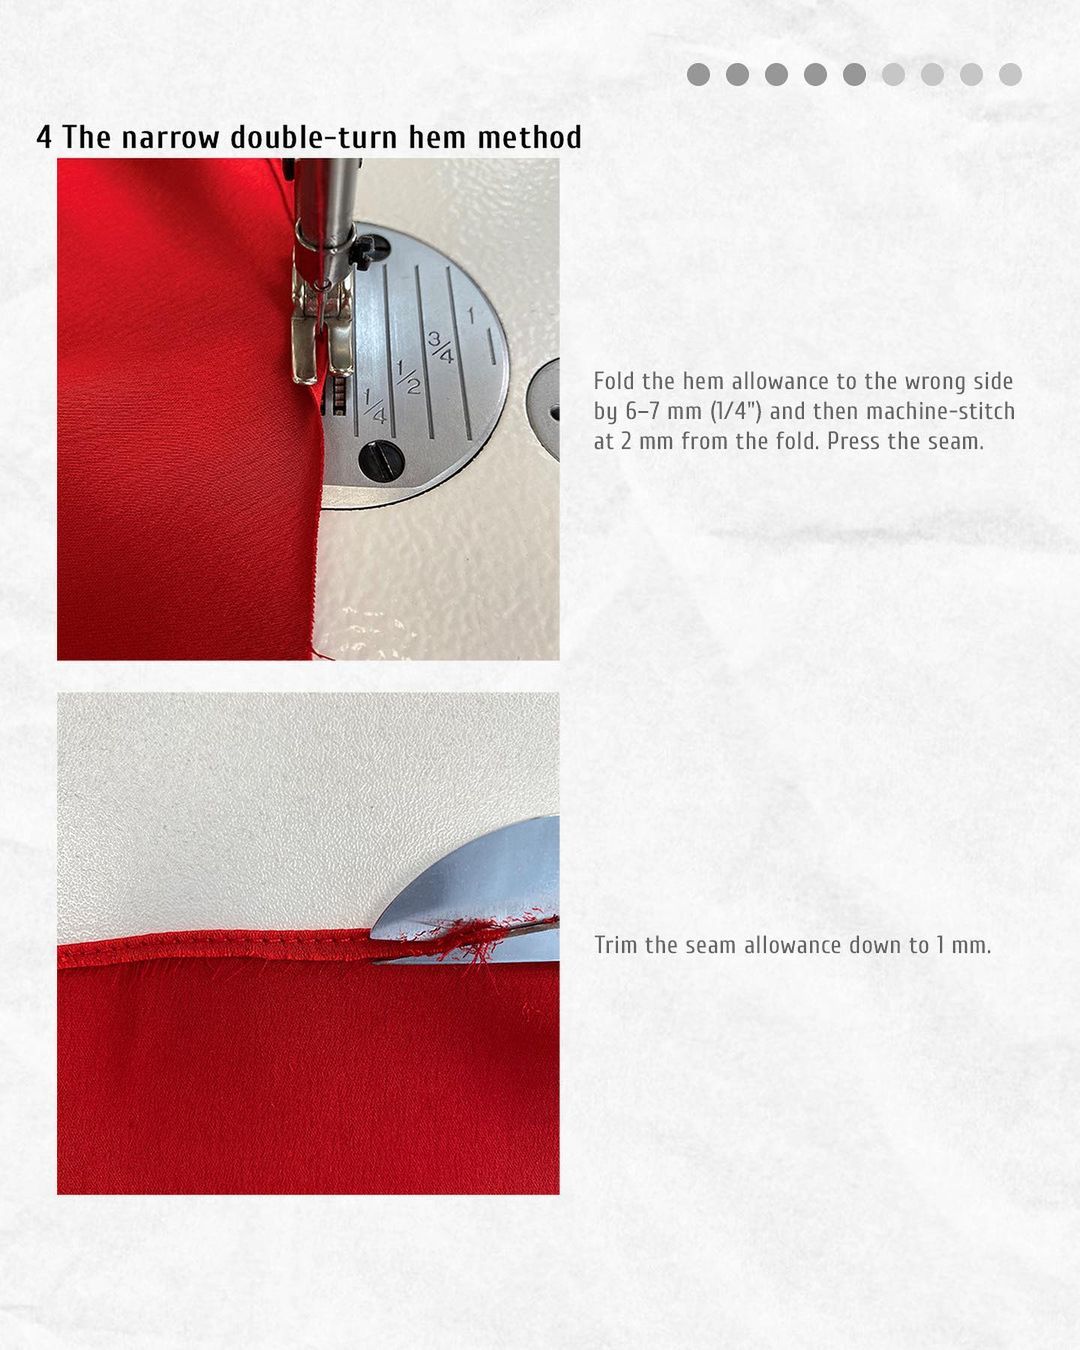
Fold the hem allowance to the wrong side by 6–7 mm (1/4") and then machine-stitch at 2 mm from the fold.
Press the seam.
Trim the seam allowance down to 1 mm.
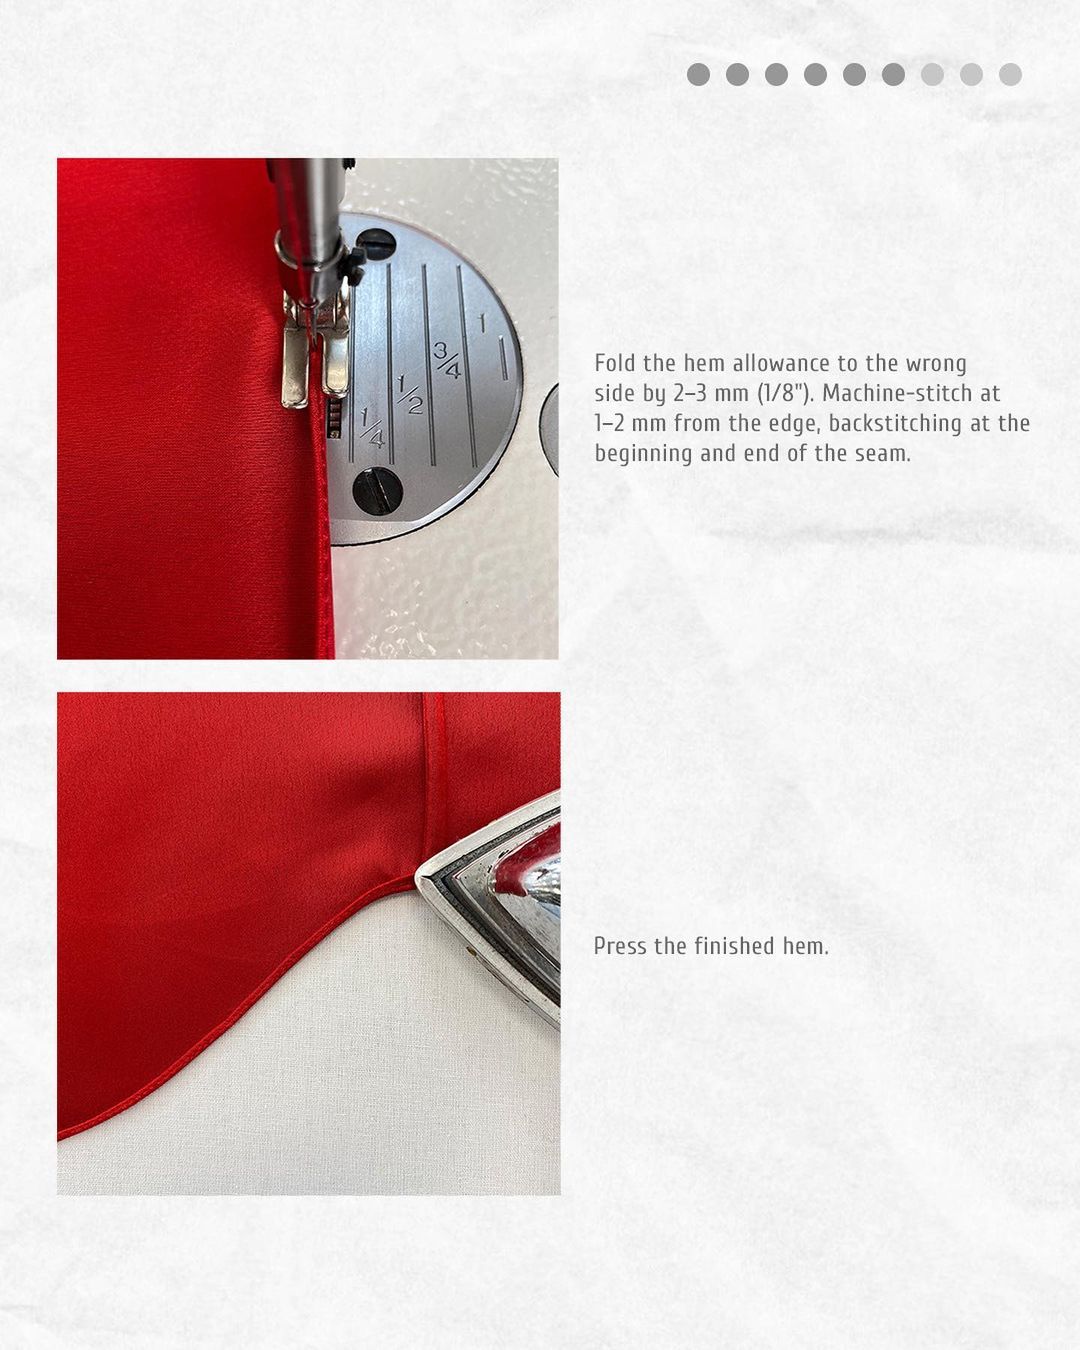
Fold the hem allowance to the wrong side by 2–3 mm (1/8"). Machine-stitch at 1–2 mm from the edge, backstitching at the beginning and end of the seam.
Press the finished hem.
5️. The single-turn hem method
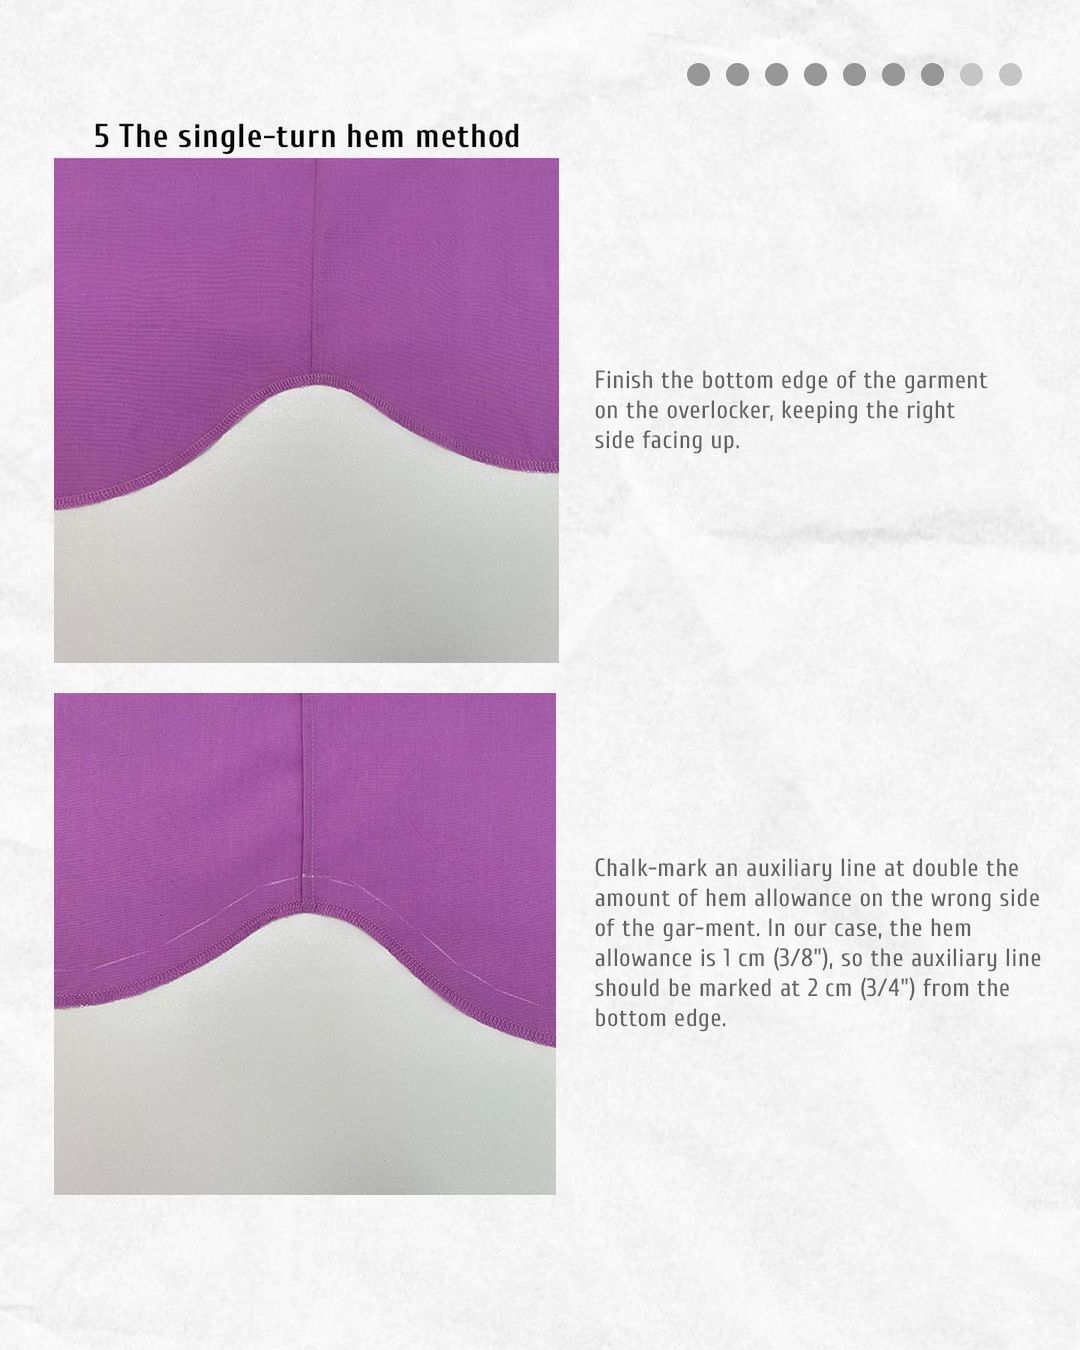
Finish the bottom edge of the garment on the overlocker, keeping the right side facing up.
Chalk-mark an auxiliary line at double the amount of hem allowance on the wrong side of the garment. In our case, the hem allowance is 1 cm (3/8"), so the auxiliary line should be marked at 2 cm (3/4") from the bottom edge.
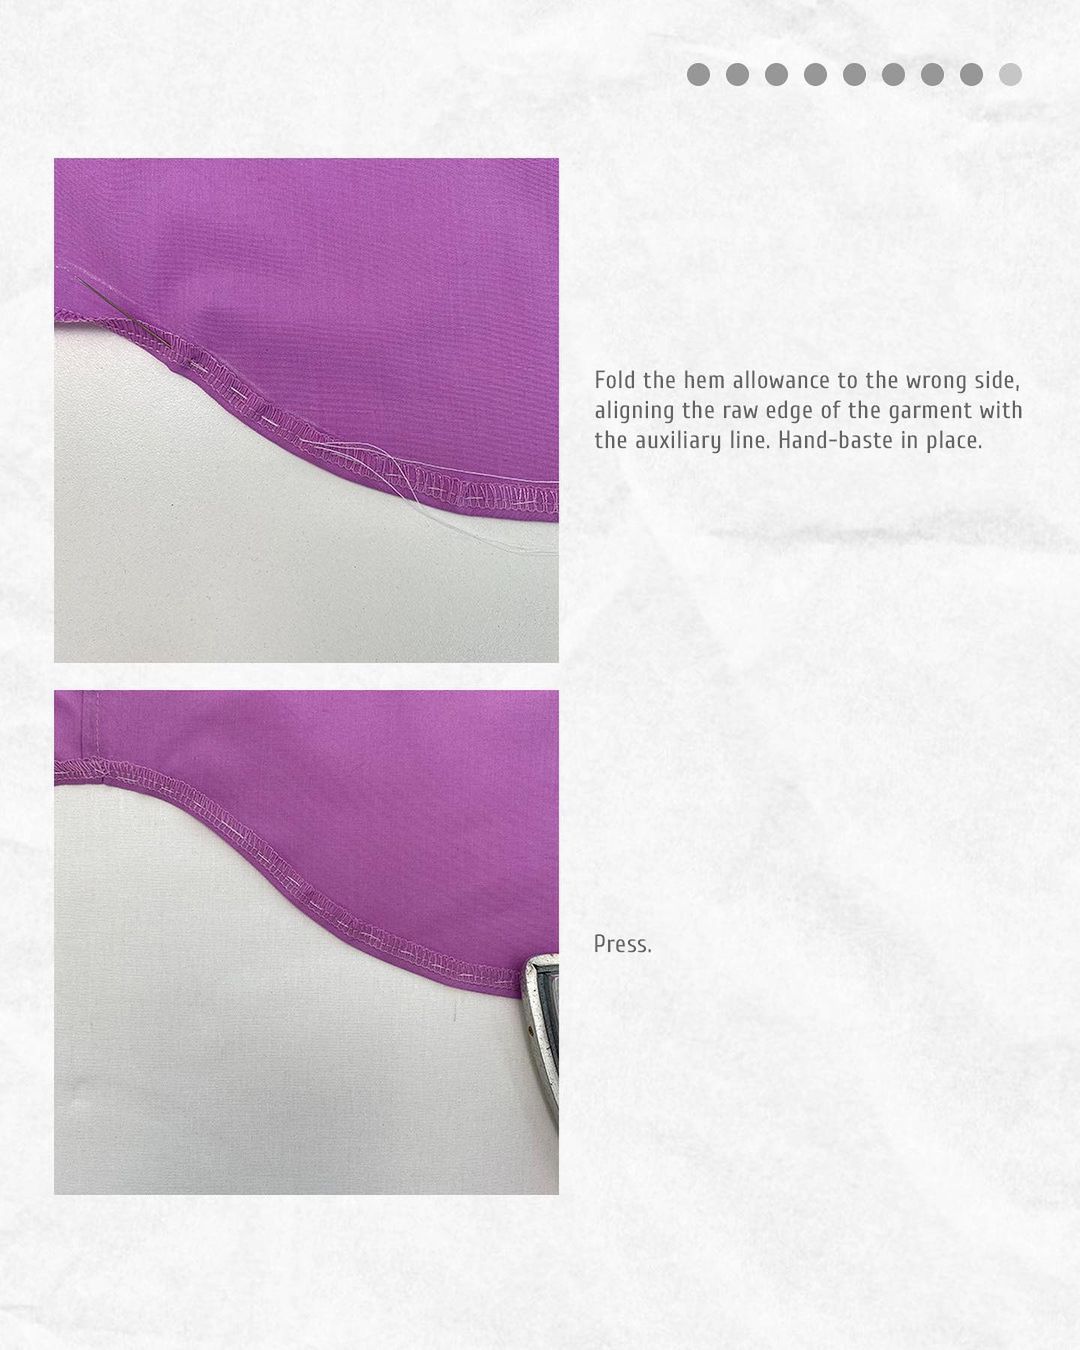
Fold the hem allowance to the wrong side, aligning the raw edge of the garment with the auxiliary line. Hand-baste in place.
Press.
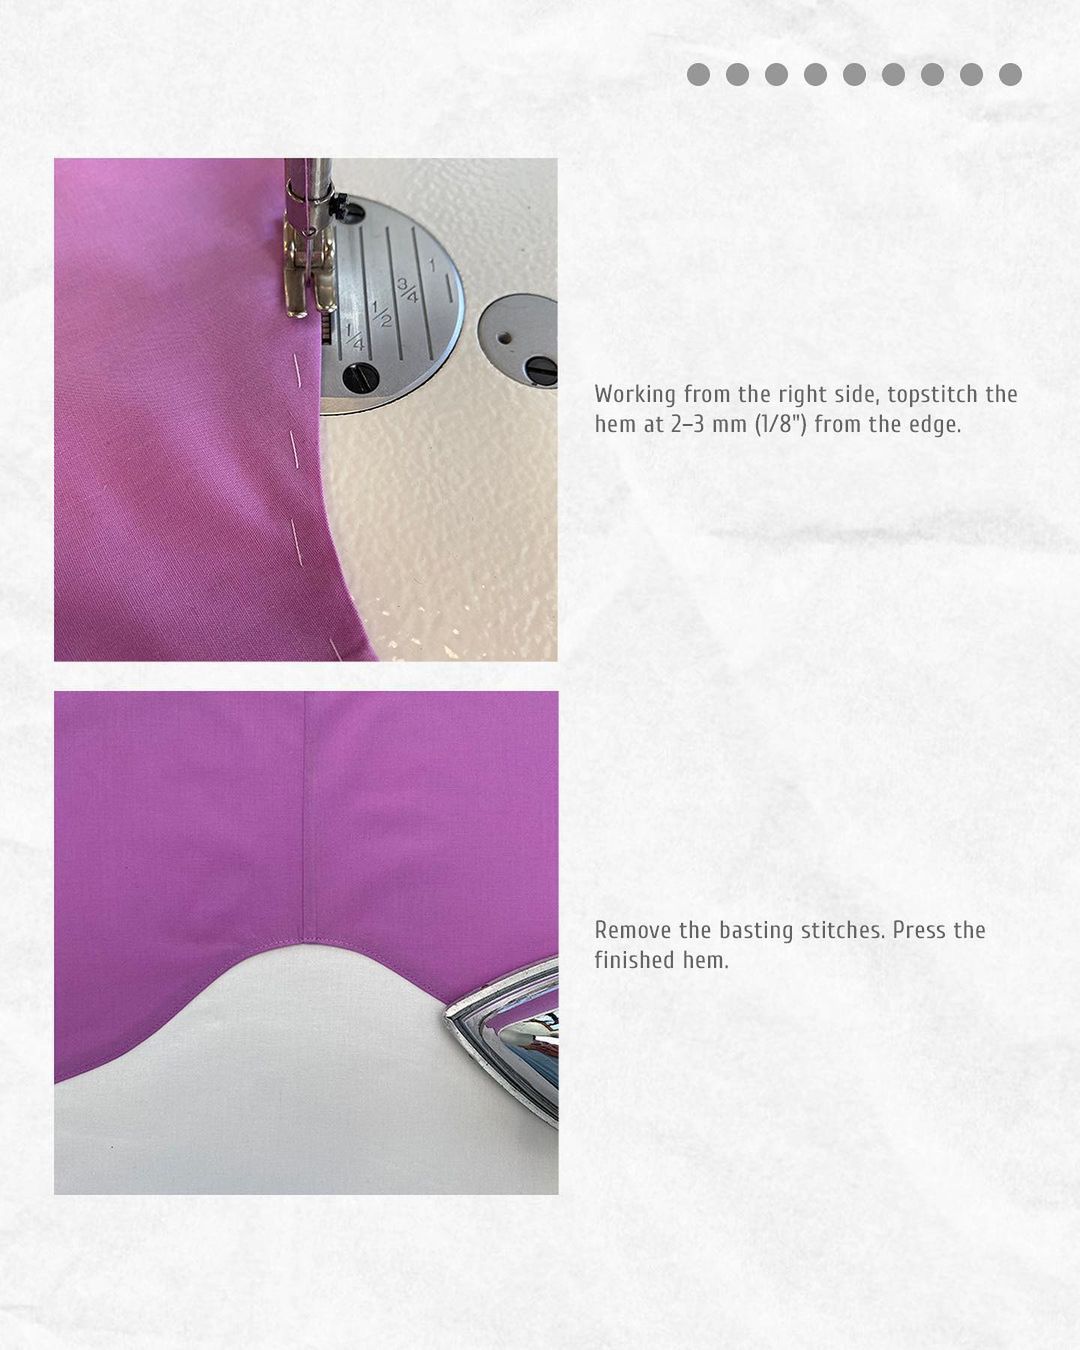
Working from the right side, topstitch the hem at 2–3 mm (1/8") from the edge.
Remove the basting stitches. Press the finished hem.
Now try one of these methods on one of the Vikisews shirt sewing patterns and check for more useful sewing tutorials and tips:
How to easily finish the slit on a sleeve


Здесь пока нет комментариев