The right answer is practice. We’ll discuss here, how to improve your skill while practicing.
We don’t know how it was in your country, but in Russia, we used to have home ec classes in school. There we learned how to cook simple dishes, how to serve dinner, how to work with wood, and how to sew. We were trained to make straight stitches using a piece of graph paper instead of fabric, without any thread.
The next step is to sew a few sets of bedsheets. 3 duvet covers + 3 sheets + 6 pillowcases = you will make perfect straight stitches!
If you don’t plan to sew bed linen, here are 6 tips you can use on your next #vikisews pattern:
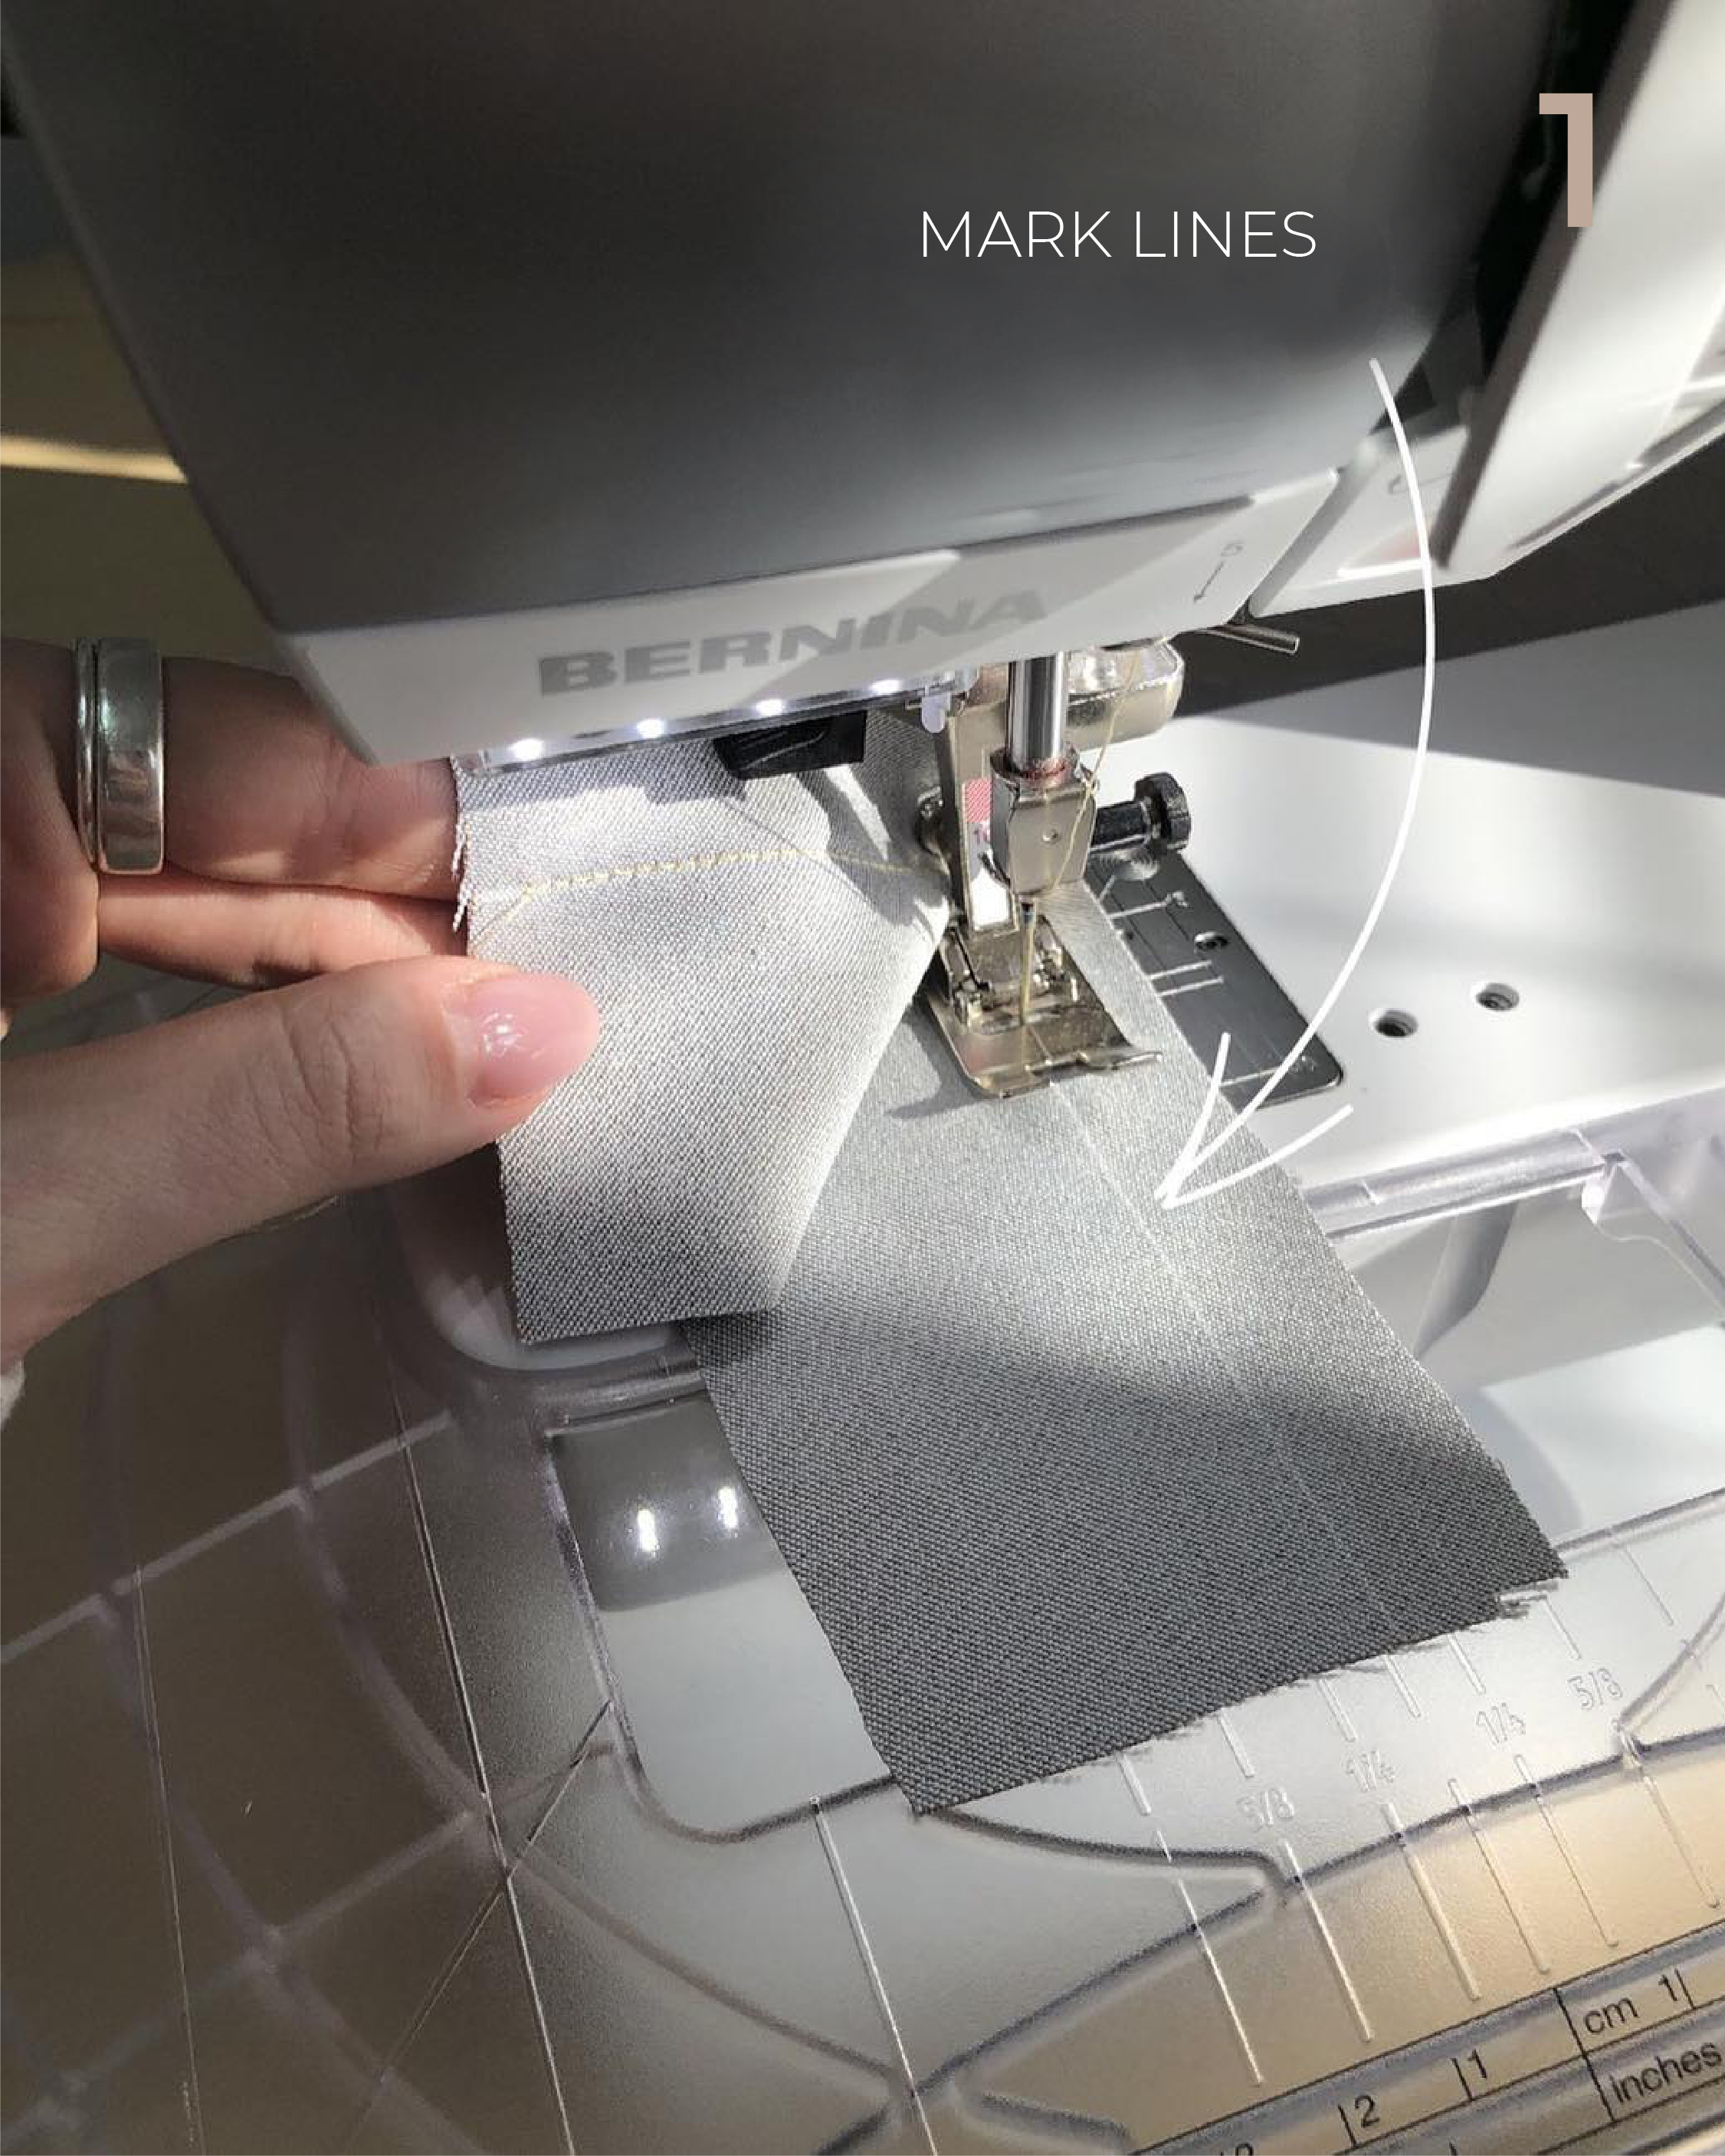
- Mark lines with a piece of soap, chalk, or disappearing pen and stitch along them. Sounds simple, but it works!
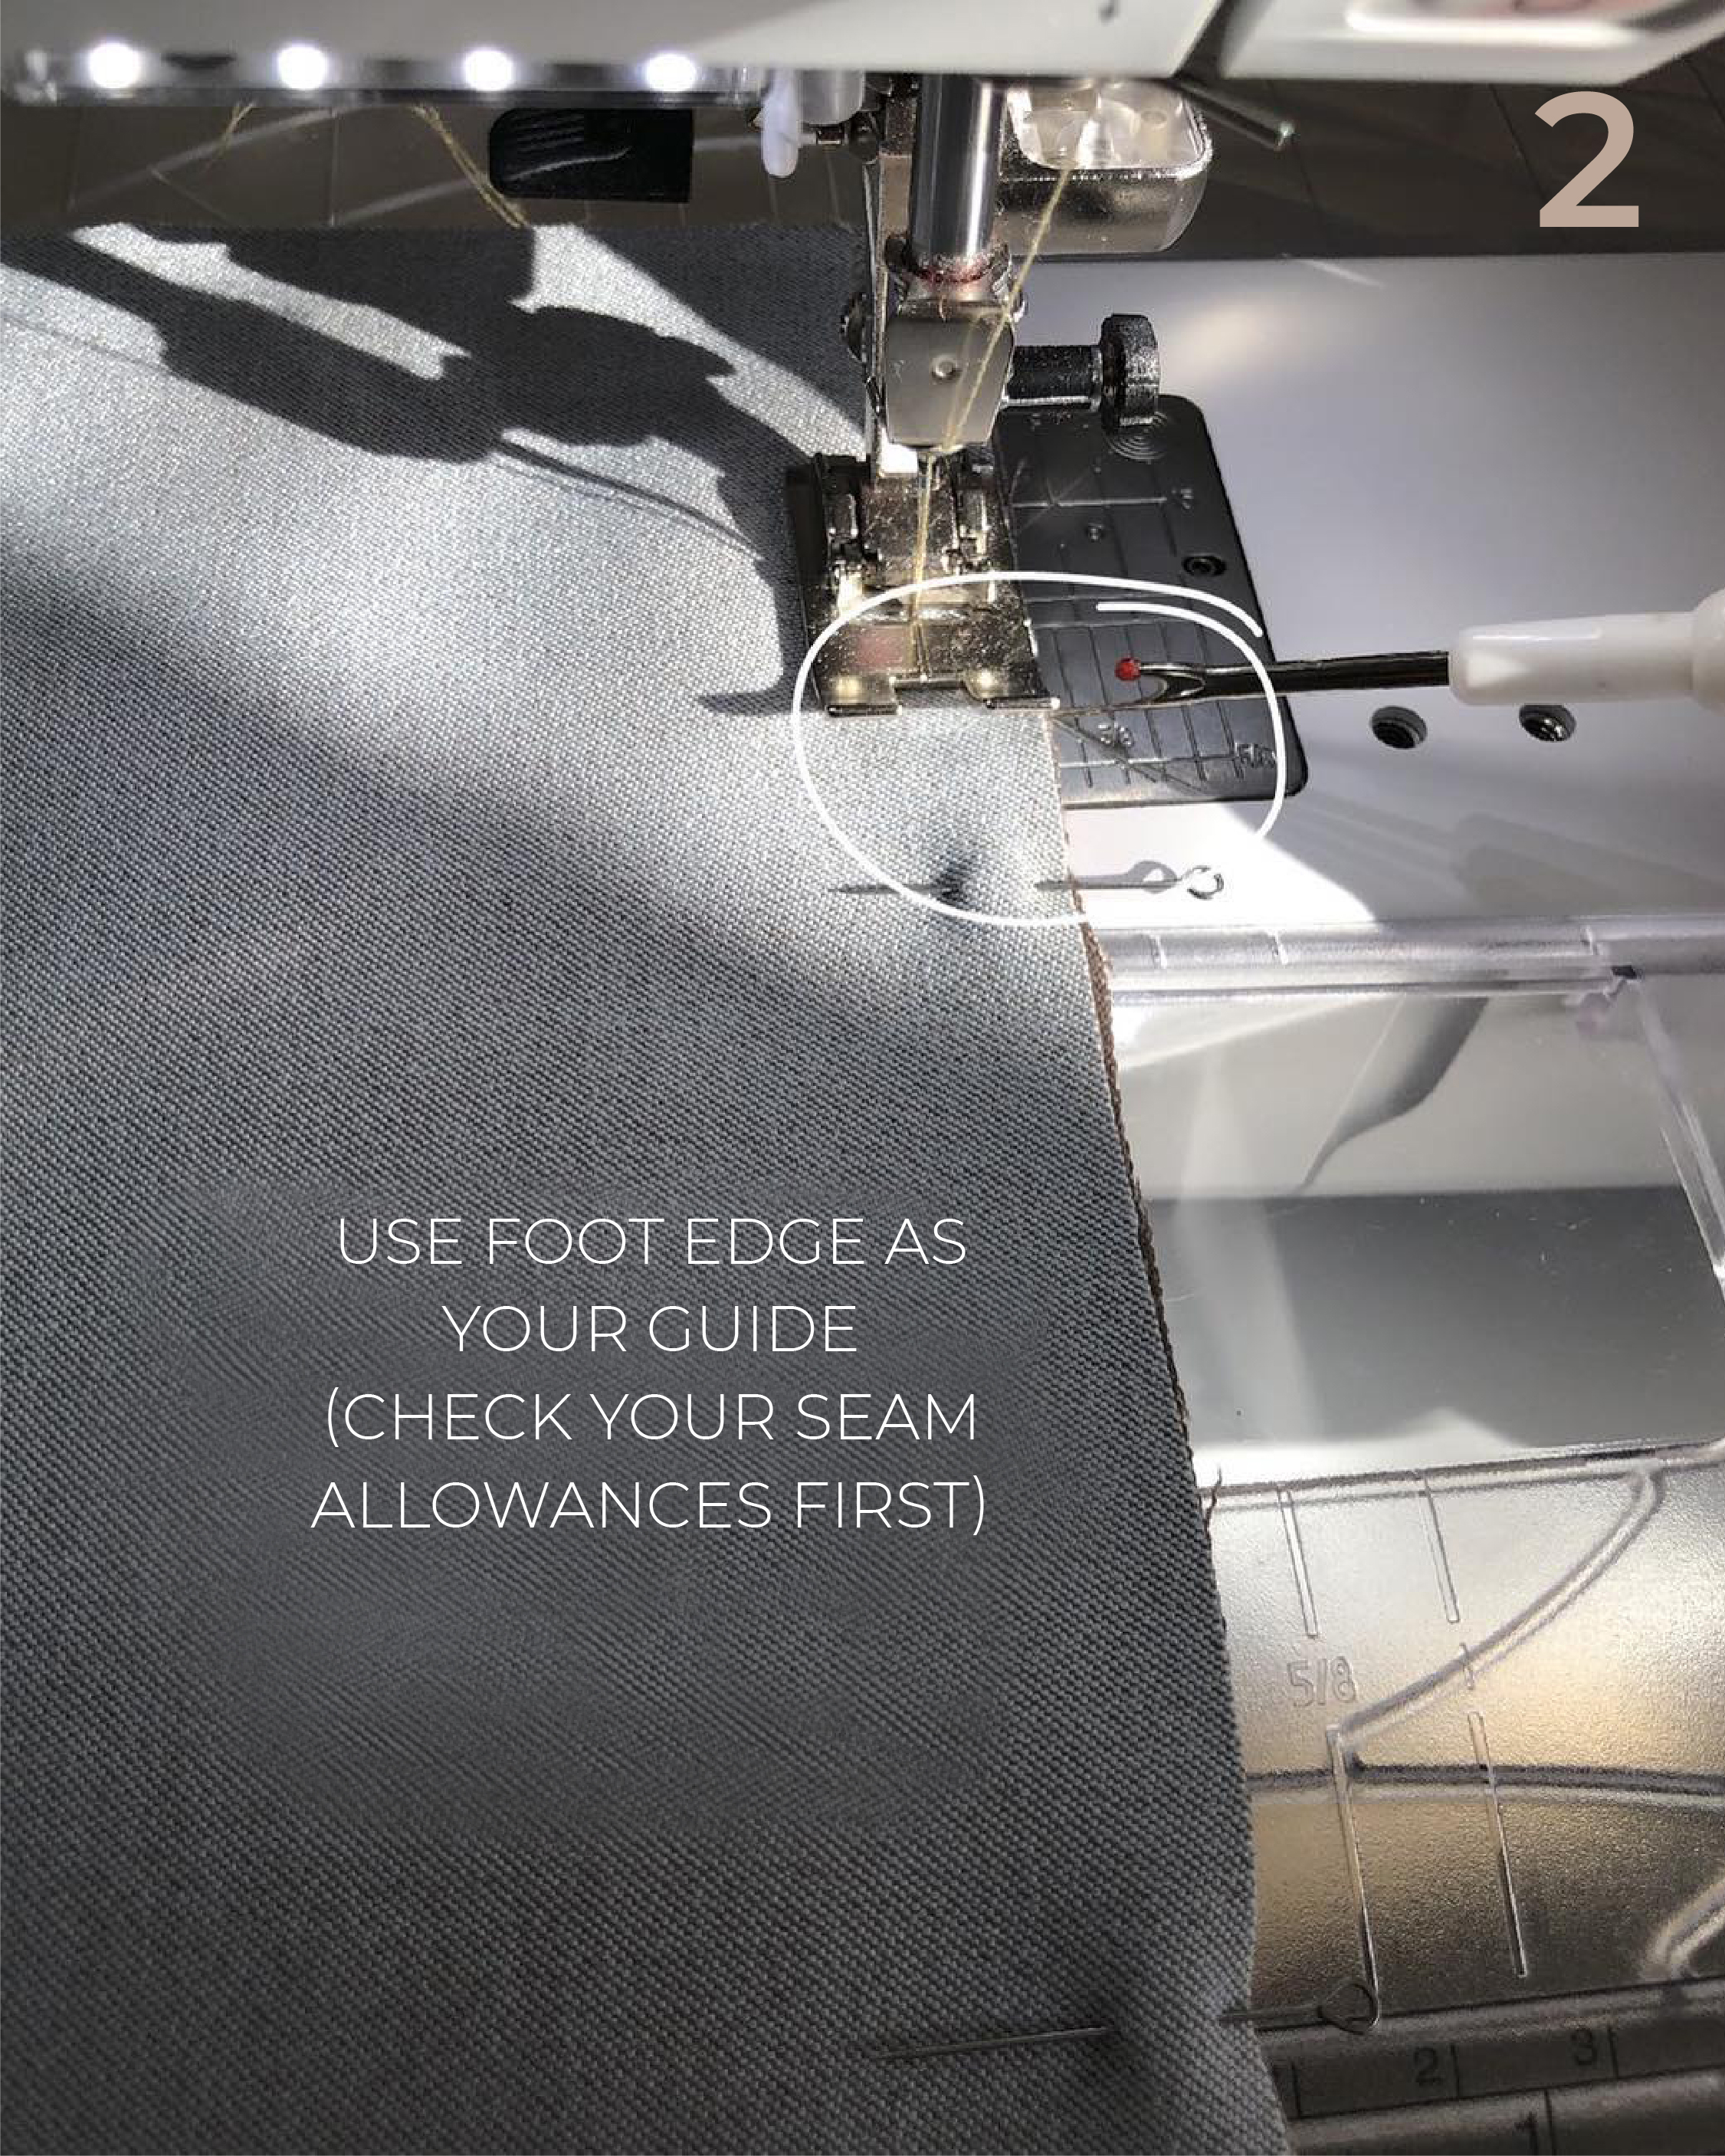
- Use the presser foot edge as a guide (or + 1/2mm, depending on your foot width). Place the needle to the far left. Do not look at the needle — look at the foot’s edge.
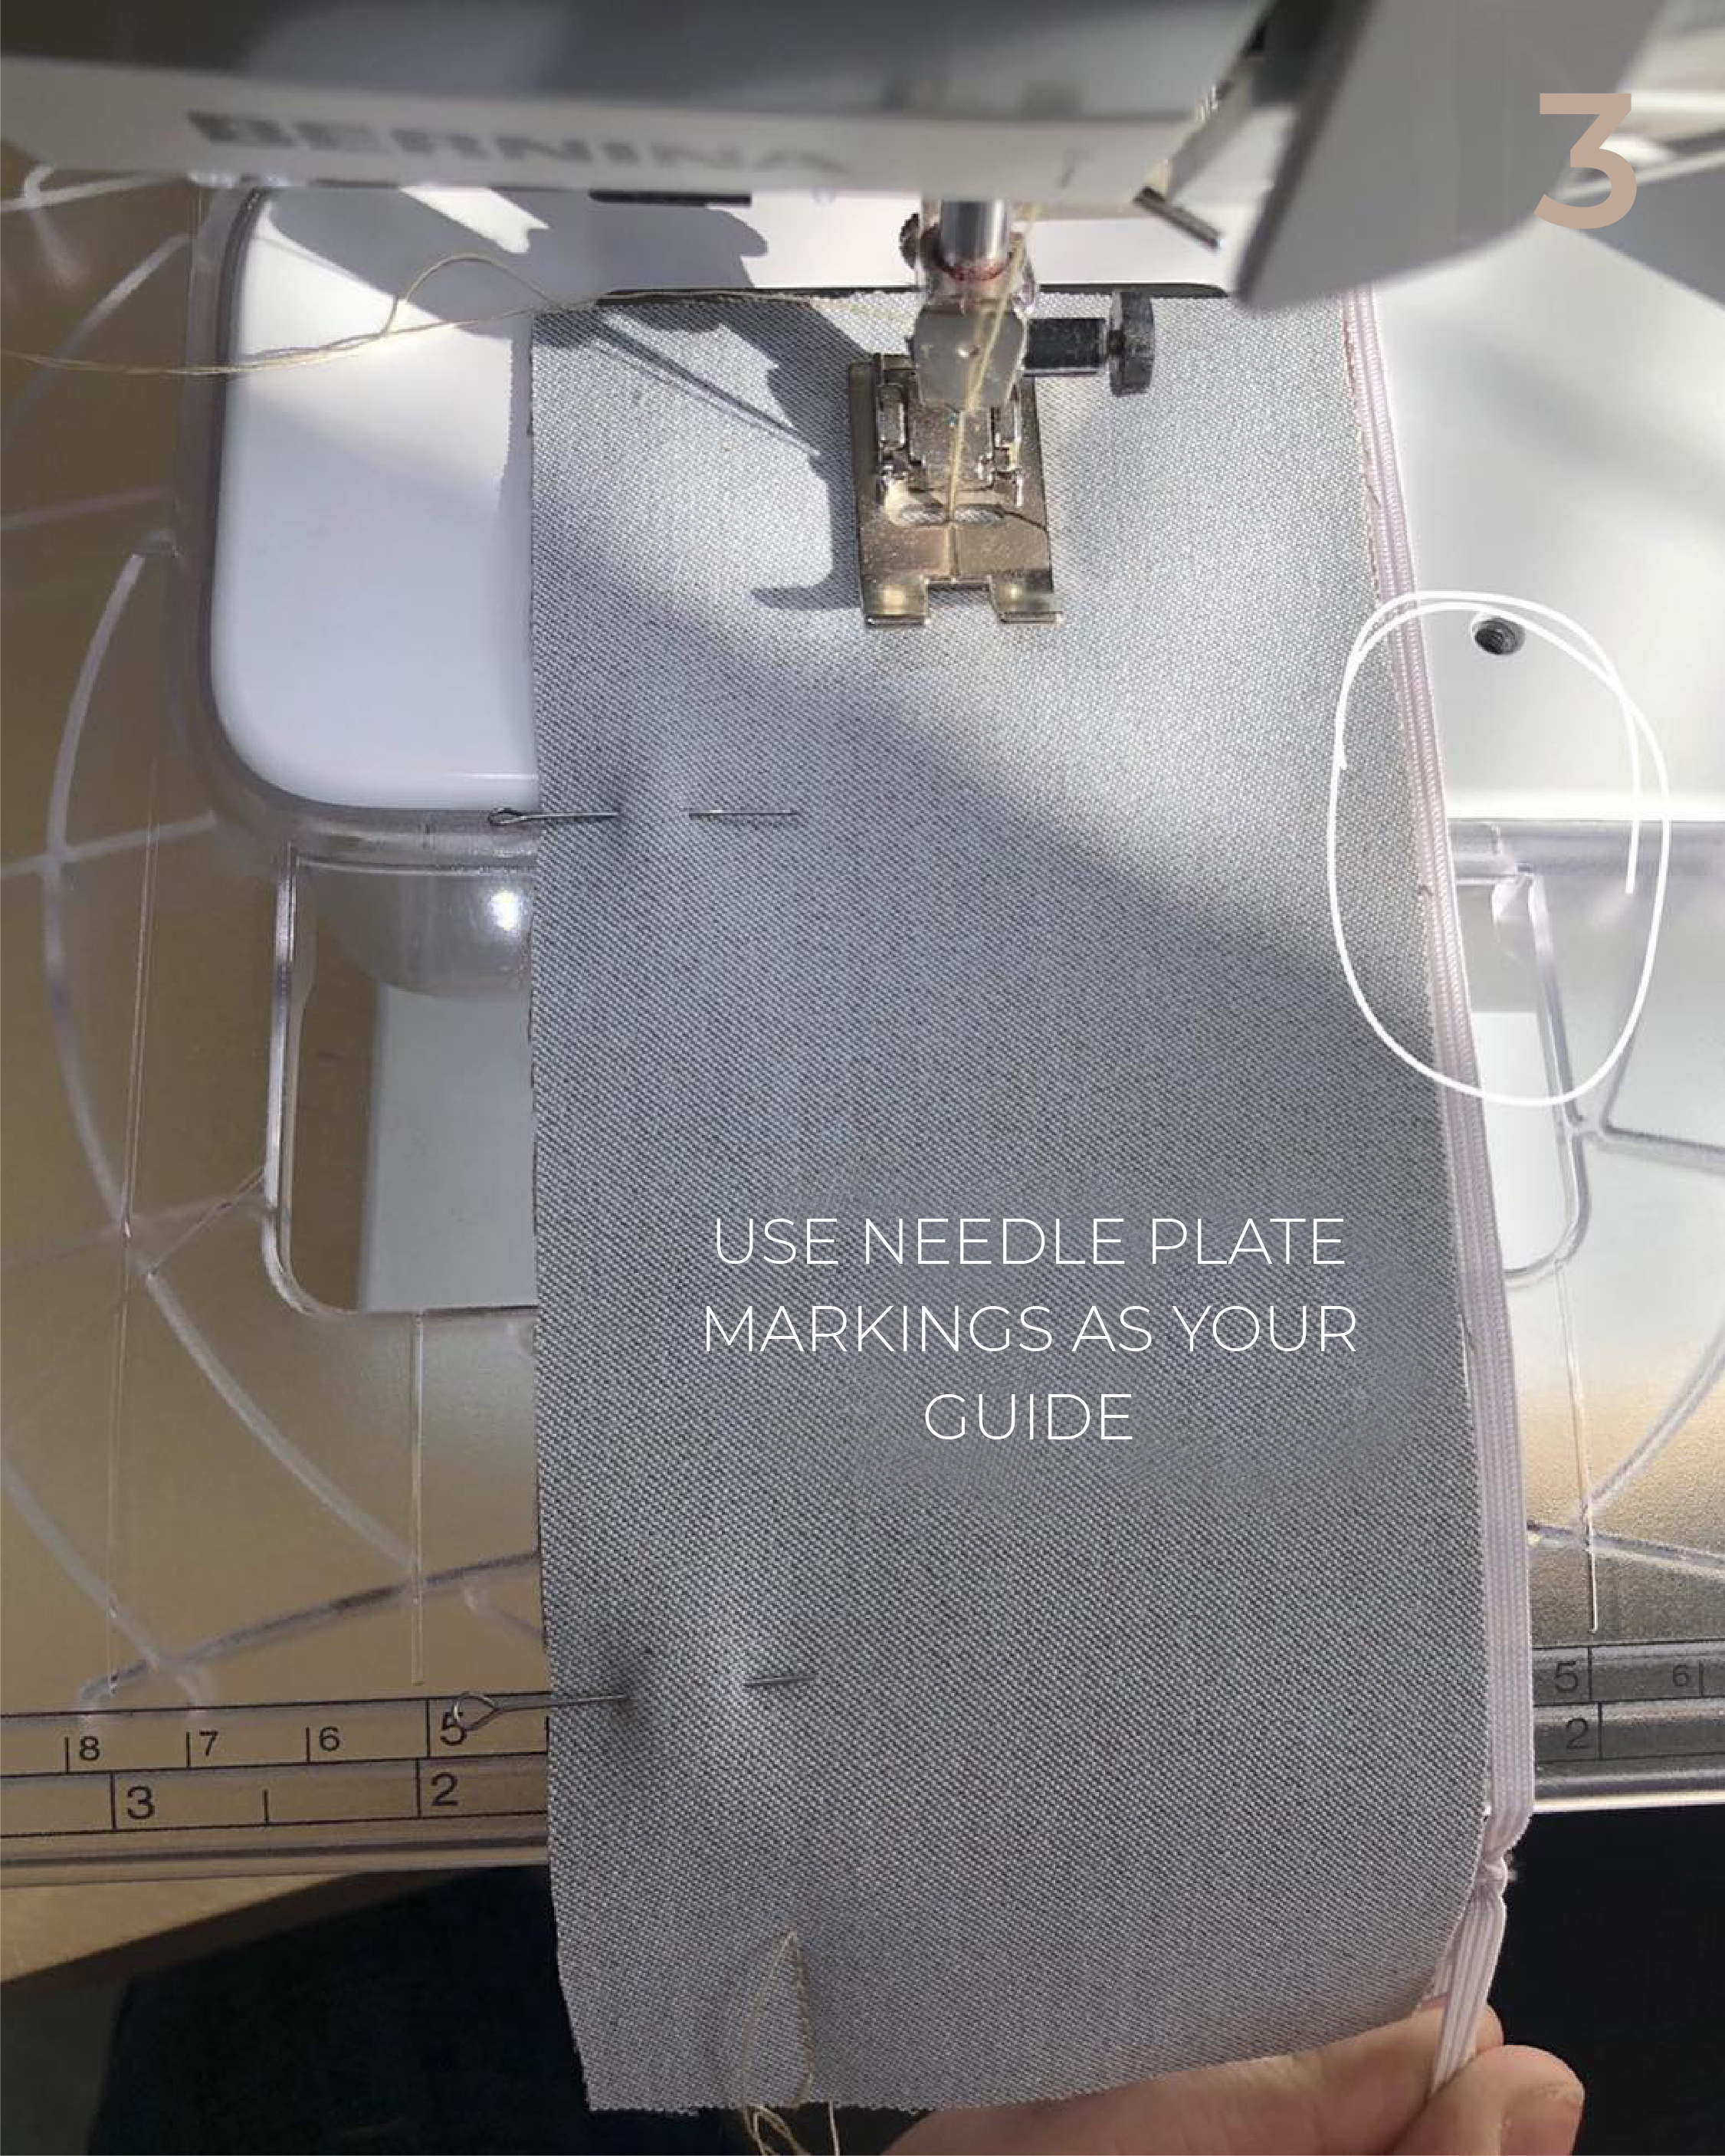
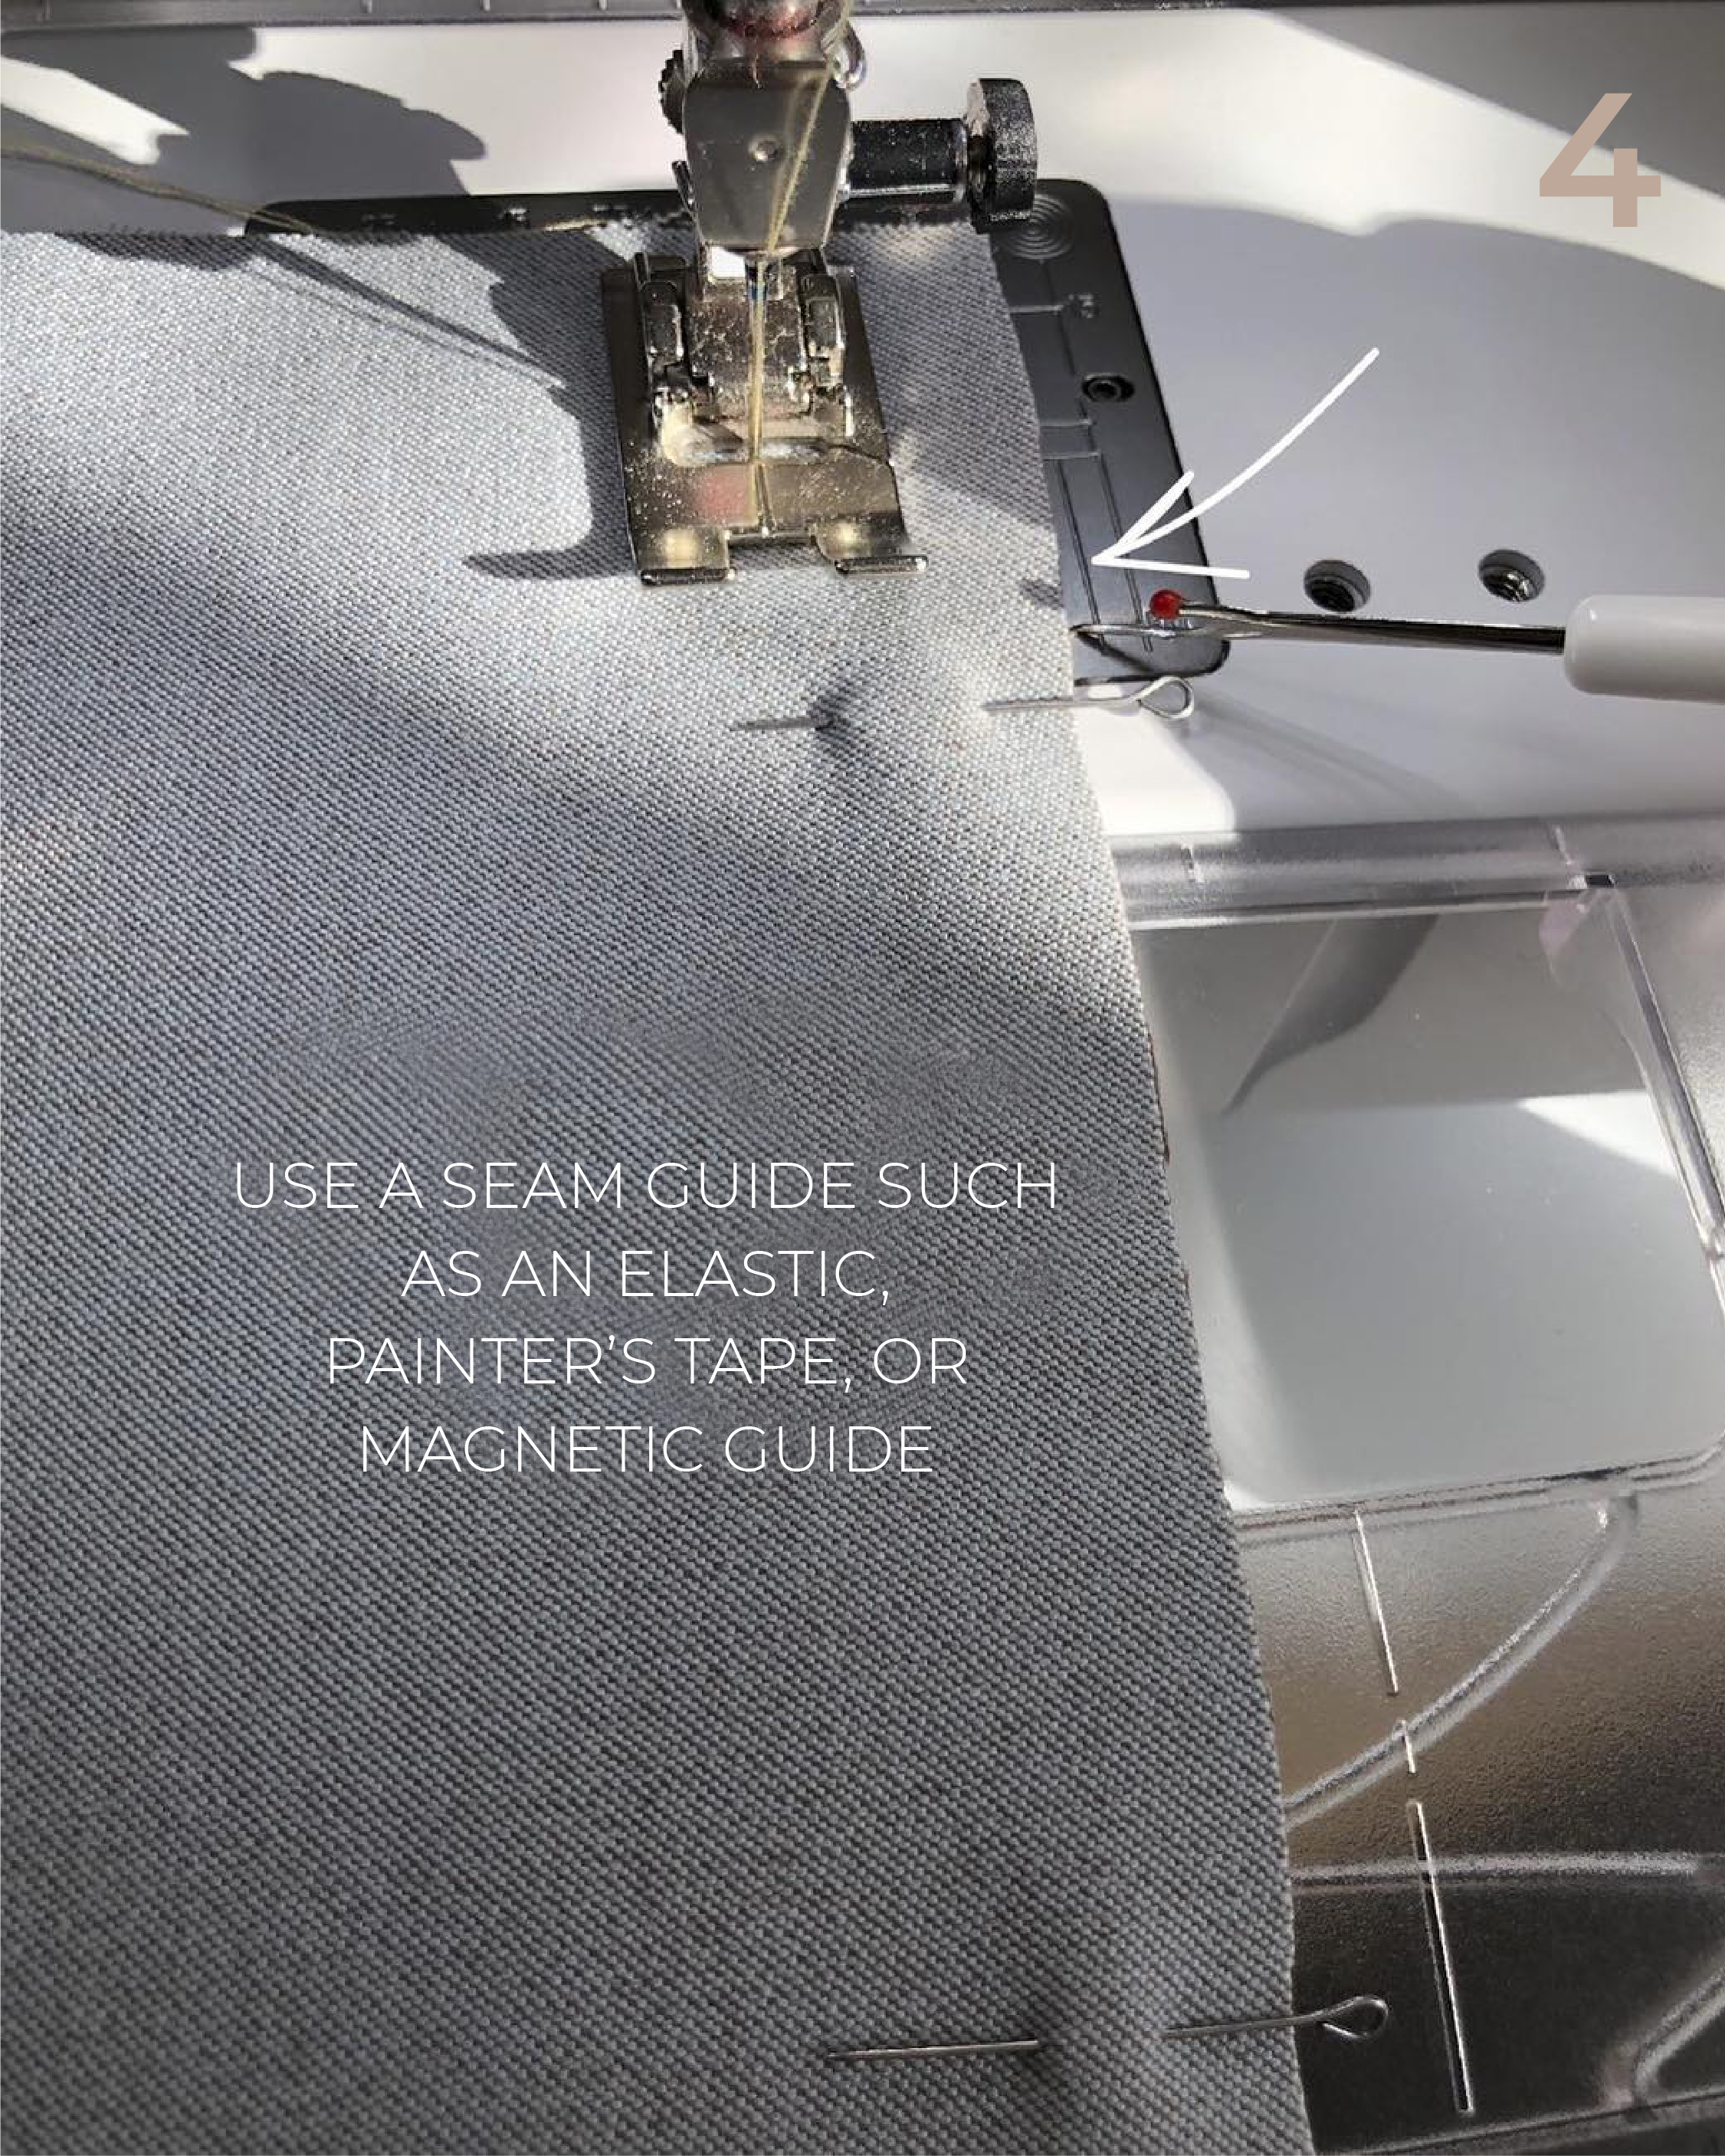
- Look at the markings on the needle plate. Or alternatively make a mark on the plate with painter’s tape, elastic, or rectangular magnet. Place your fabric against the mark and use it as your guide.
- For topstitching or when stitching at 1-2mm from the edge, use a stitch-in-the-ditch foot (see photo No2)
- Stop at curves and corners leaving the needle in the fabric. Rotate the piece slowly in the needed direction.
- When you need to quilt raincoat fabrics with insulation and make many parallel stitches, tape a strip of masking tape on the fabric and stitch along it. It’s important to test in advance how the fabric reacts to the tape and make sure that it can be easily removed without leaving any traces.
Choose your one.


Здесь пока нет комментариев