
There’s no sewing magic to it, just a little hack!
Sharon transforms into a blouse as we extend the bodice and widen the waist. All you need to do is calculate the new width of the garment using the formula below. And the mutton leg sleeve variation will be just a cherry on top.
Modifying the bodice
- Lengthen the bodice front and bodice back 20 cm down from the waist line — this is your hip line. Add 2-4 cm to the side width at the waist. Don’t bother with the waist darts, we no longer need them.
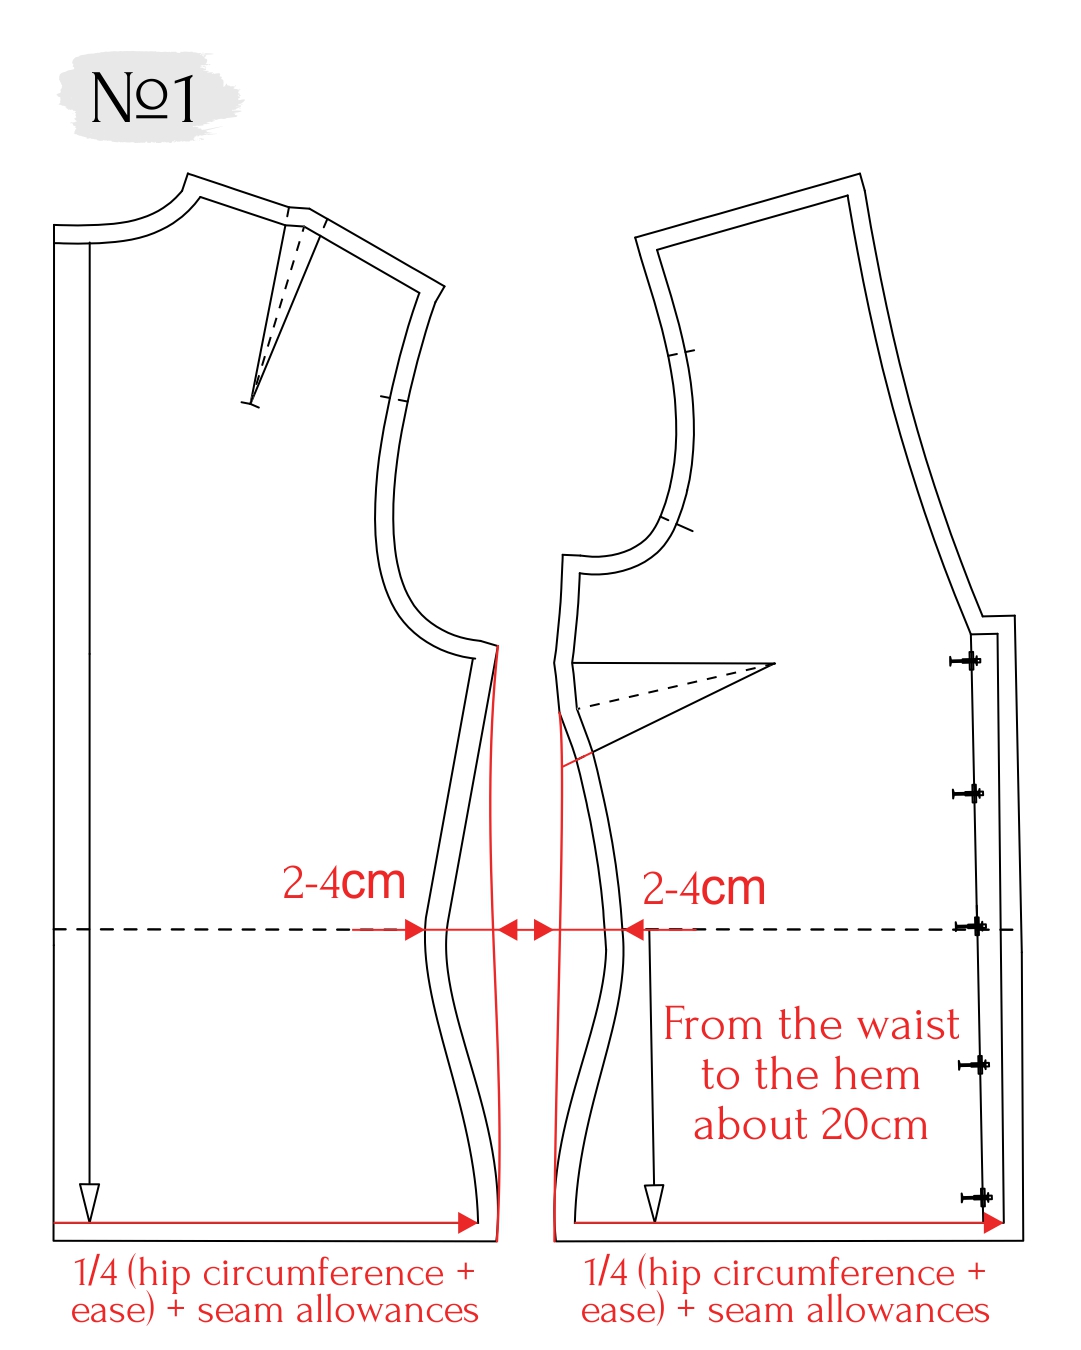
- Calculate ¼ (hip circumference + ease) + seam allowances. For example, for size 36 it will be: Hips 90cm, 10cm ease, which results in ¼(90+10)=25cm + seam allowances (photo1).
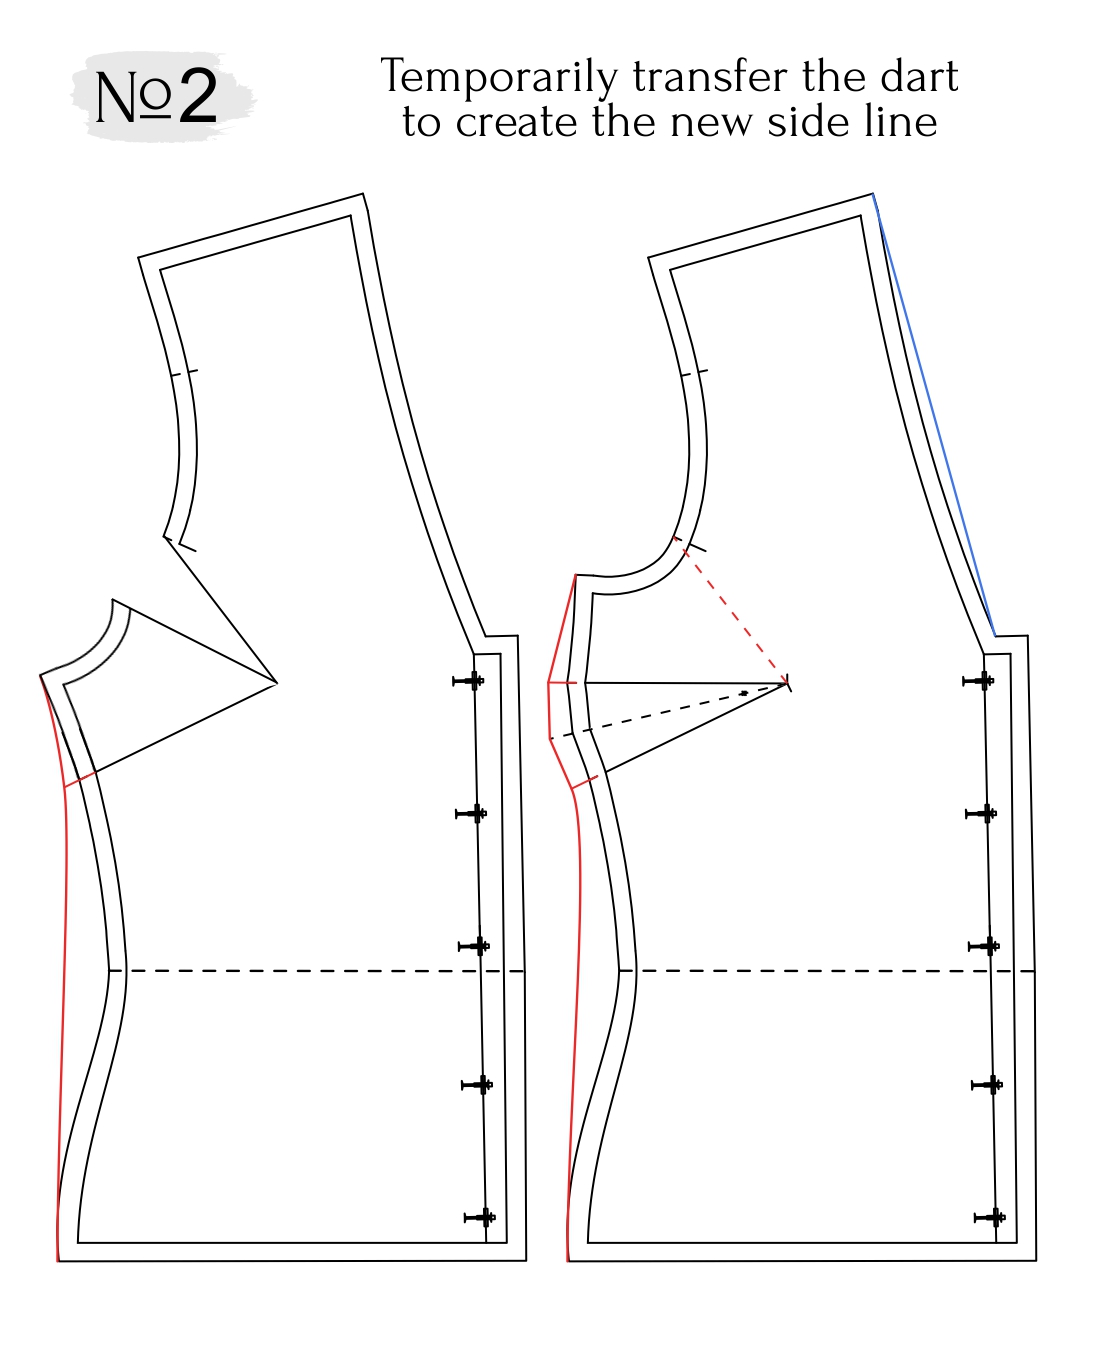
- Temporarily move the bust dart to the front bodice armscye in order to shape the side. To do that, draw a line from the armscye to the top of the dart. Cut along the lines starting at the armscye and the top line of the dart from the side, then close over the bust dart from the side and you will have opened the dart in the armscye. Now you can modify the line of the side seam. After you’ve done that, transfer the dart back where it was by doing everything in reverse. Extend the legs of the new dart across the new side seam.
Modifying the sleeve
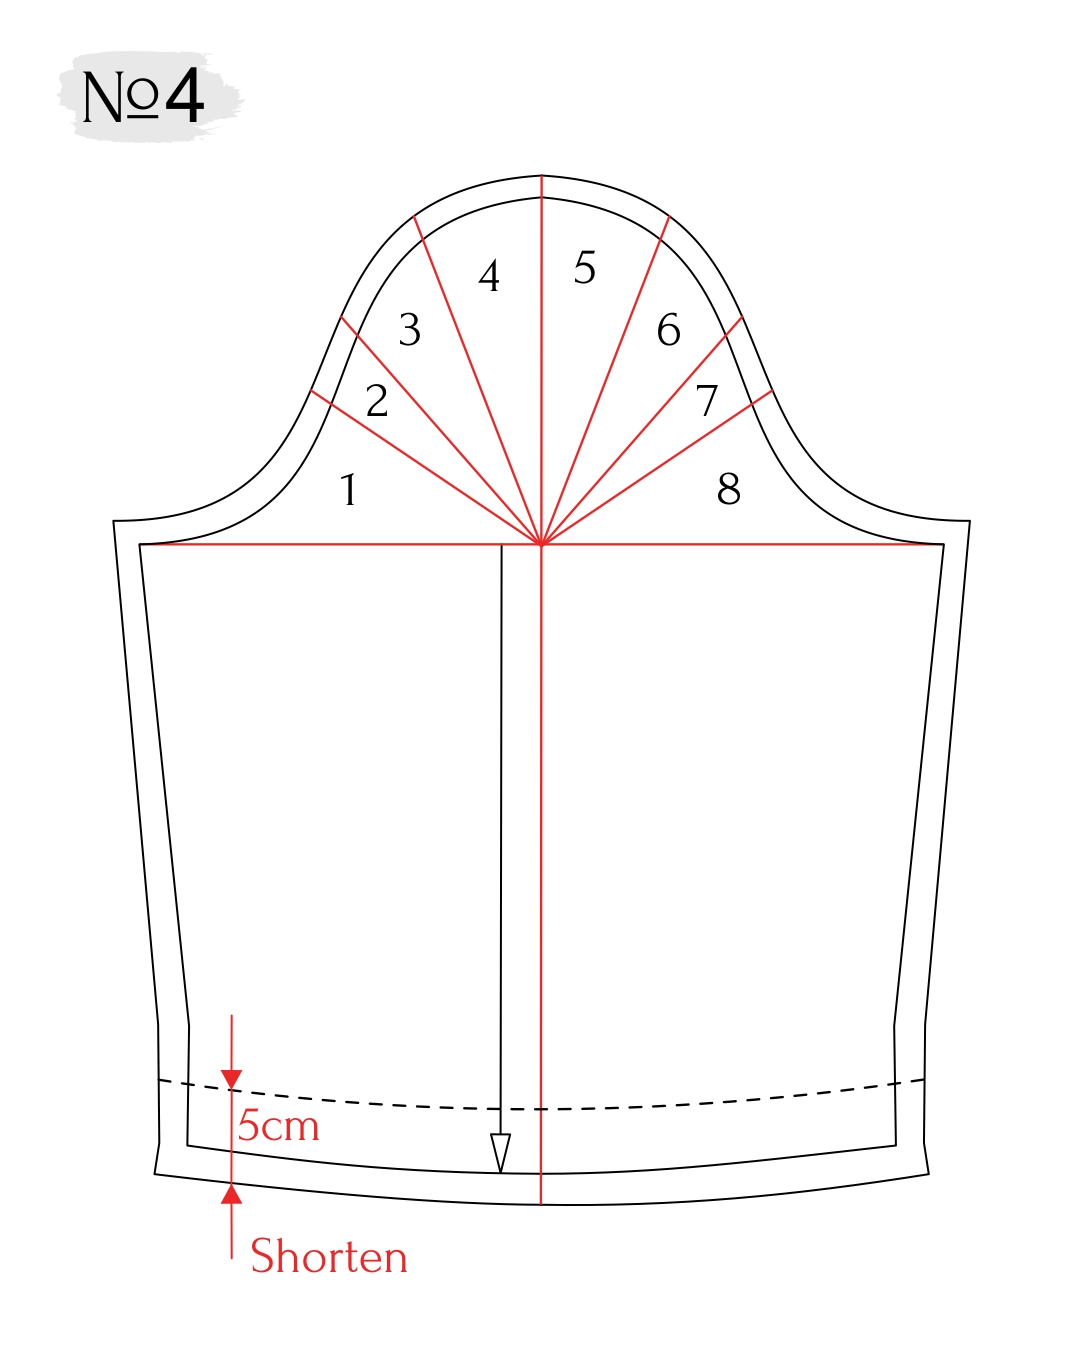
- First, close up the sleeve pleats as per the instructions and shorten the sleeve by 5cm. It should look like a standard-looking sleeve without the pleats.
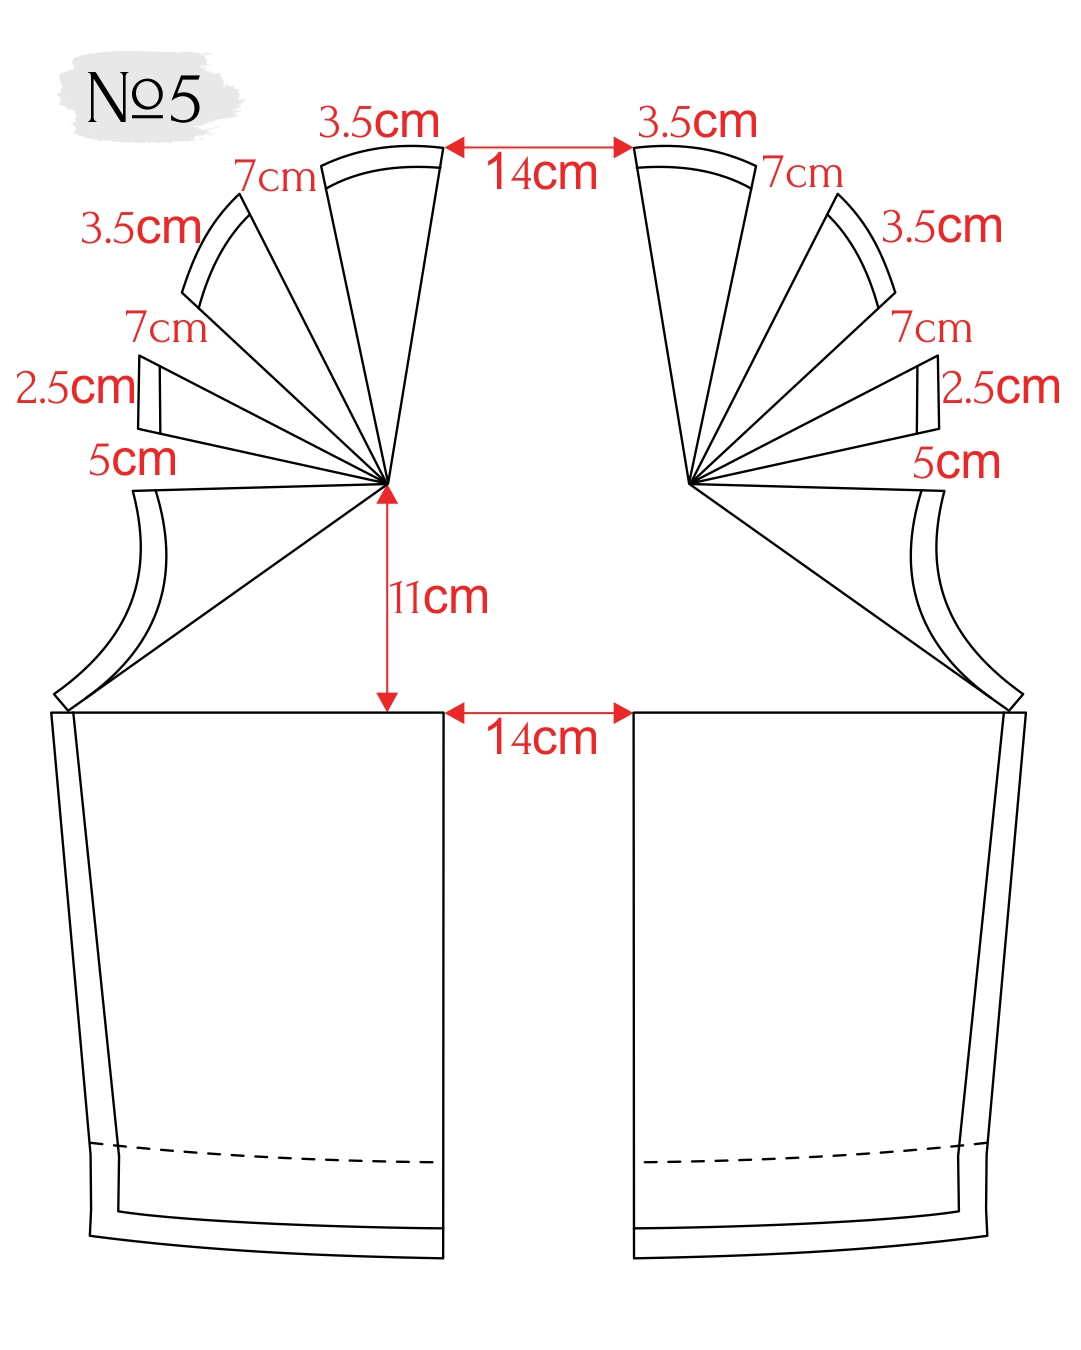
- Draw a horizontal line at the widest part of the sleeve, joining the highest points of sleeve sides. Draw a perpendicular line from the highest point of the sleeve cap onto the horizontal line and extend it to the bottom of the sleeve. Draw 7 lines spreading from the cross centre towards the sleep cap. Number the fragments from 1 to 8 (photo 4).
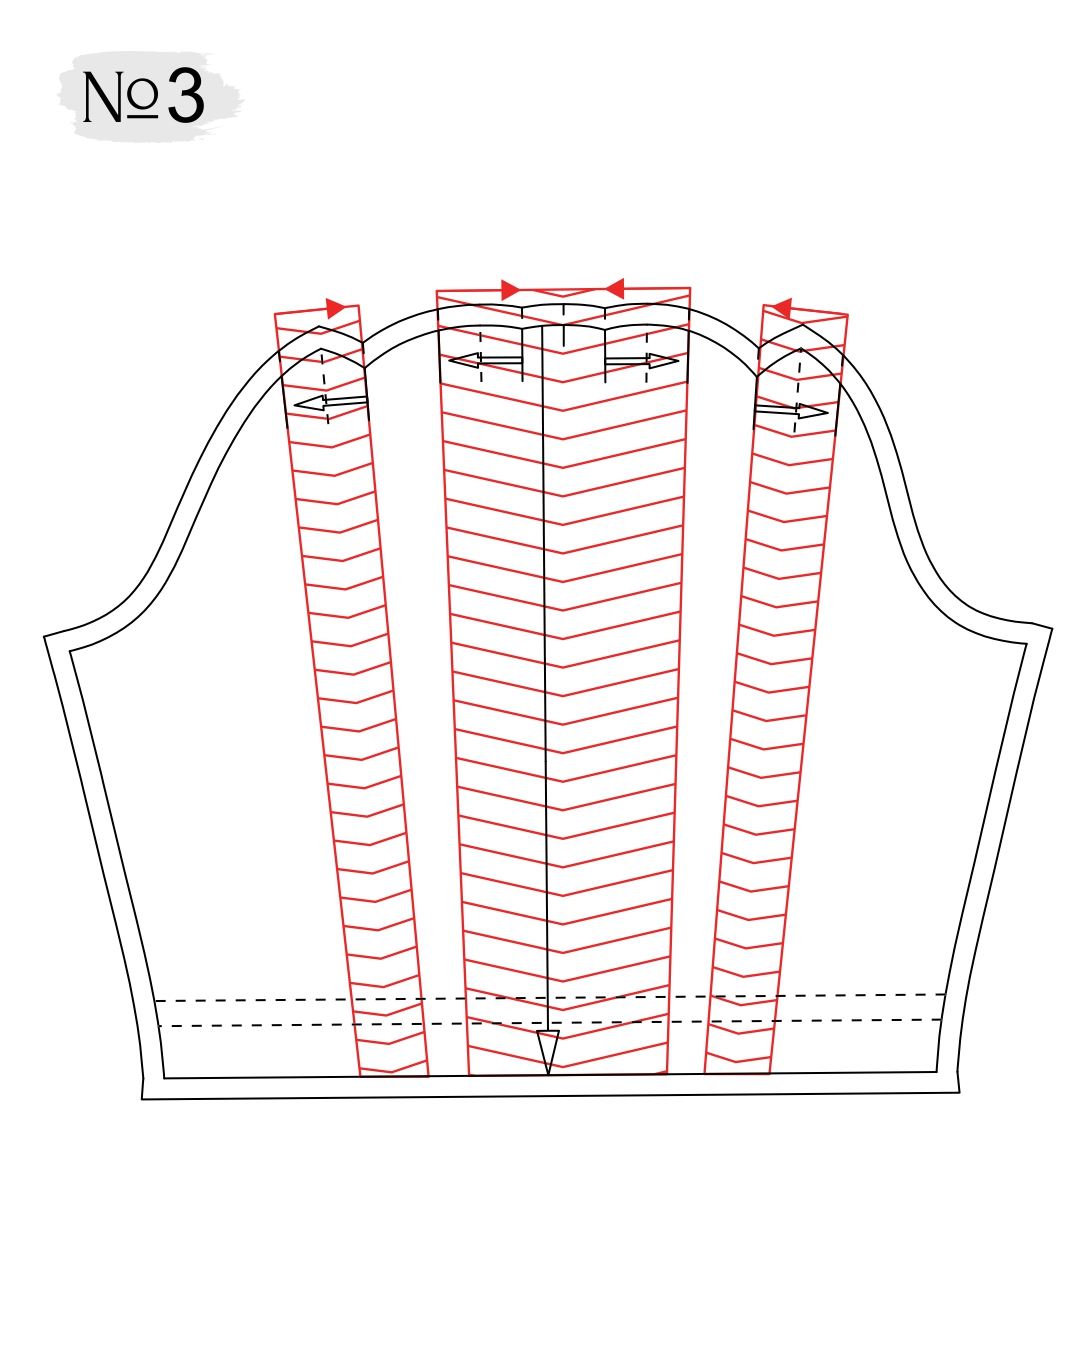
- Cut along the new lines. Open the sleeve up along the centre vertical line that goes from the top of the cap to the hem, 14cm wide. The rest of the fragments should be spread 5 and 7cm wide, following the instructions drawing (photo 5).
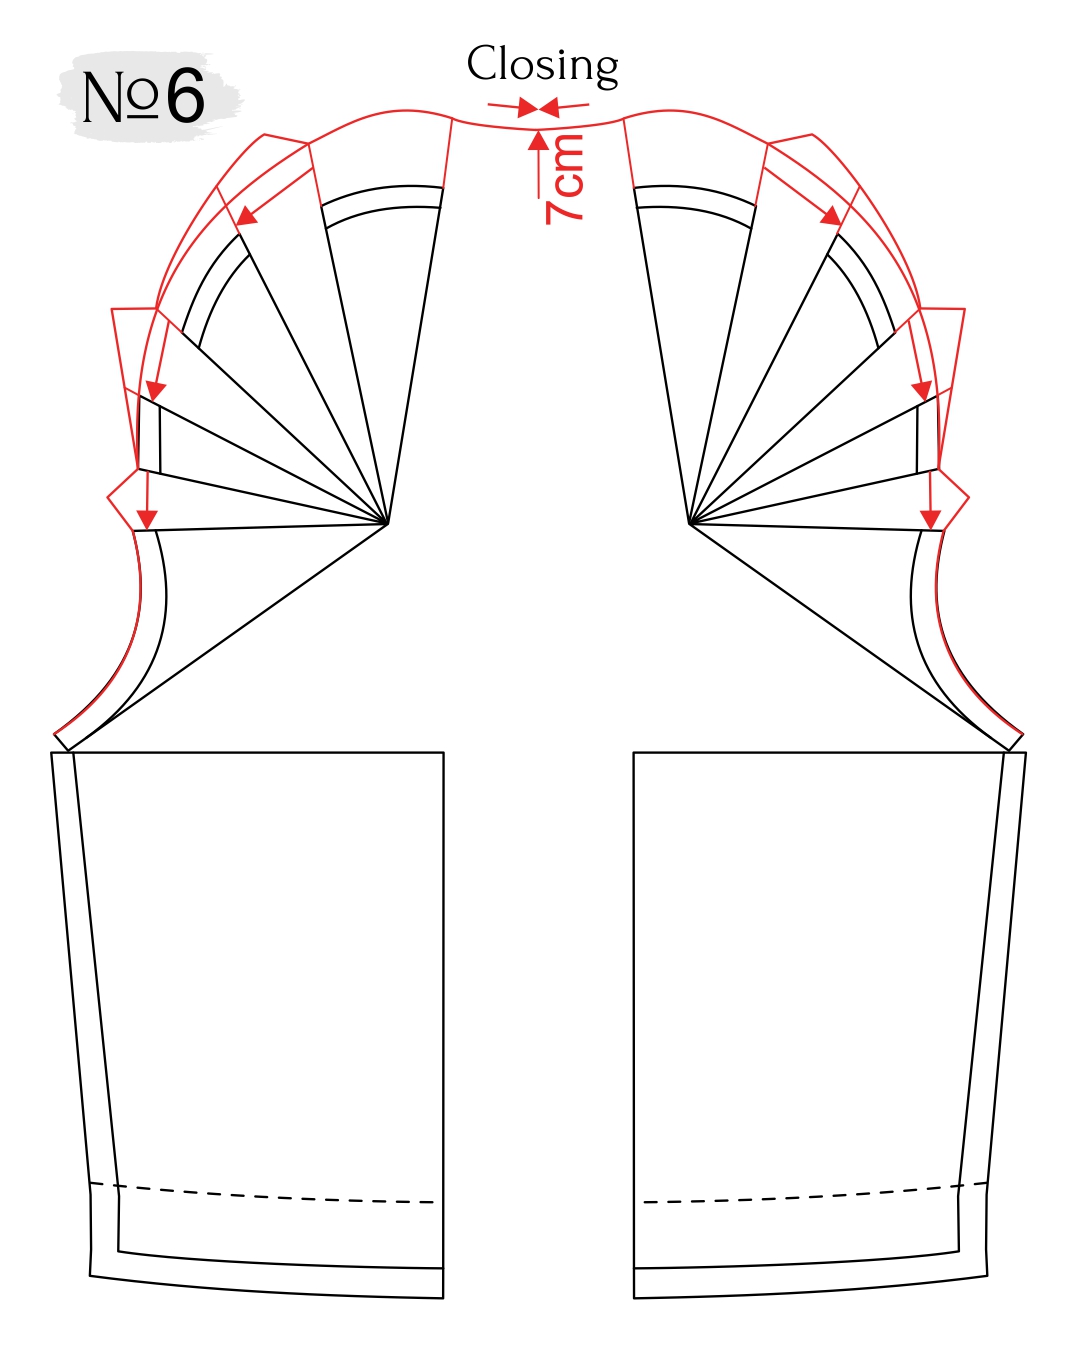
- Add 7cm upwards from the highest point of the sleeve cap and draw a new cap line, outlining the new highest point of the cap, covering fragments 1 to 8.
Then close the pleats on paper, secure them with the pins and create the cap line over the closed pleats. Cut out the pattern along this new line. There should be little angles extending over the pleats, like the ones you find on patterns’ darts. Length of the sleeve for size 36 is 47cm plus seam allowances. (photo 6)
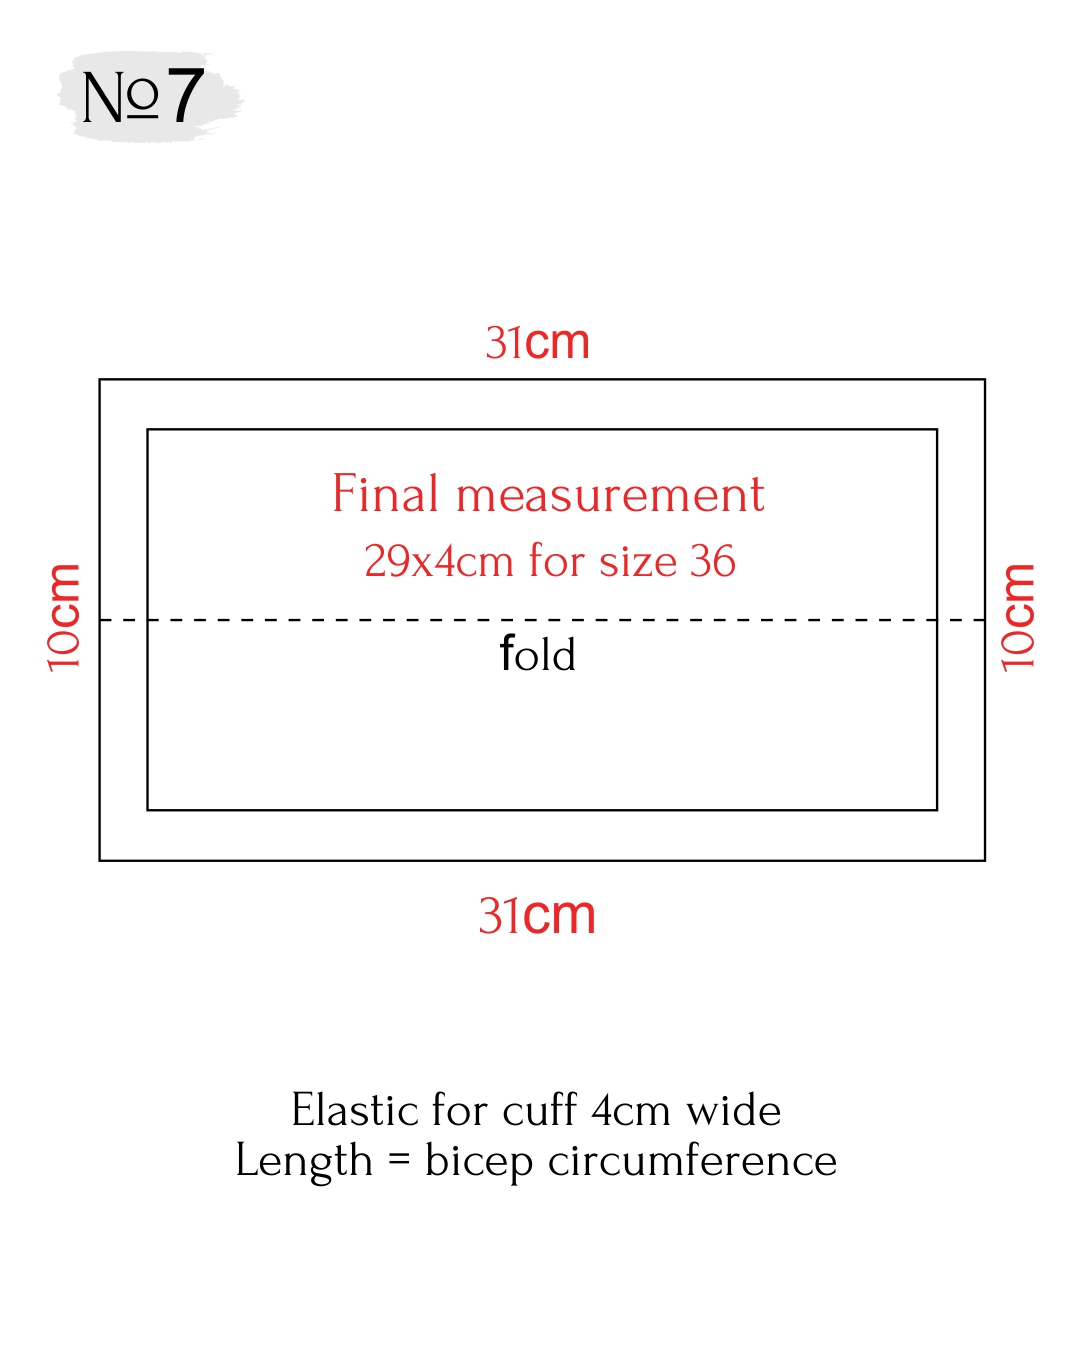
- Create a cuff (the measurements given here are for size 36)
- Rectangle 31x10cm (29x4cm when finished).
- Elastic for the cuff: 3.5cm wide, 22cm long when finished (the length equals the bicep circumference above the elbow).
For the rest of the sizes, add 7cm + 2cm for seam allowances on top of your bicep circumference measurement.
Well done! Download the ready-to-use sewing pattern of Sharon dress here.


Здесь пока нет комментариев