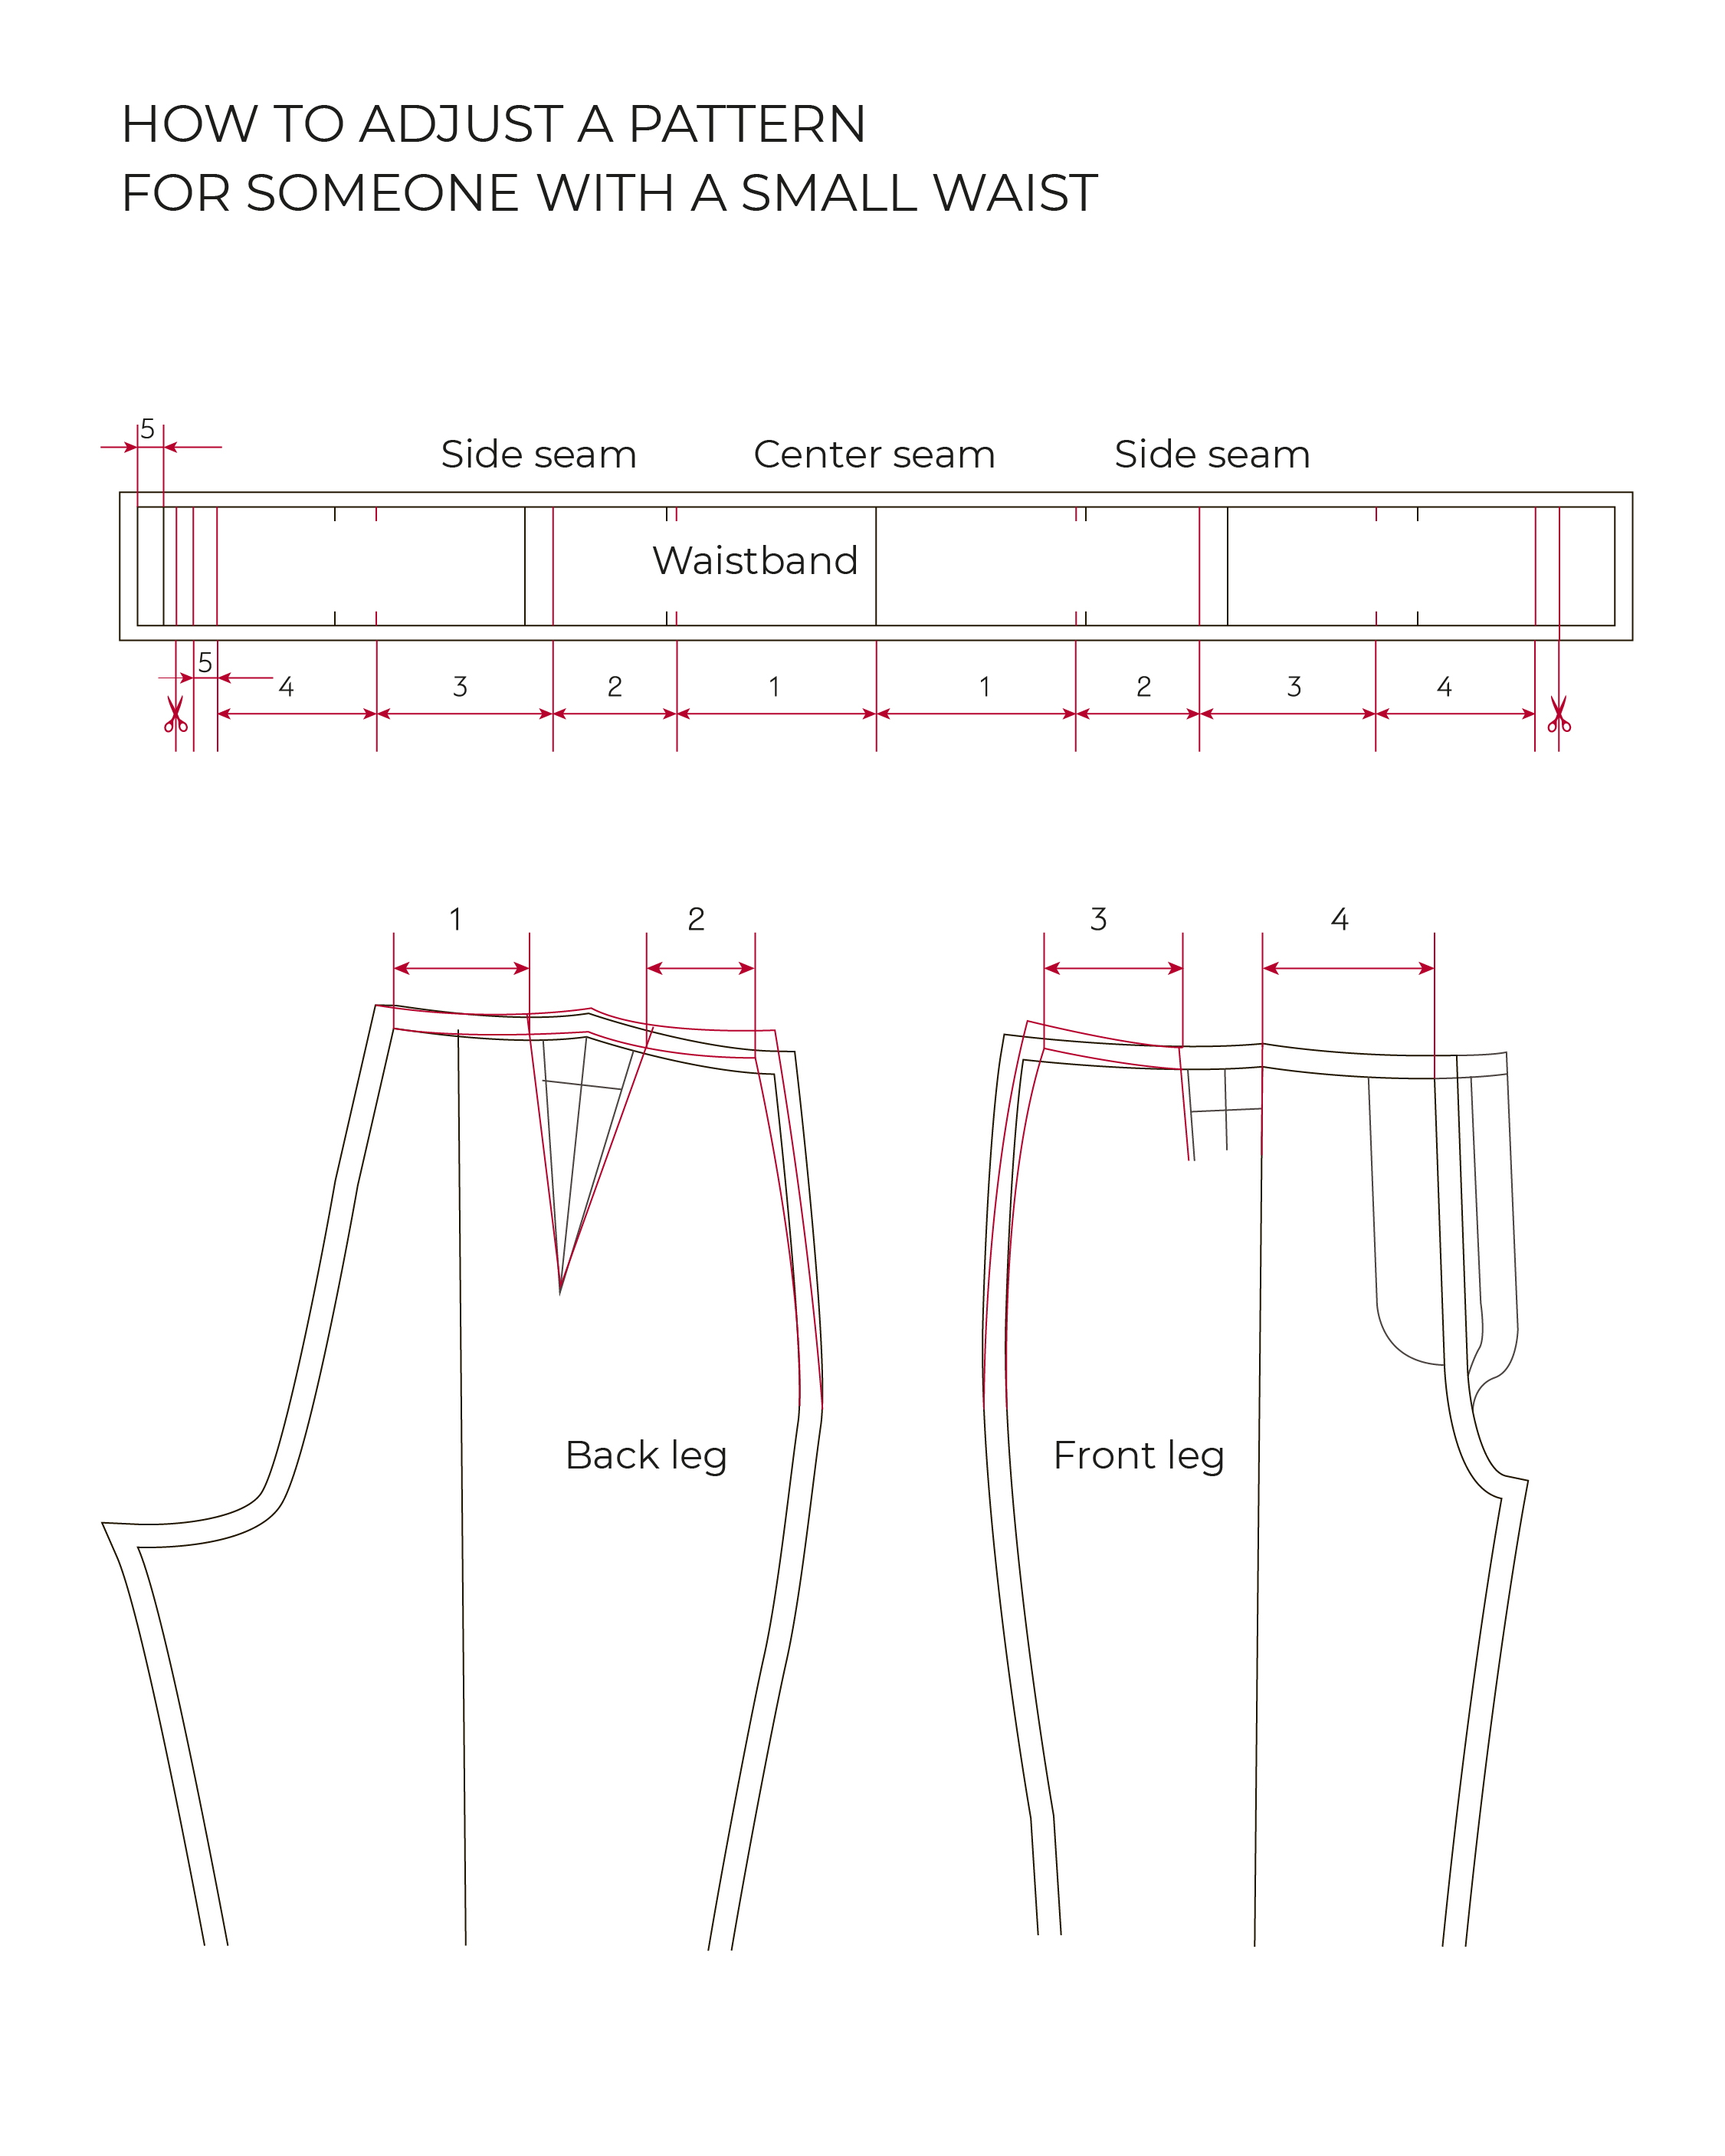
Let’s look at how to adjust a pattern of pintuck trousers for someone with a small waist. We will take the following measurements as an example.
Waistline – 65 cm
Hipline – 98 cm
Based on the hips measurement we should go with size 40. Why? Read it in the article “How to choose the right size”. But the waist measurement for size 40 is 72 cm so we would end up having the garment’s waist being 7 cm wider (98 – 65). If nothing is corrected, these trousers will be too loose around the waist.
This is what we do instead. Divide your waist measurement by 2 and do the same for the standard measurement for your size and calculate the difference between the two numbers:
65/2 = 32.5 cm
72/2 = 36 cm
36 – 32.5 = 3.5 cm
Now you need to correct the pattern by adding 3.5 cm to the back dart, the front pleat, and the side seams.

The length of the back dart can be increased by 0.5 cm, then we add to the width of the dart on each side by 0.5 cm. Connect the new dart point to the top of the dart, going through the new points of the modified dart legs.
On the front pleats, you can take out 0.5 cm from the inner side of the pleat (on the centre seam side) and transfer this to the outer side part of the pleat (on the side seam side). The remainder (3.5 – (0.5 + 0.5 + 0.5) = 2cm) you can even out between the side seams of the front and back pattern pieces 1cm per side:
- On your waistline from the side seam of the front and back pieces measure 1 cm less width (towards centre).
- On the back and front pieces, with the help of a French curve, draw a gentle curve to connect the new points with notches on the hips which are already indicated in the pattern.
- Add new seam allowances of 1 cm to the front and backside seams
- Fold your paper pattern back dart and front pleats closed and secure them with pins, then fold in the first 5-7 cm at the beginning of the side seam. Pin the back and front side seams together.
- Apply the French curve ruler in such a way that it starts at the back dart, goes through the side seam, and connects to the front pleat. Mark the new waistline in a curved line.
Check the length of the new waistline. It should be equal to half of your waistline measurement (waistline measurement / 2) + ½ waistline ease (check with the ease allowance measurement chart included in your pattern).
For example, the waistline ease allowance for our size is 4.5 cm. So your finished measurement should be 32.5 cm + 2.25 cm = ~34.8 cm. If not, you need to make further adjustments (adjusting it at the side seams would be easiest).
Waistband adjustment
Take the measure from your newly modified pattern and write down the following:
Part 1 – length from centre back to the back dart (we have 9.8 cm)
Part 2 – length from the dart to the side seam (we have 6.2 cm)
Part 3 – length from the side seam to the front pleat (ours is 8.3 cm)
Part 4 – length from the front pleat to the centre front seam (ours is 10.5 cm)
The scheme is above:
- On the waistband pattern piece measure and mark from the centre front to the left and to the right the “part 1” measurement (9.8 cm) – these will now be your new notches.
- Next, to the right and to the left of those add the “part 2” measurement (6.2 cm) – these are the side seams notches. From these, drew perpendicular lines on to the waistband and make a note that they are “side seams”.
- From the new side seams measure to the right and to the left add “part 3” measurement (8.3 cm) – these are the new notches.
- From these add to the right and to the left “part 4” measurement (10.5 cm) On the right side add a further 1 cm for construction. On the left side cut off the excess paper.
- On the left from the new mark – new center line – draw a perpendicular line and from there mark “part 5” – this will be the measurement from the original pattern piece from the centre to the side seam (we have 1.5 cm). And further to the left add 1 cm seam allowance, then cut off the excess paper.
Quick check: if paper pieces, which were trimmed off from the left and the right sides respectively, are equal width, you’ve made everything correctly.
Practice using Vikisews trousers patterns. Find them in the “Pants and Shorts” section.
Read also “How to adjust a pattern for someone with a bigger waist”.
More about pattern adjustments:
Cup size in vikisews patterns and pattern adjustment for large bust and narrow back


Здесь пока нет комментариев