
Let’s redesign Deborah blouse into a tiered dress.
Swipe to see the technical drawings. We removed the princess seams, added bust darts, removed the waist darts, added an empire waist seam, and added flared tiers.
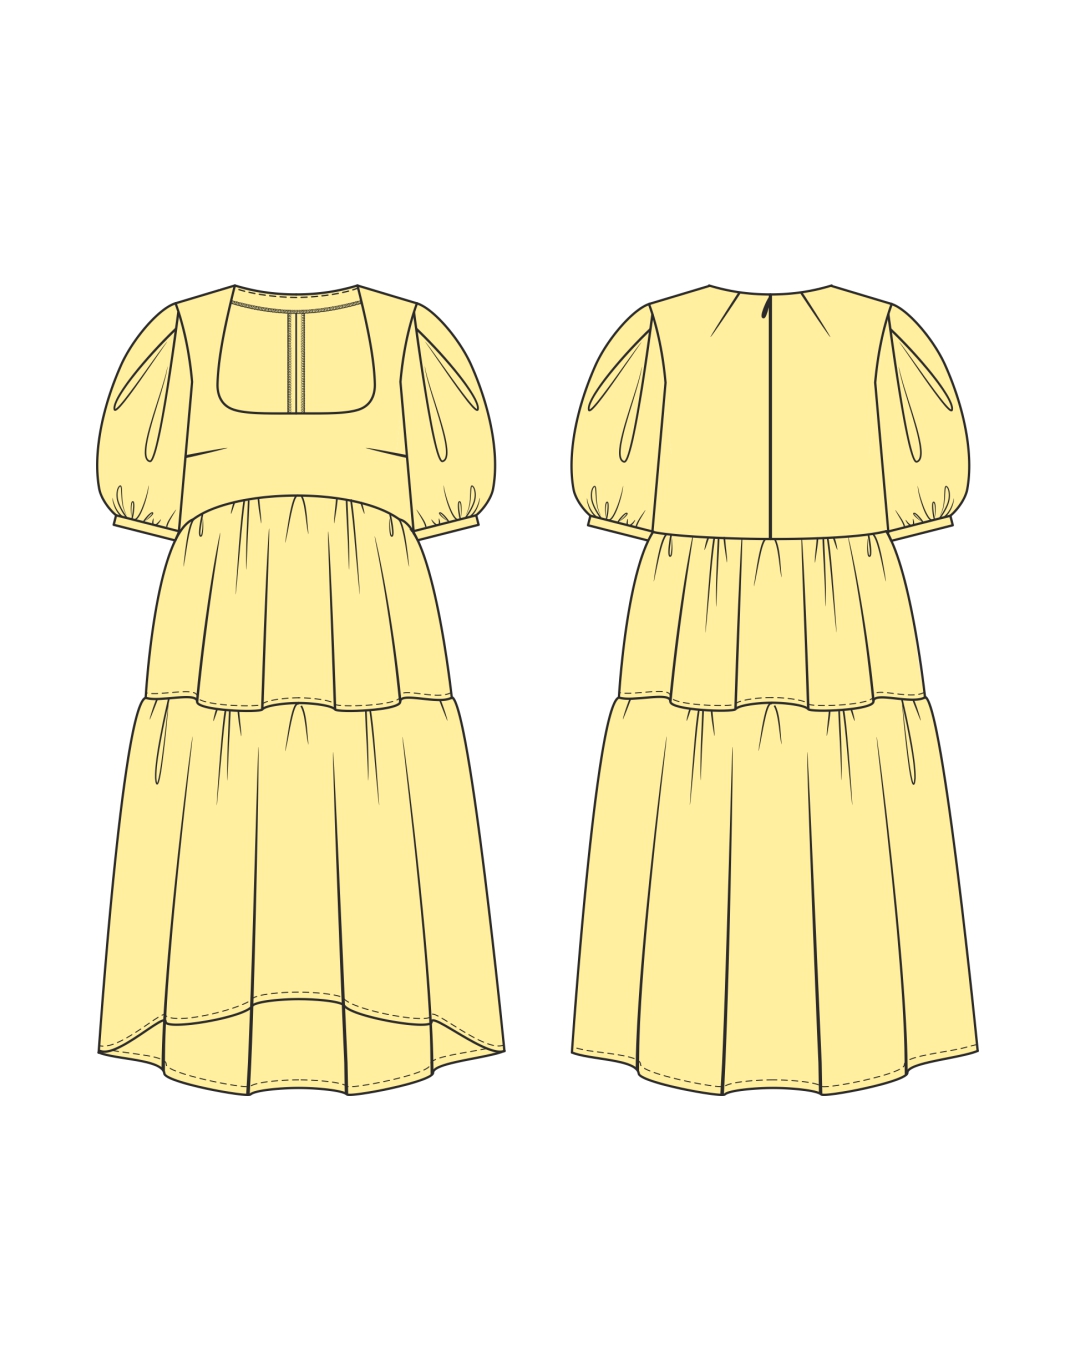
The dress bodice
- Trace the empire waist seam line.
To do this, mark notches perpendicular to the seam at the side seam allowance on the back piece, align the back and the front pieces along the side seams (fold the back side seam allowance and align it with the front side seam, pin in place).
Next cut off the seam allowance on the princess seam of the side front piece and tape it to the princess seam on the center front piece (red line in photo 1).
Tape the pieces from the bust line to the hips in such a way that the top of the side piece stays mobile to transfer the bust dart.
Now that the vertical seams of the front and back are aligned, trace the empire waist seam line, measuring from the waistline up:
- 9.5cm at the center front
- 4cm at side seams
- 1.5cm at center back seam
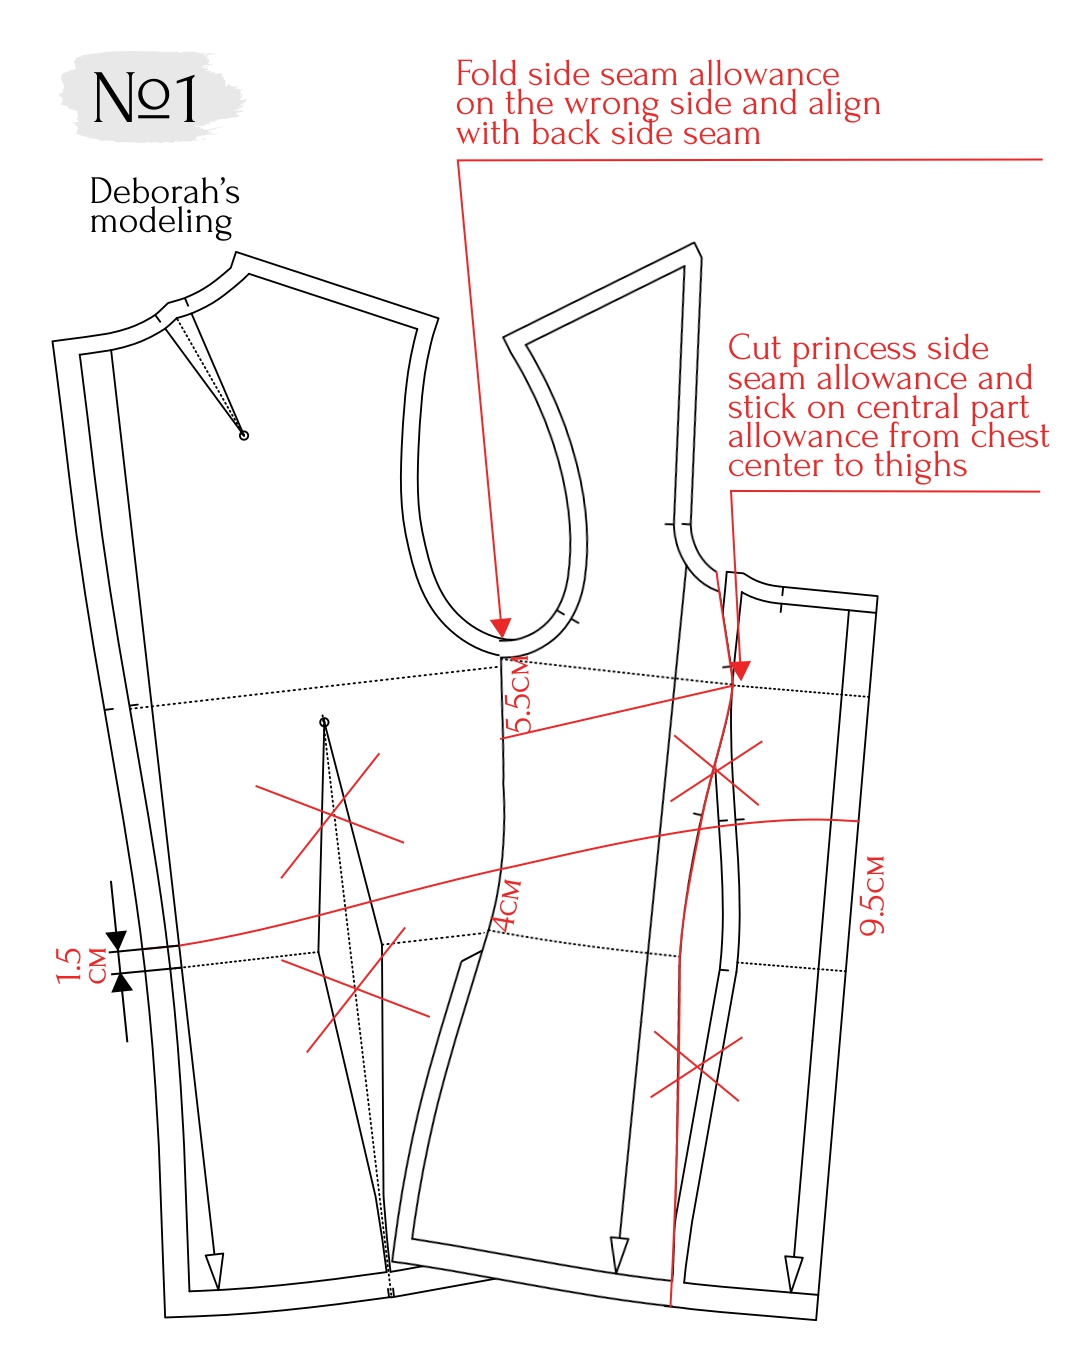
Connect the dots with a smooth line.
▫️The line goes at a right angle in the side seam areas, the front fold, and the center back edge.
▫️Add seam allowances to the empire waist seam line (1 cm above and below).
▫️Ignore the waist darts on the back and front pieces.
- Complete the front pieces.
- measure 5.5 cm down from the armscye along the side seam.
- measure 1 cm down from the center bust notch on the princess seam. Connect these points with a straight line from the side seam to the princess seam and cut along this line.
- close the neckline dart in the princess seam and transfer it into the side seam bust dart. Trace the side seam dart where the dart apex stops 2cm short of the princess seam. Trace the side seam accounting for the new dart.
Place the closed (new) neckline with the front facing, aligning the folds of the pieces, and verify that the lines match.
Verify the lines carefully! Close the bust dart in the final bodice pattern, check the smoothness of the side seam line, align the back and front along the side seams, and check that the waistlines match taking into account the added seam allowances.
The dress skirt
- Lengthen the lower front part from the upper edge to the bottom hem to get 70 cm with flare at the bottom.
First, secure the lower front section on paper (you may tape printer paper sheets together). The length of the piece must be 70cm along the entire width (from side seam to center). The bottom corner of the side front seam will be lower than the corner of the center front hem.
- Tape the lower part of the back on paper and lengthen the piece from the upper edge to the bottom hem to be 70 cm with flare at the bottom.
Divide both skirt pieces into 2 tiers:
- the length of the upper one is 28 cm;
- the bottom one — approx. 42 cm (for size 36)
- Align the pieces along the side seams and check that the lines match. Cut the pieces along the tier line and add seam allowances to the cut edges.
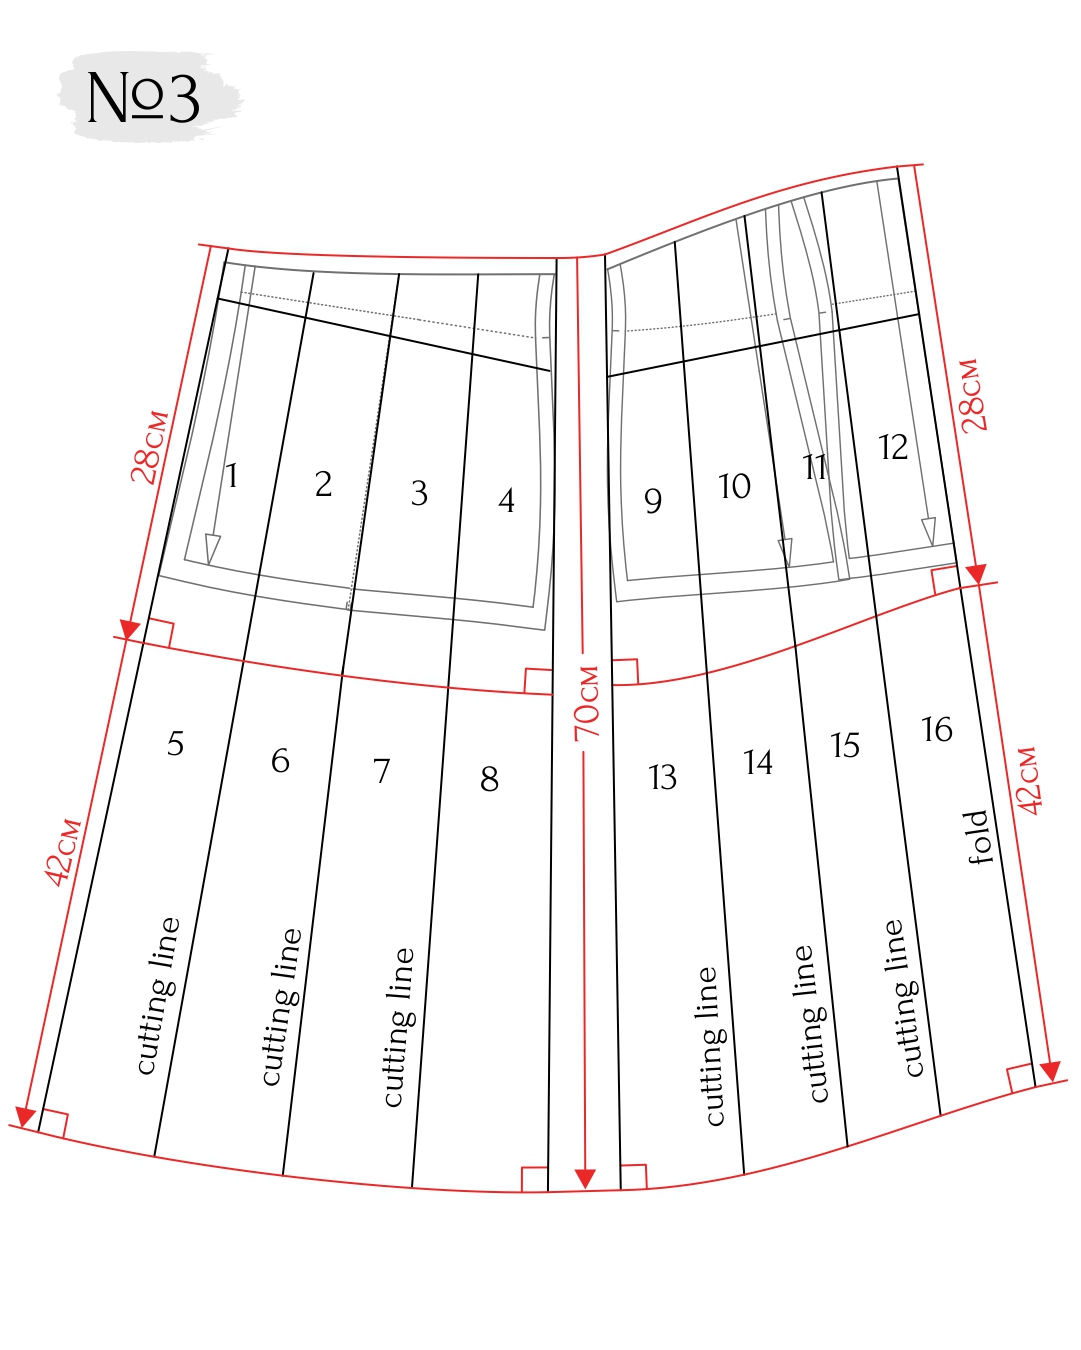
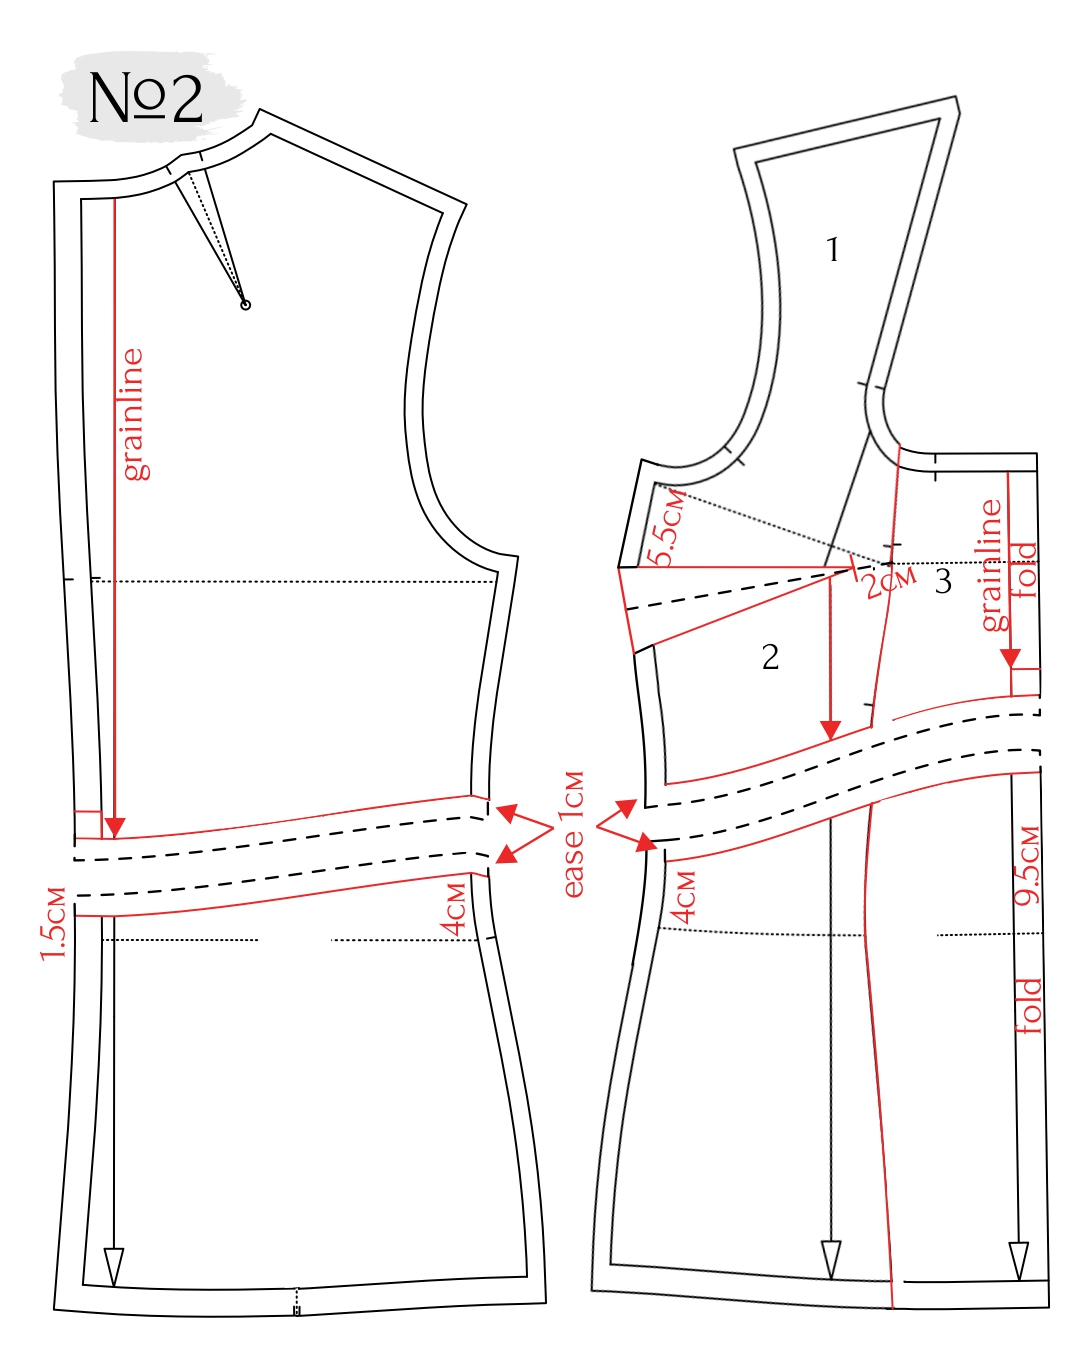
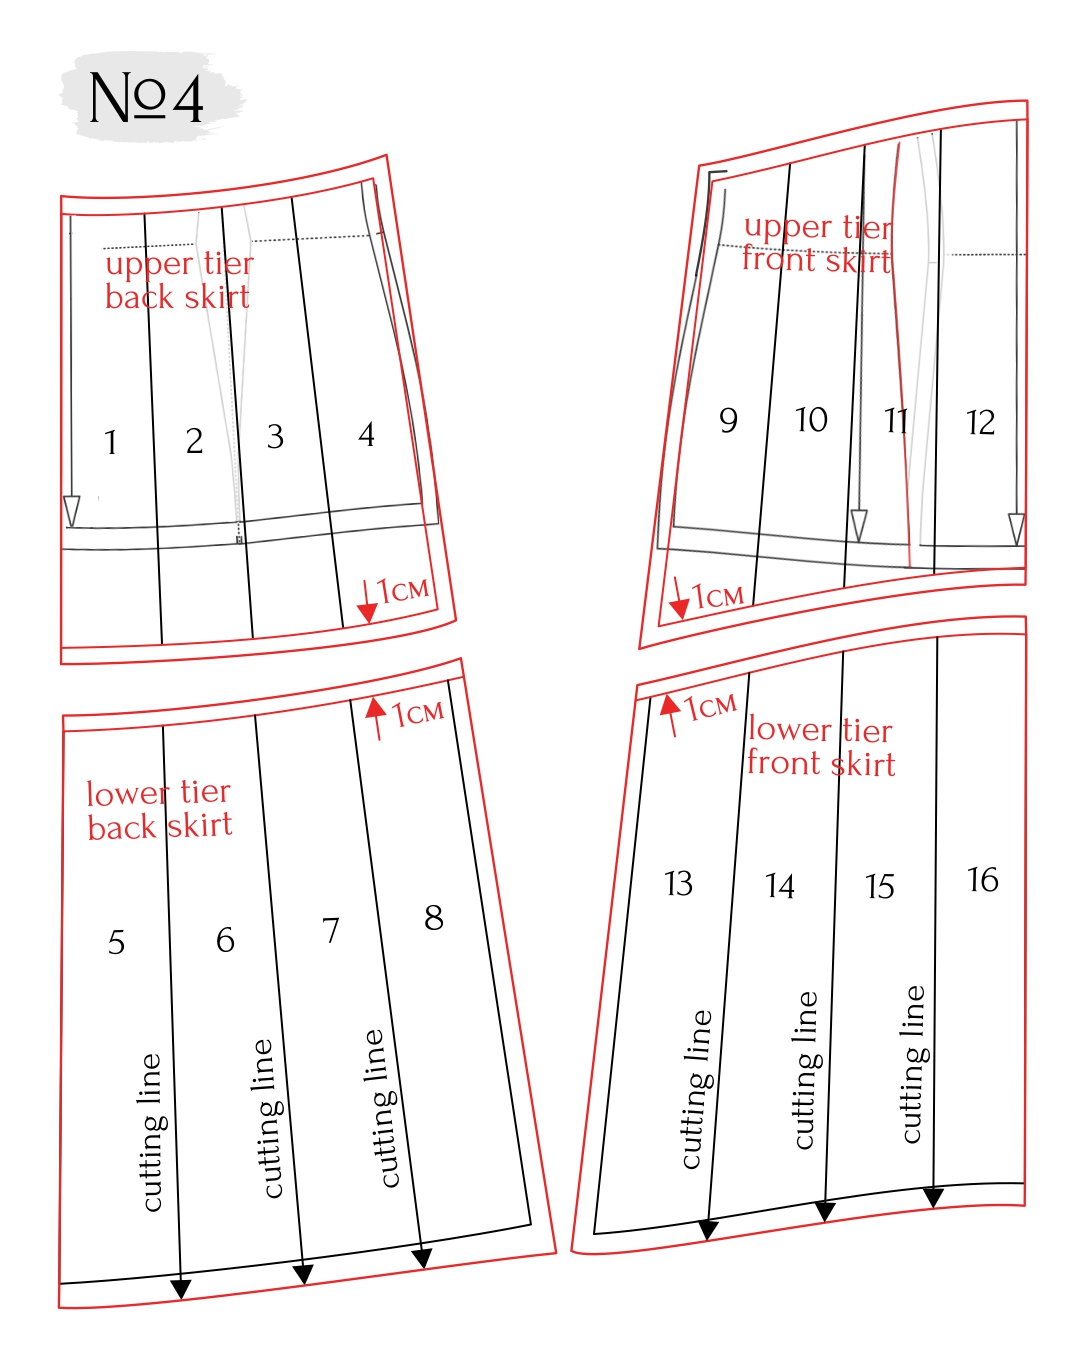
Divide the front and back sections into 4 equal parts with vertical lines.
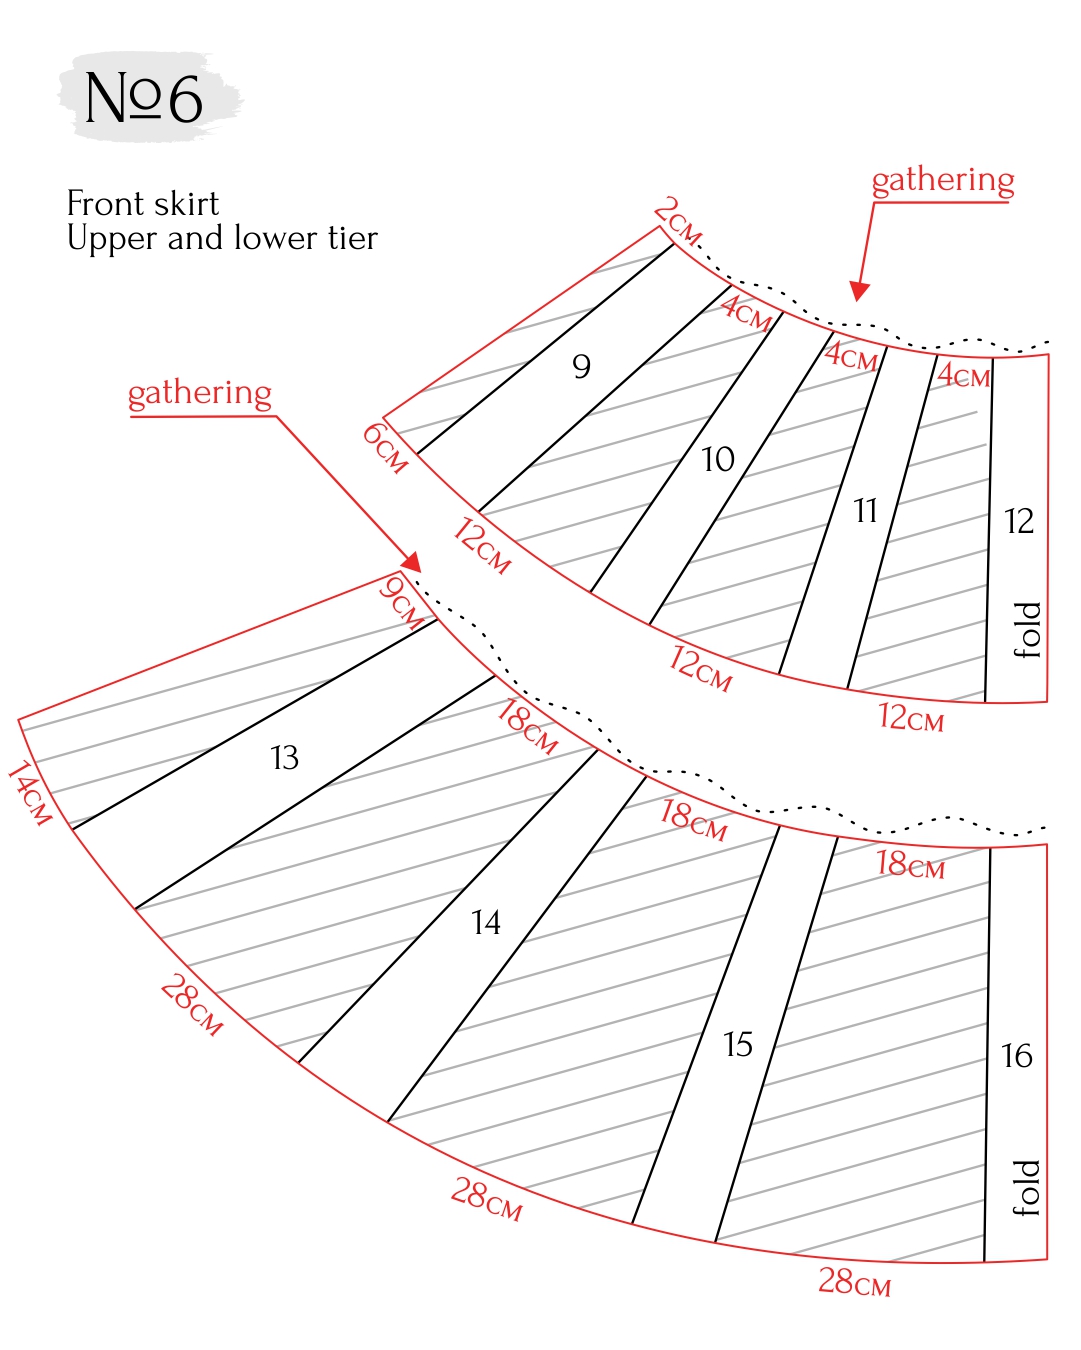
Cut the front sections along vertical lines and spread according to the illustration.
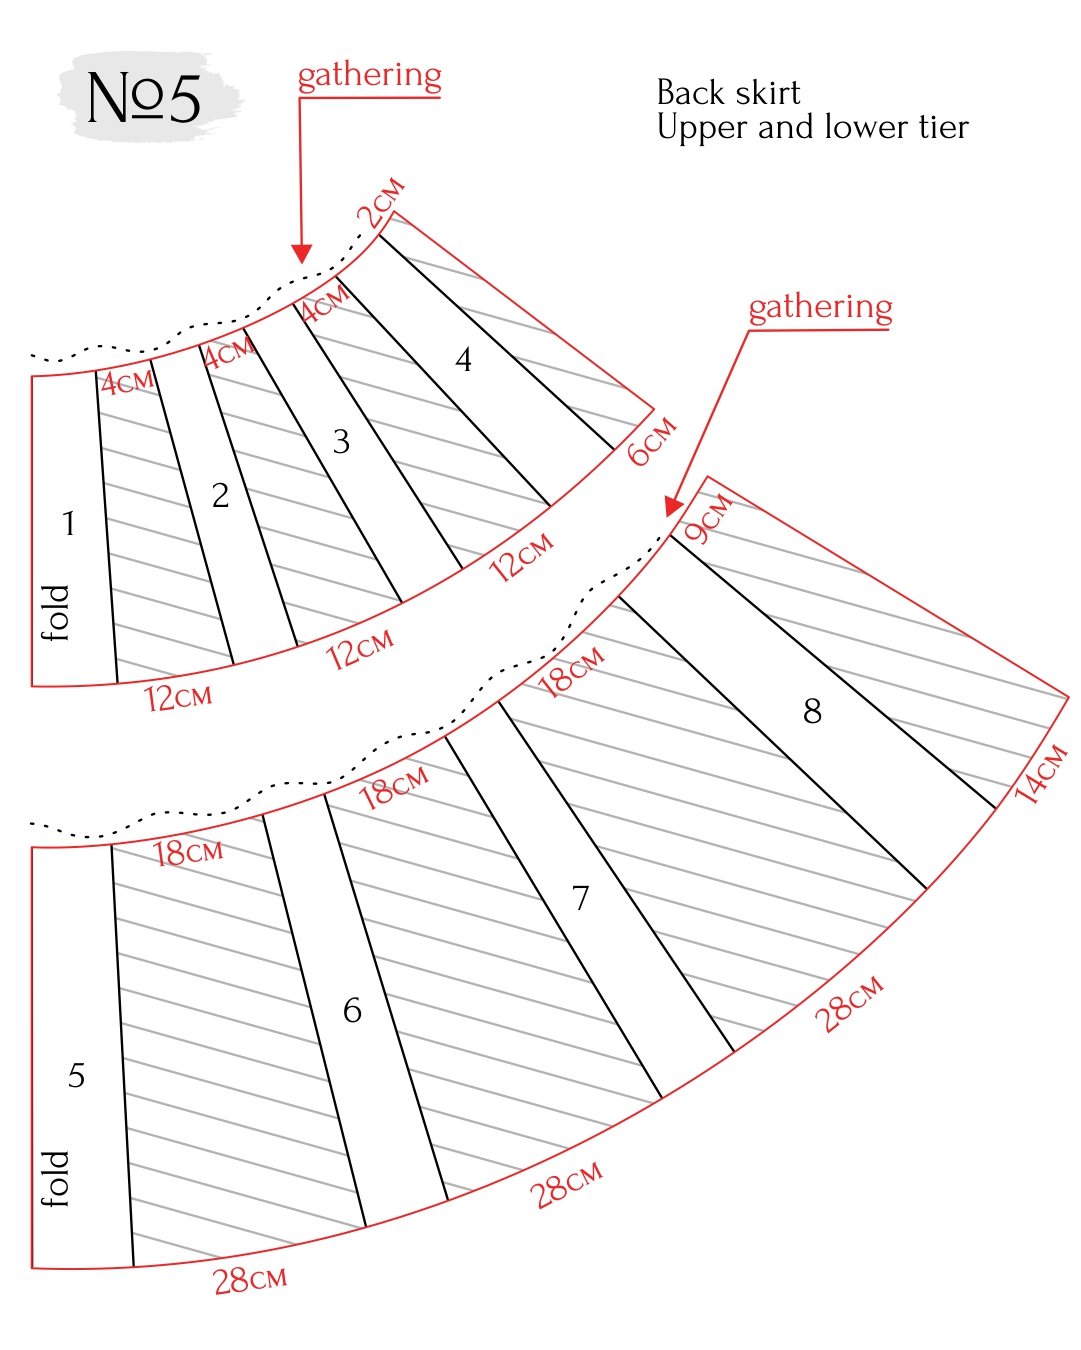
Cut the back sections along the marked lines. Spread according to the illustration. Please note there is no center back seam on the skirt, it’s cut on fold and therefore is on the grainline.
Make sure all the sections fit on your fabric width. For size 36, height 2, we used 4.3m of fabric.
Read more about modeling of Vikisews patterns:


Здесь пока нет комментариев