
Let’s redesign Gloria into a cocktail dress?
We changed the sleeves and added some length to make it harmonious.
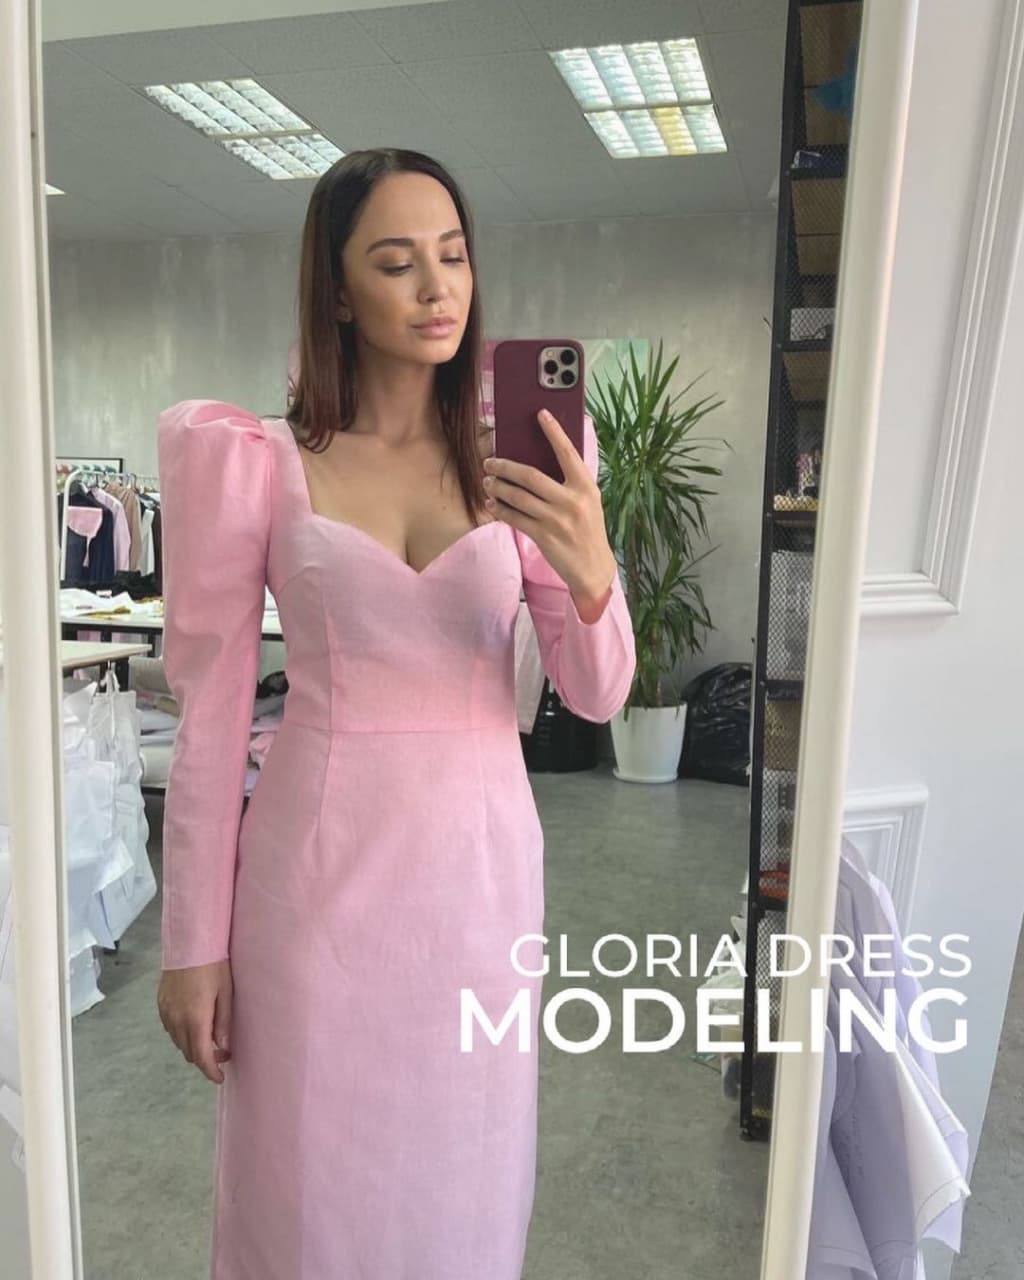
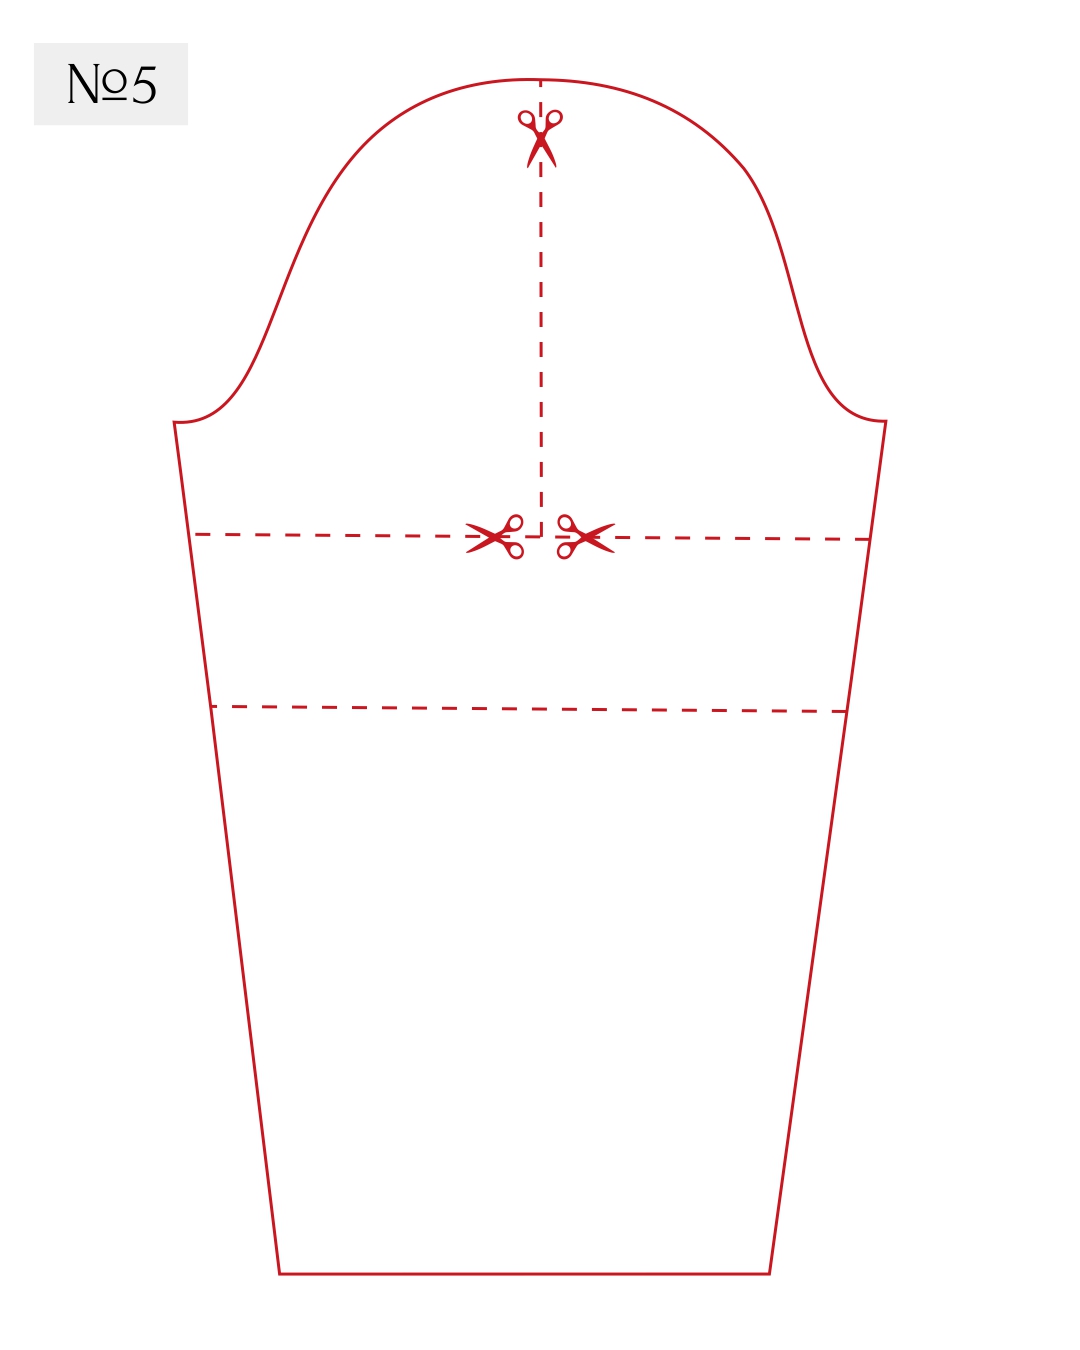
- Take the top part of the sleeve without the cuff. To make a long, narrowed sleeve from a short and extended sleeve, we need to remove the extension from the bottom. To do this, put three vertical lines from the sleeve cap downwards. One of them runs along the grainline, the other two - at the right and left at a distance of approx. 3 cm along the cap and 4-5 cm in the bottom of the sleeve pattern. Cut the pattern along these lines from the bottom-up, stopping 3-5 mm short of the upper edge.
- Overlap the sleeve sections by about 2-3cm. !!! Check the width of the sleeve: upper arm circumference + 5-6 cm for ease of movement. The cut sections of the sleeve should now be vertical.
- Measure the desired length of the sleeve down from the central notch on the sleeve cap along the middle line of the cut pattern. The vertical line passes through the center of the line connecting the lower edges of the sleeve.

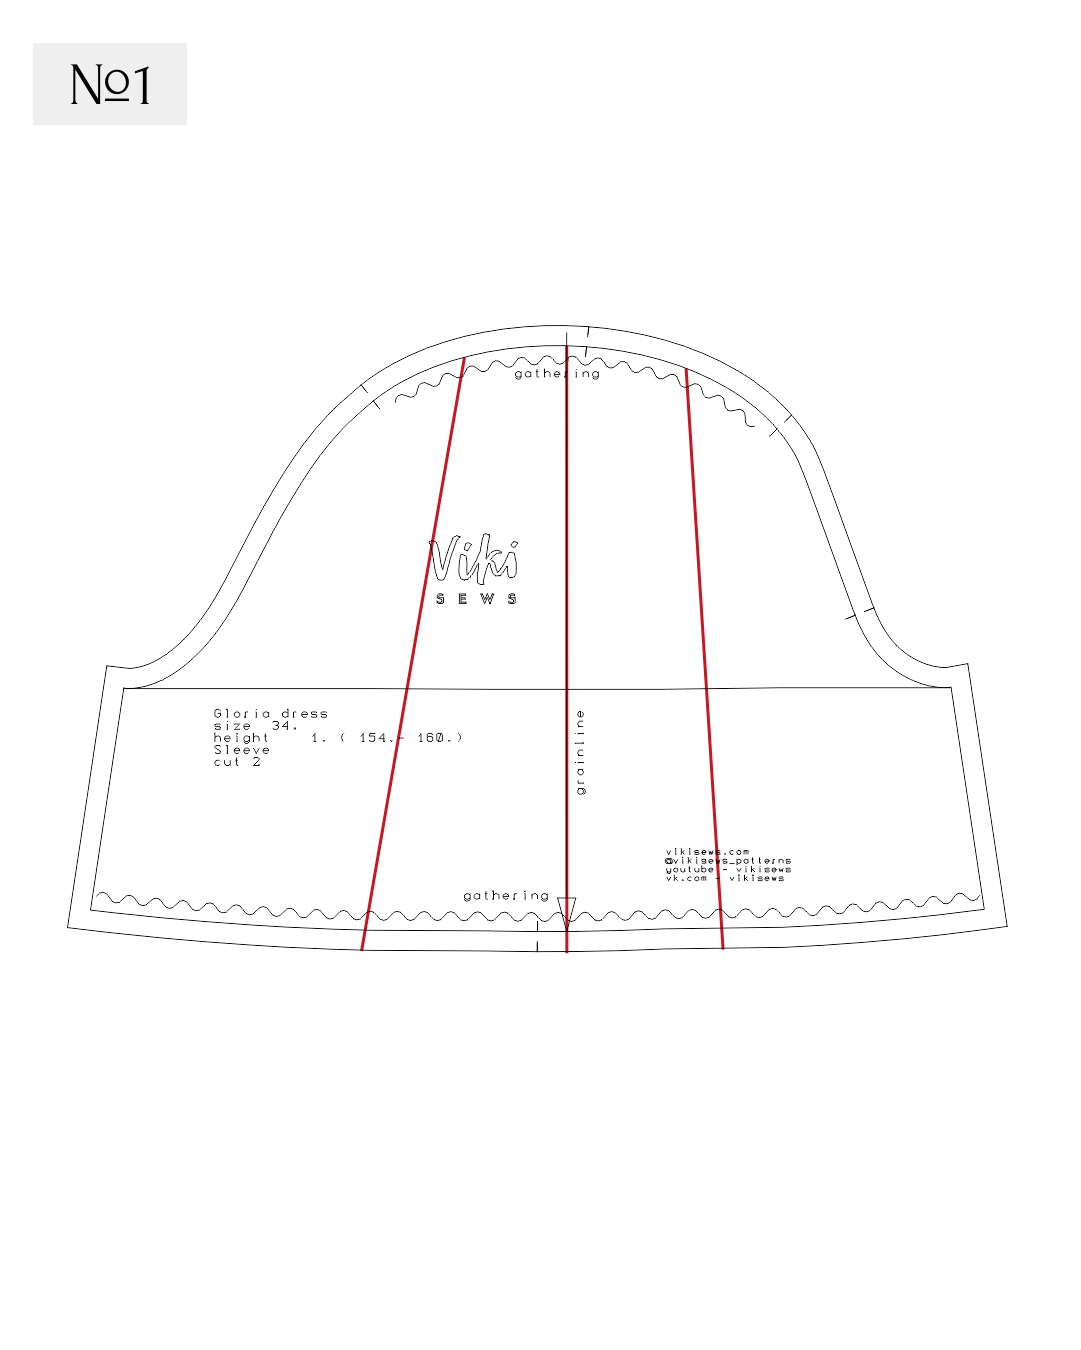
- Take a piece of paper and transfer the new pattern of the sleeve.
Trace the horizontal line of the sleeve bottom perpendicular to the previously traced vertical line which goes from the central notch on the pattern. Draw a line at the level of the elbow and check the sufficiency of the sleeve circumference here: compare it with your measurement plus add ease. Extend the length of the sleeve to the bottom line. The tapering is 9-10 cm.
The length of the bottom line = wrist circumference + 5-6 cm for wearing ease.
Connect the seams of the sleeve from the armscye bottom to the marks along the sleeve bottom.
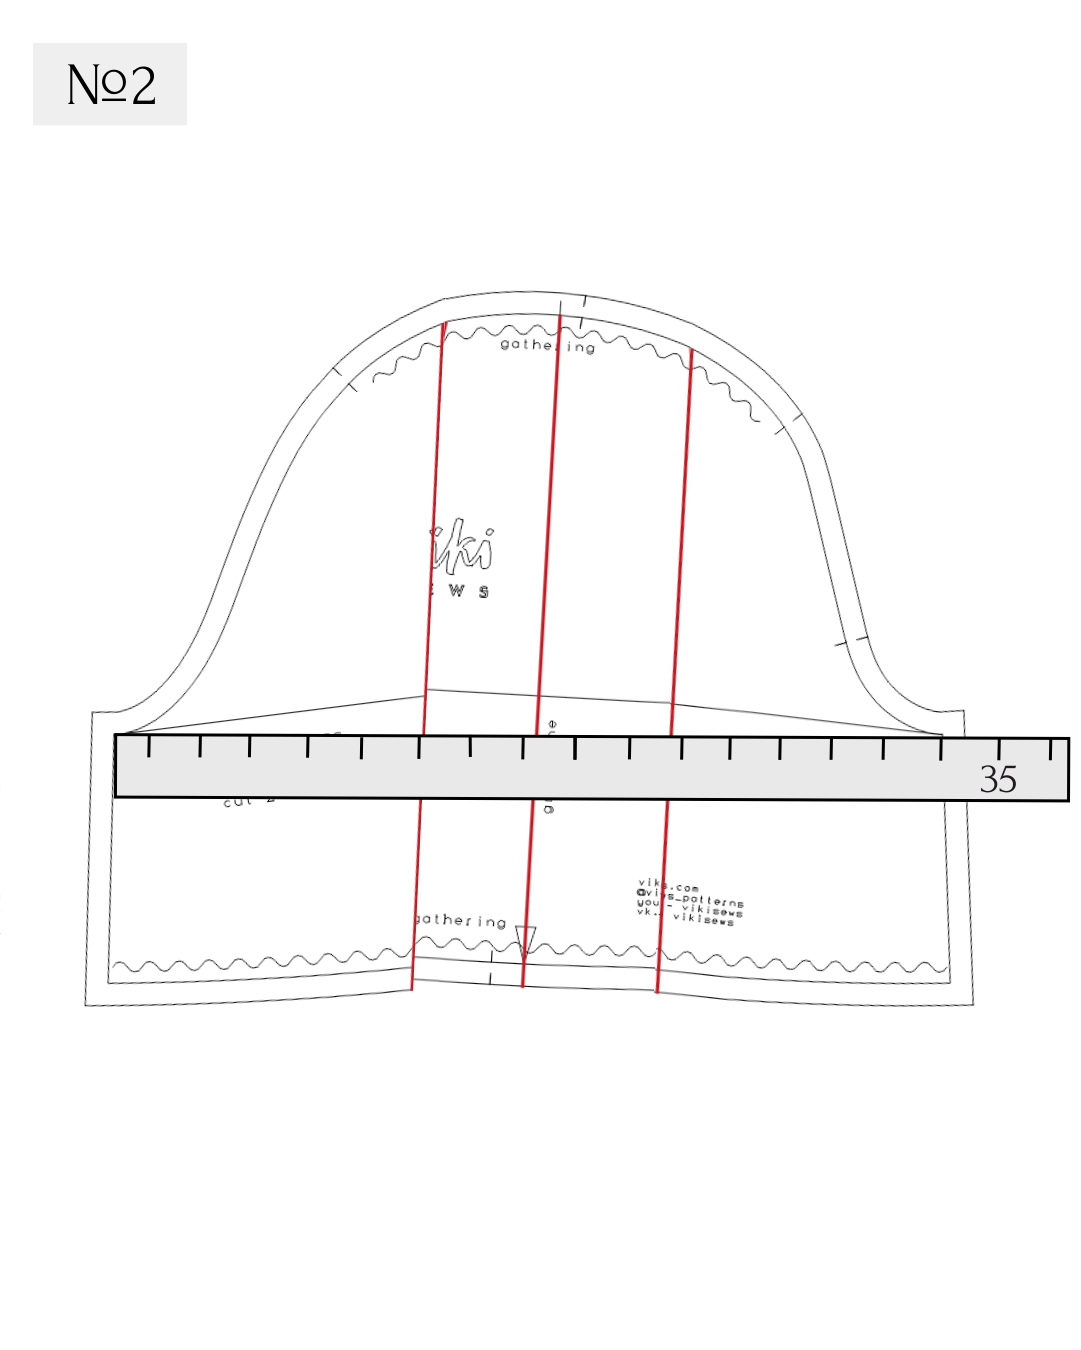
- From the top point of the sleeve cap along the central line, measure 25-26 cm down and draw a perpendicular line.
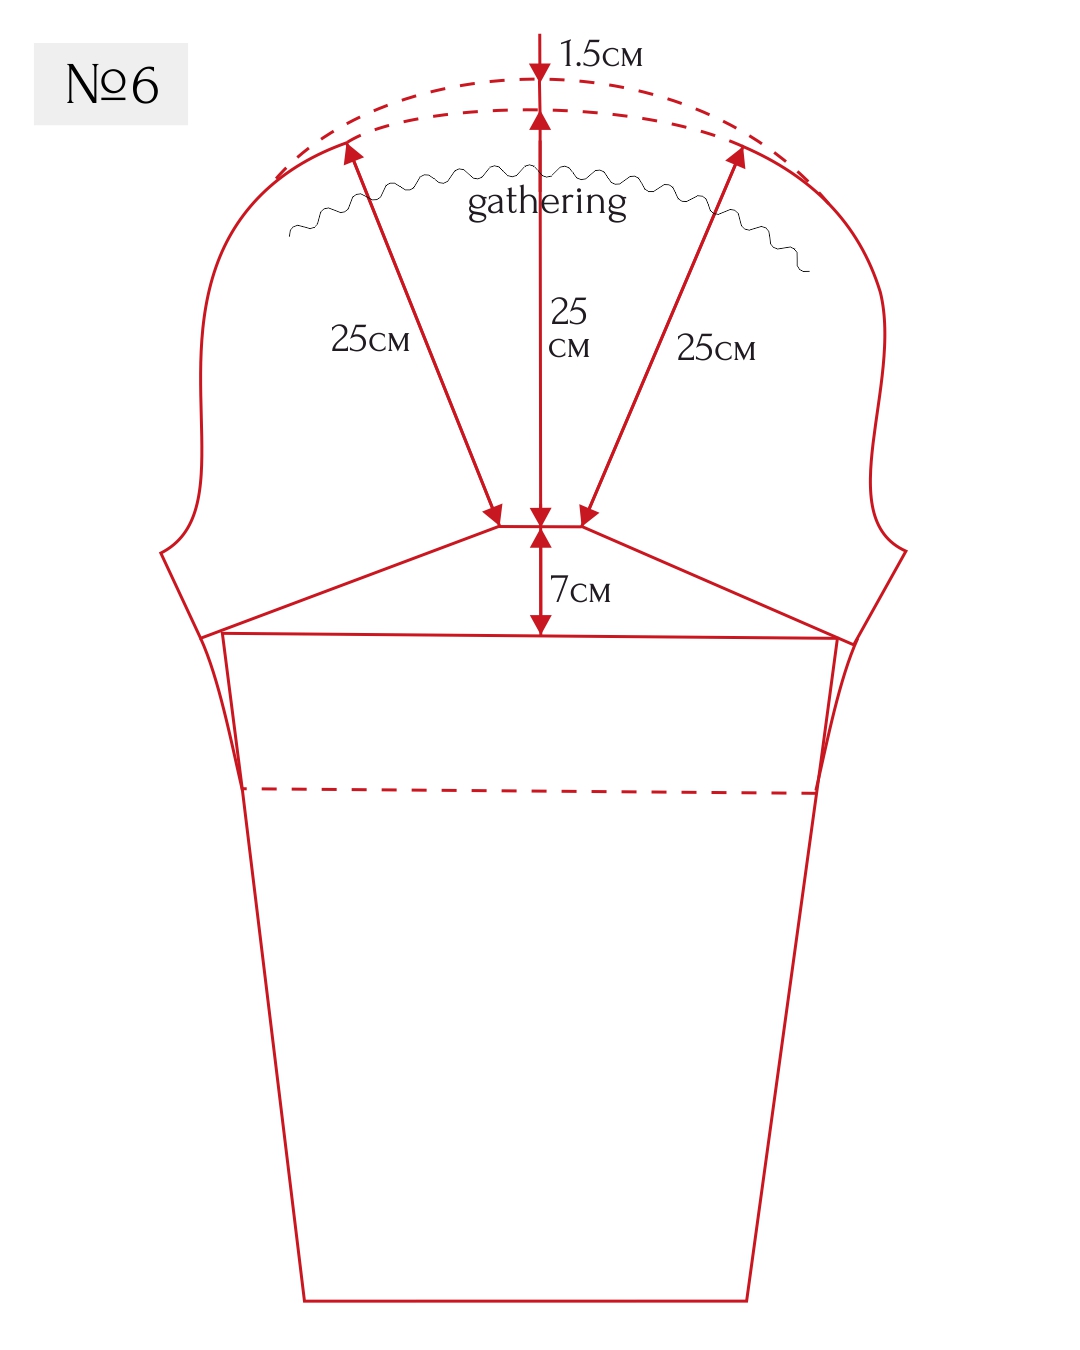
- Cut the pattern vertically and then horizontally. Do not reach the edge by a couple of mm. Spread it along the cut line, raising the horizontal undercut by approx. 7 cm, as shown in Drawing 6.
Complete the upper part of the sleeve cap, putting an equal distance (25-26 cm) along the radius. Add up another 1-1,5 cm along the centerline, gradually tracing the line to the parted edges of the sleeve cap. Connect the sides of the sleeve with a smooth line.
Move the control notches on the sleeve cap to the new pattern and mark the gathering location.
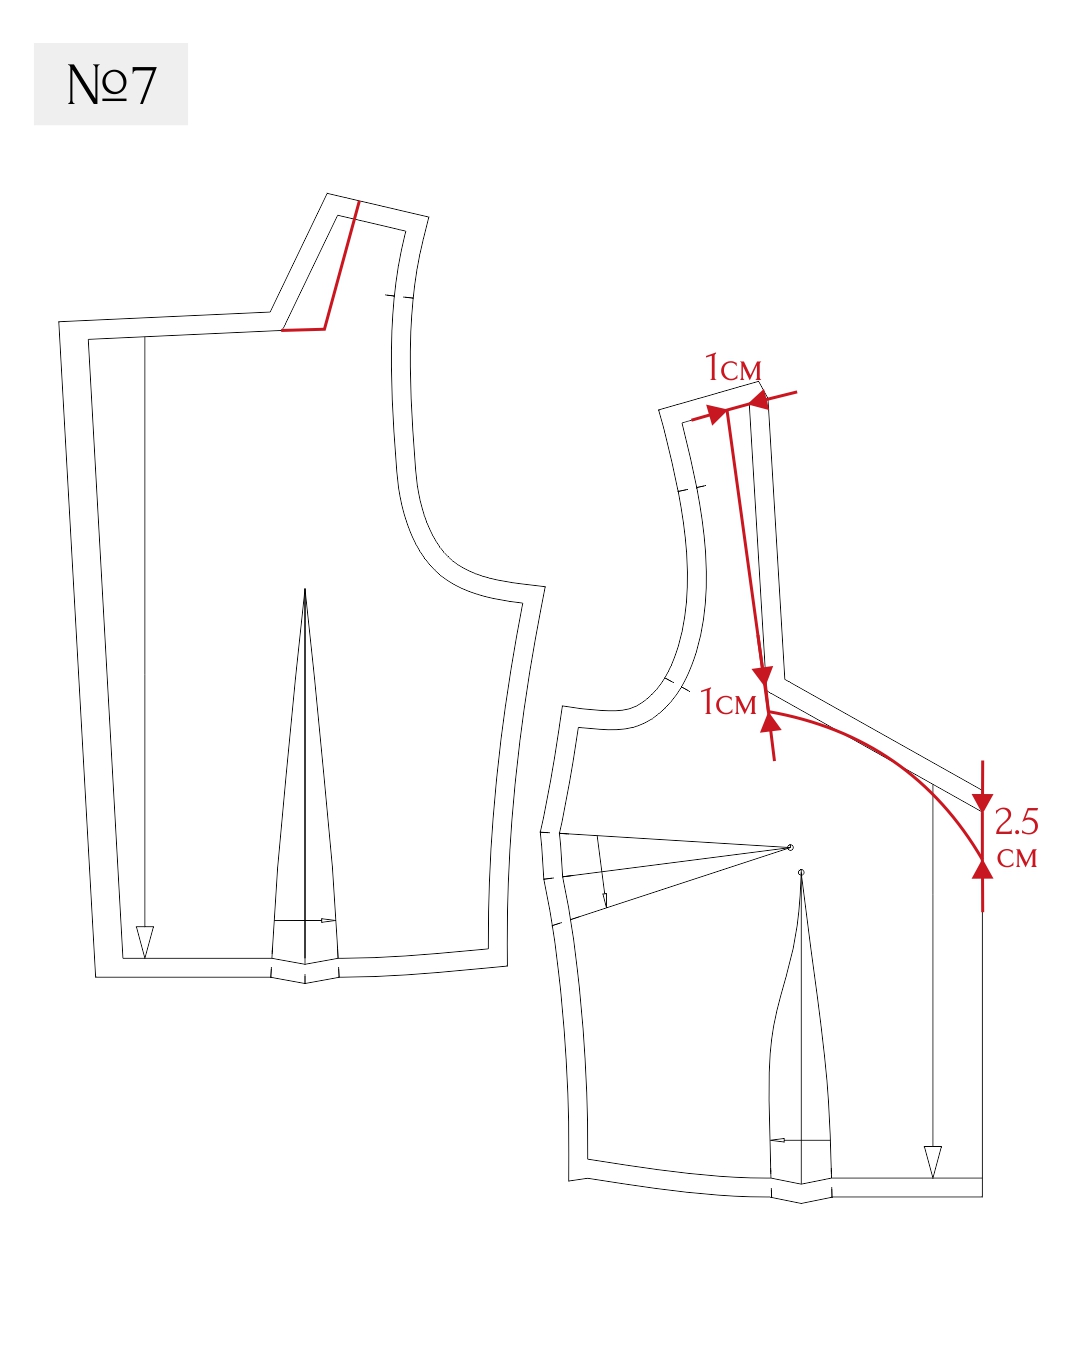
- Deepen the neckline at the top of the front. Choose the opening depth you prefer or follow the example in Drawing 7.
Then adjust the width and depth of the neckline on the back piece. Mark the shoulder seam from the neck of the same length as on the top of the front.
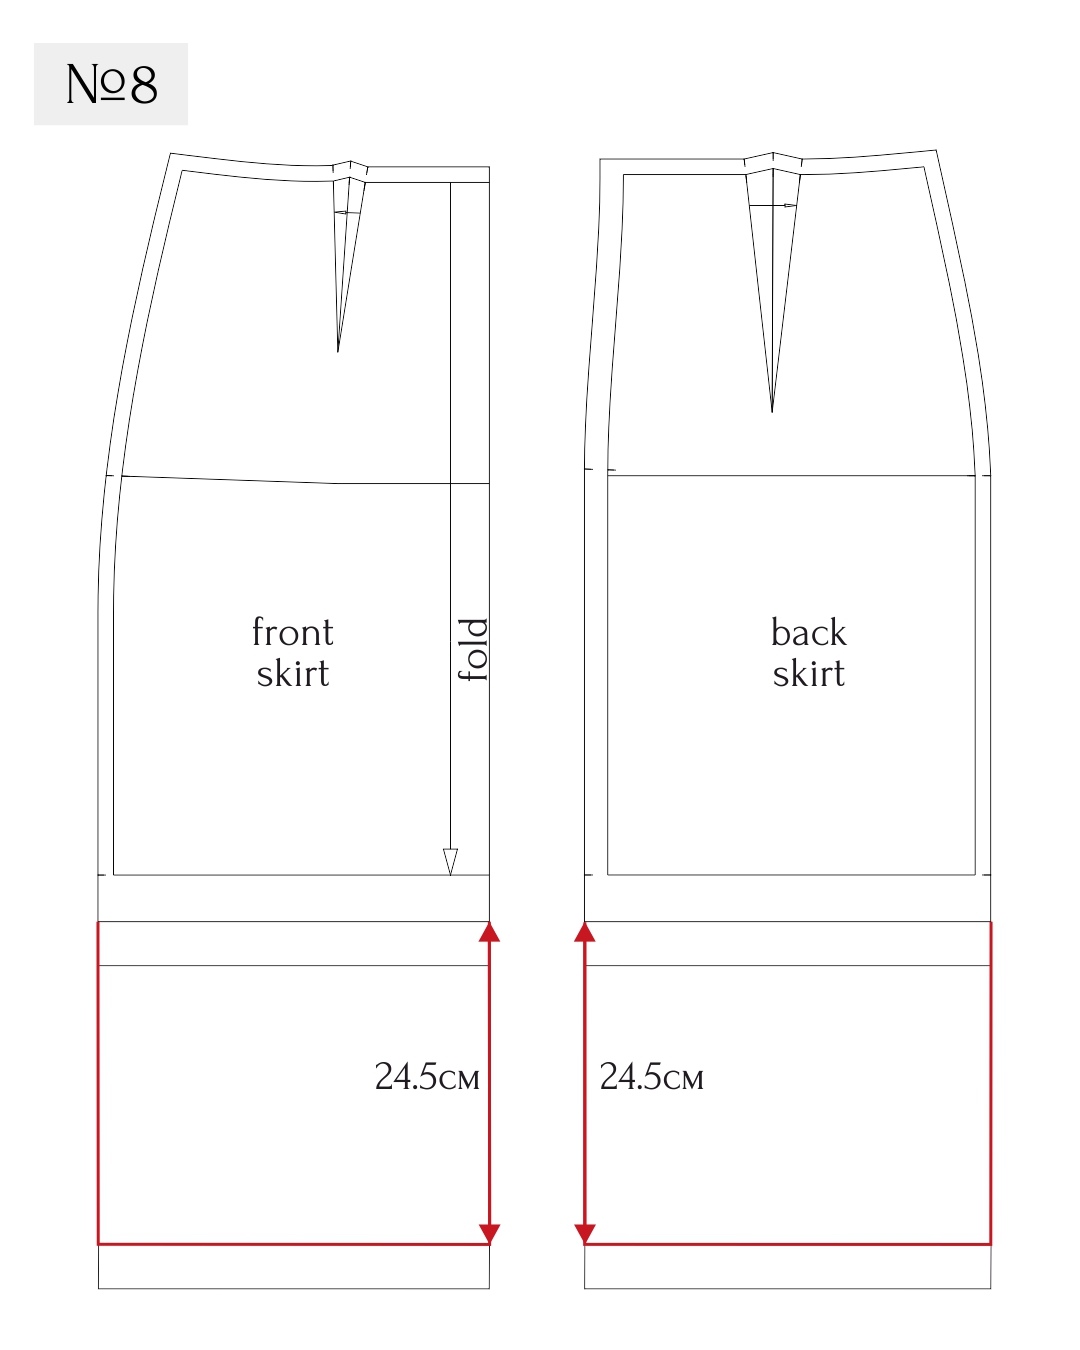
- To keep the proportions and harmony, we need to lengthen the lower part of the dress. To do this, continue the side seams and the middle seam of the back along the tangent line down. In the example, this is 24.5 cm plus a hem allowance.
For comfort, add a slit in the back skirt. To do so, cut the middle seam of the back skirt portion. Its height is equal to one-third of the length on the back skirt section.
Read more about modeling of Vikisews patterns:


Здесь пока нет комментариев