
Today we are sharing a sewing hack that is handy not only when sewing garments but also when finishing corners on a festive dining table runner or blanket.
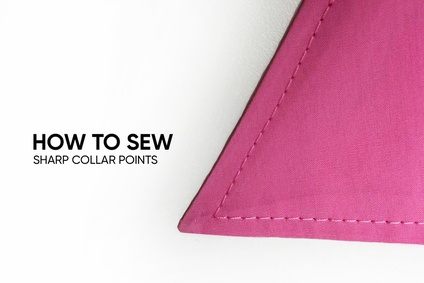
How to sew a mitered corner?
This finishing is used for vents and slits on skirts, dresses, blazers, trench coats, coats, and sleeves and helps achieve a polished look. Here are a couple of ways to sew a mitered corner.
Method no. 1
For this example, we show you how to finish a vent.
- Mark the bottom and side seam lines at e.g. 4 cm (1 5/8") from the edge. Then mark again at 4 cm (1 5/8") from each of the lines as shown in the photo.
!! If the garment is not lined, we recommend finishing the edges on the overlocker.

- Draw a line connecting the two marks, ensuring it crosses the intersection of the finished edges (that is the finished corner).
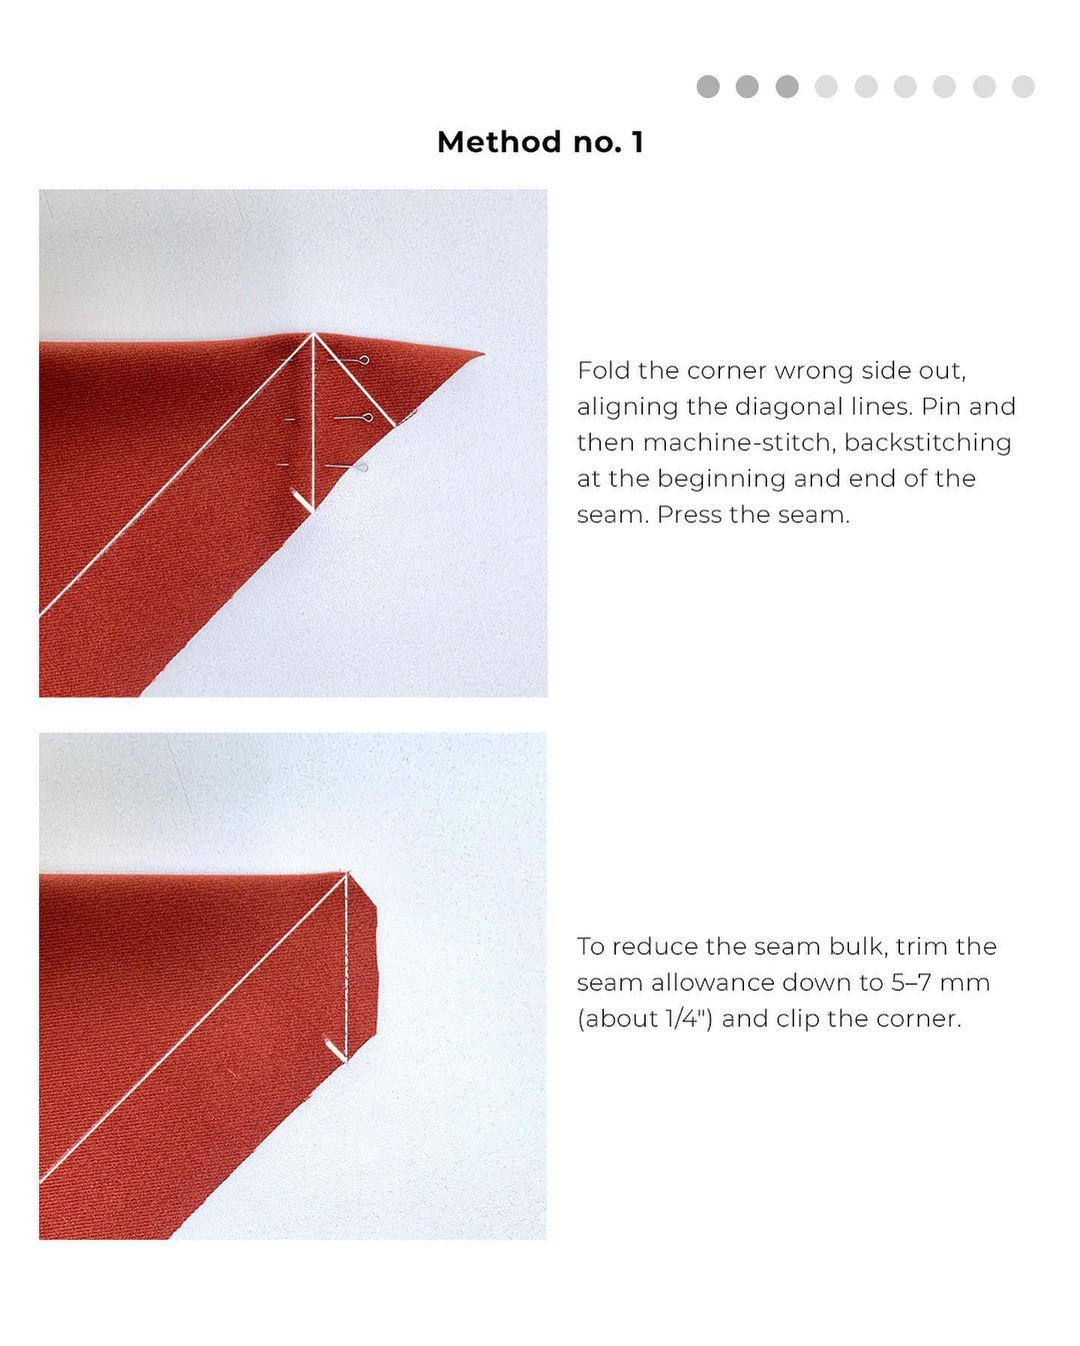
- Fold the corner wrong side out, aligning the diagonal lines. Pin and then machine-stitch, backstitching at the beginning and end of the seam. Press the seam.
- To reduce the seam bulk, trim the seam allowance down to 5–7 mm (about 1/4") and clip the corner.
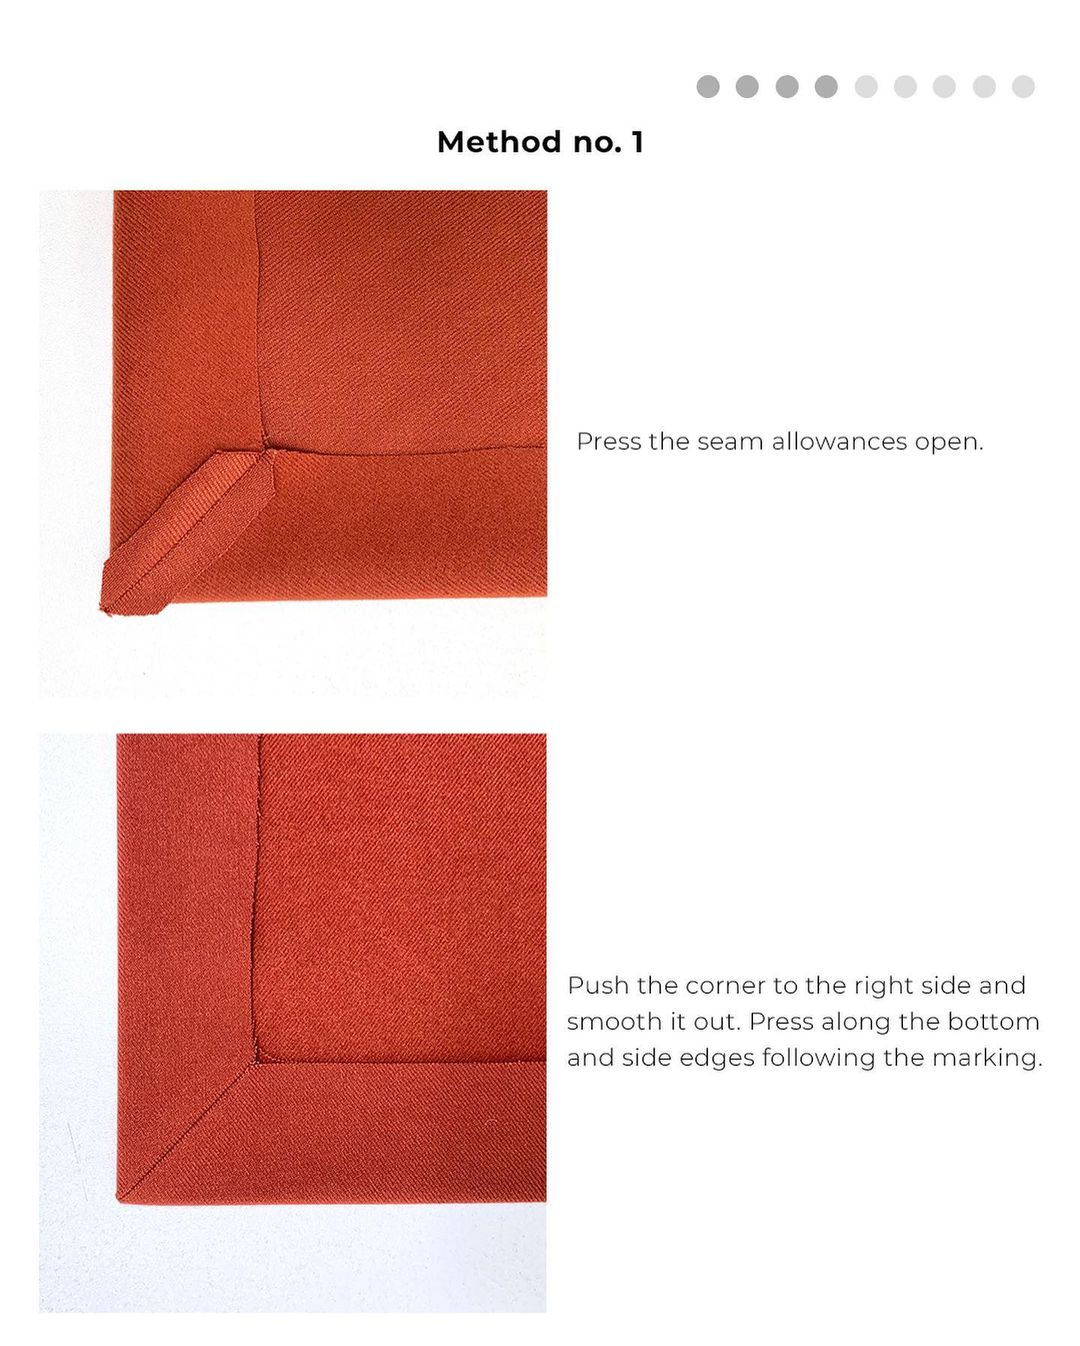
- Press the seam allowances open.
- Push the corner to the right side and smooth it out. Press along the bottom and side edges following the marking.
Method no. 2 (with a double turn hem)
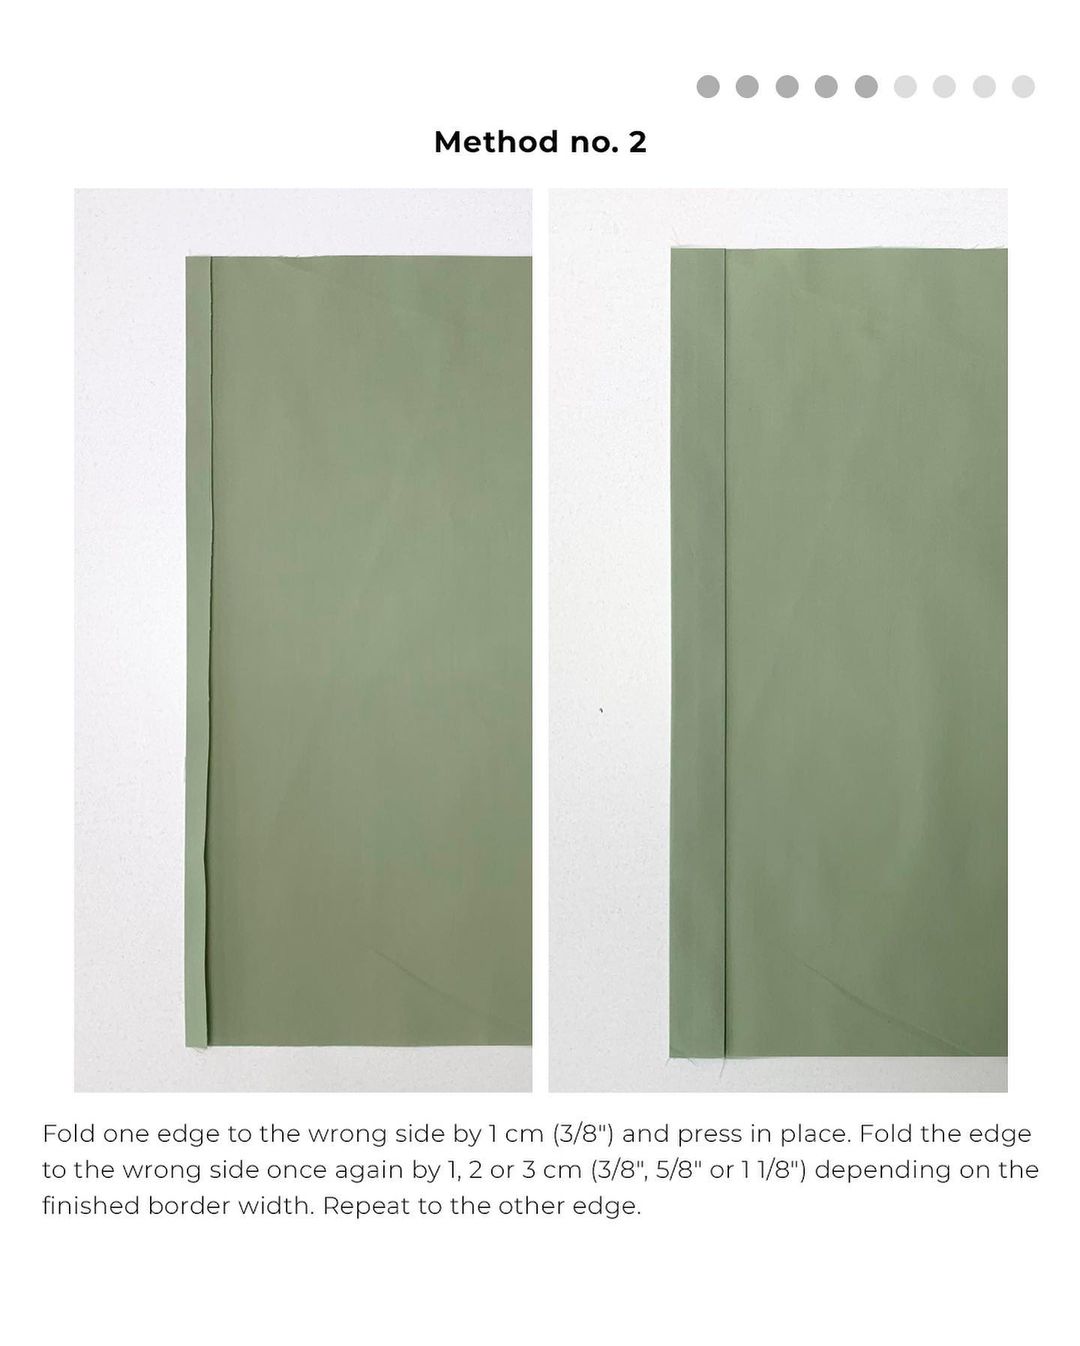
- Fold one edge to the wrong side by 1 cm (3/8") and press in place. Fold the edge to the wrong side once again by 1, 2 or 3 cm (3/8", 5/8" or 1 1/8") depending on the finished border width. Repeat to the other edge.
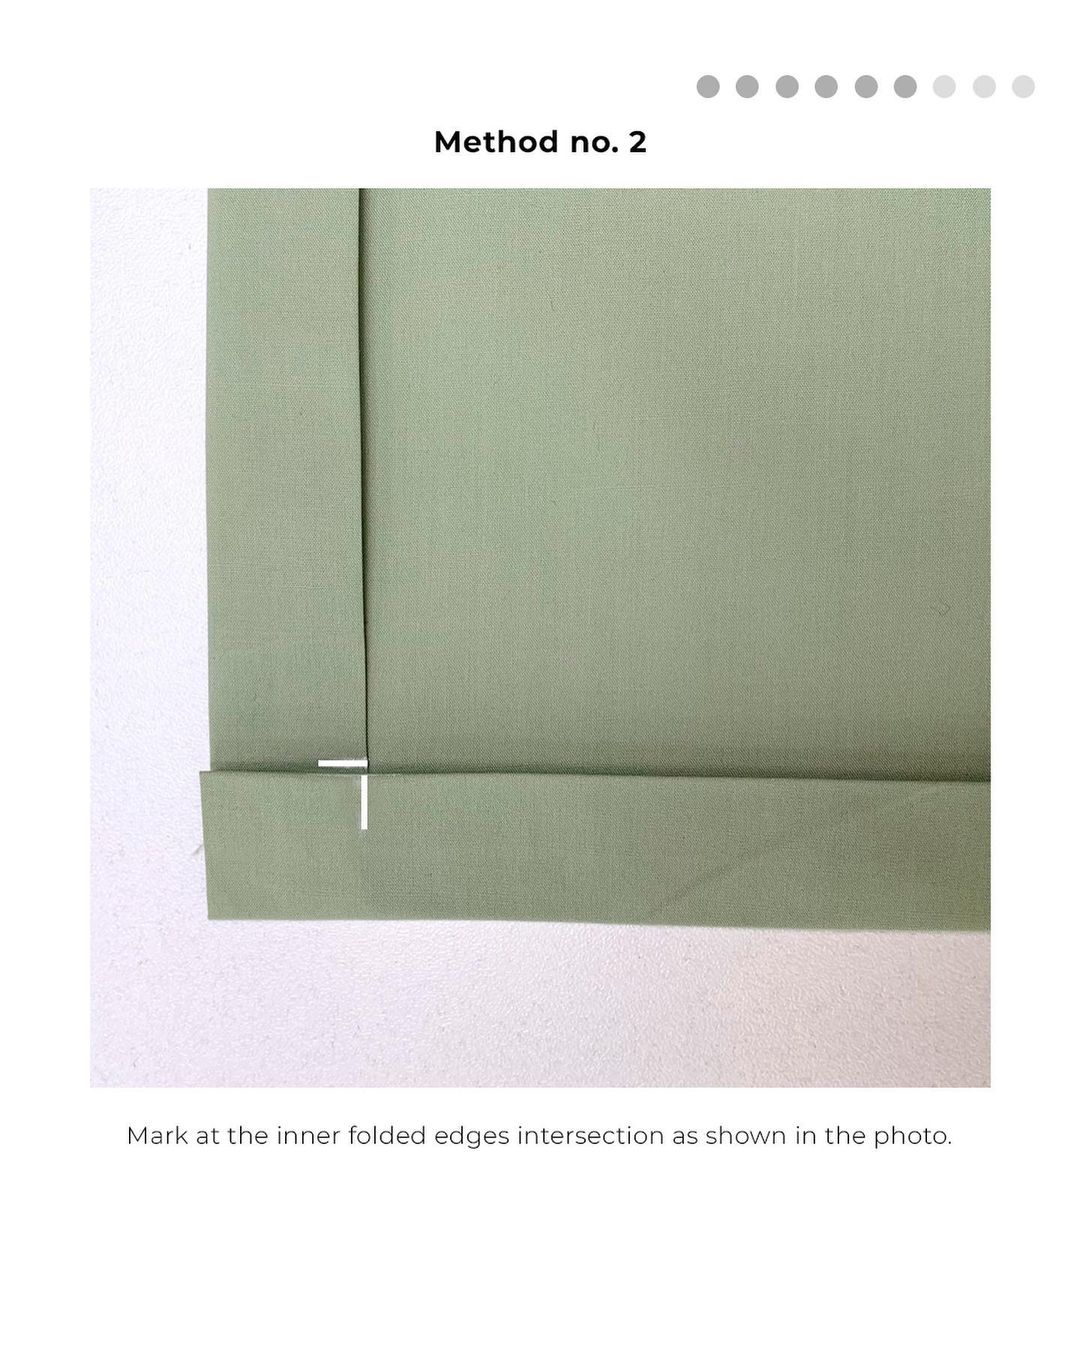
- Mark at the inner folded edges intersection as shown in the photo.
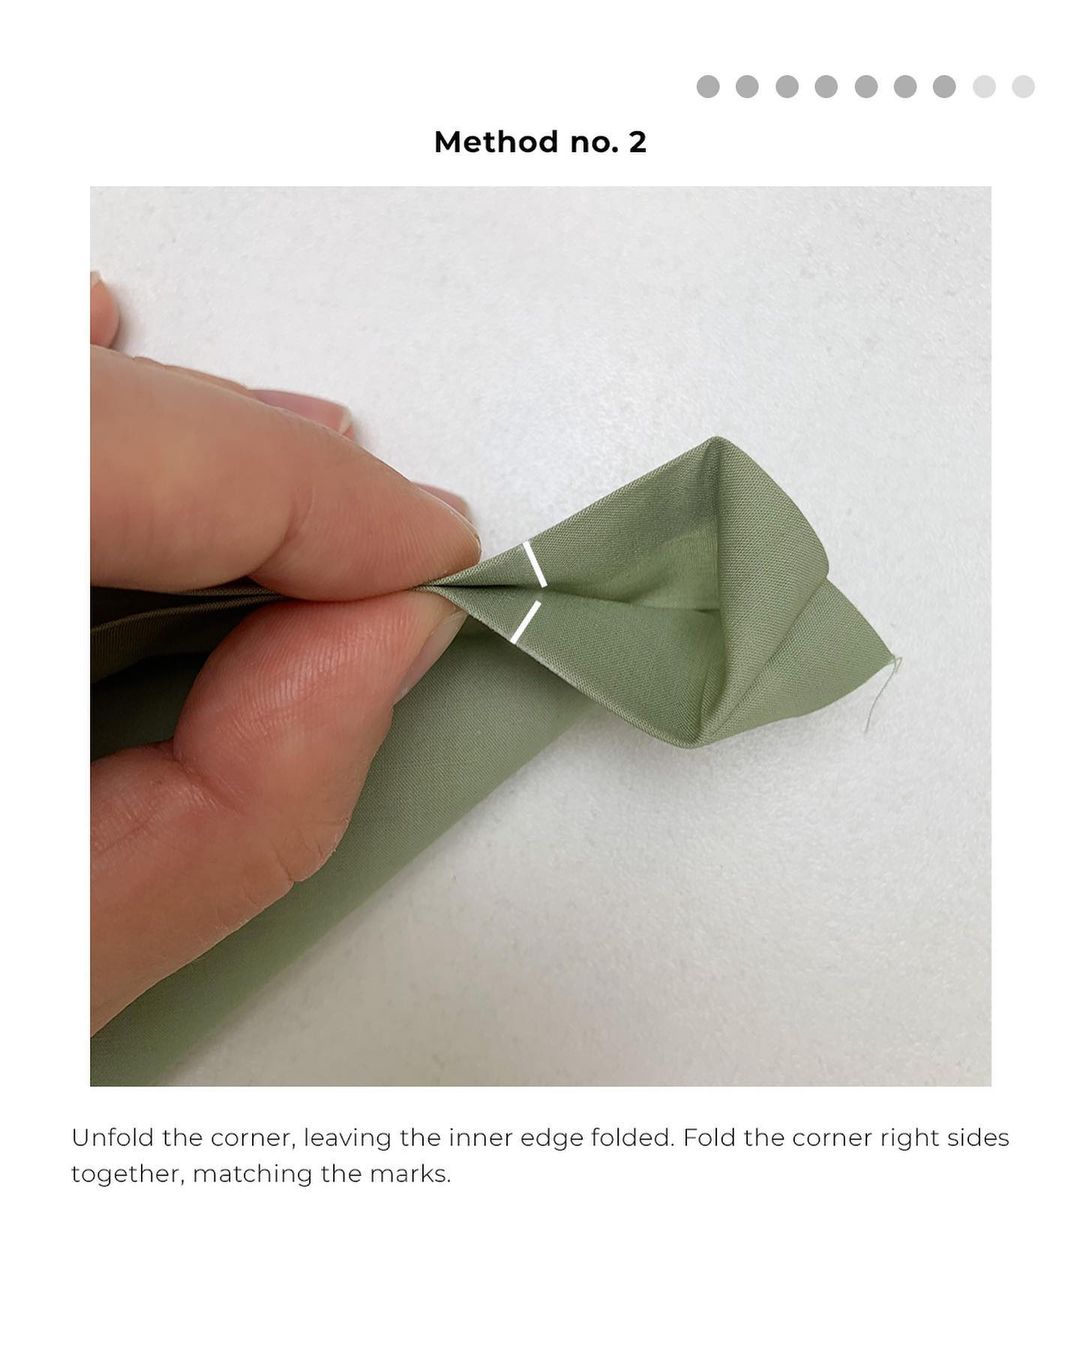
- Unfold the corner, leaving the inner edge folded. Fold the corner right sides together, matching the marks.
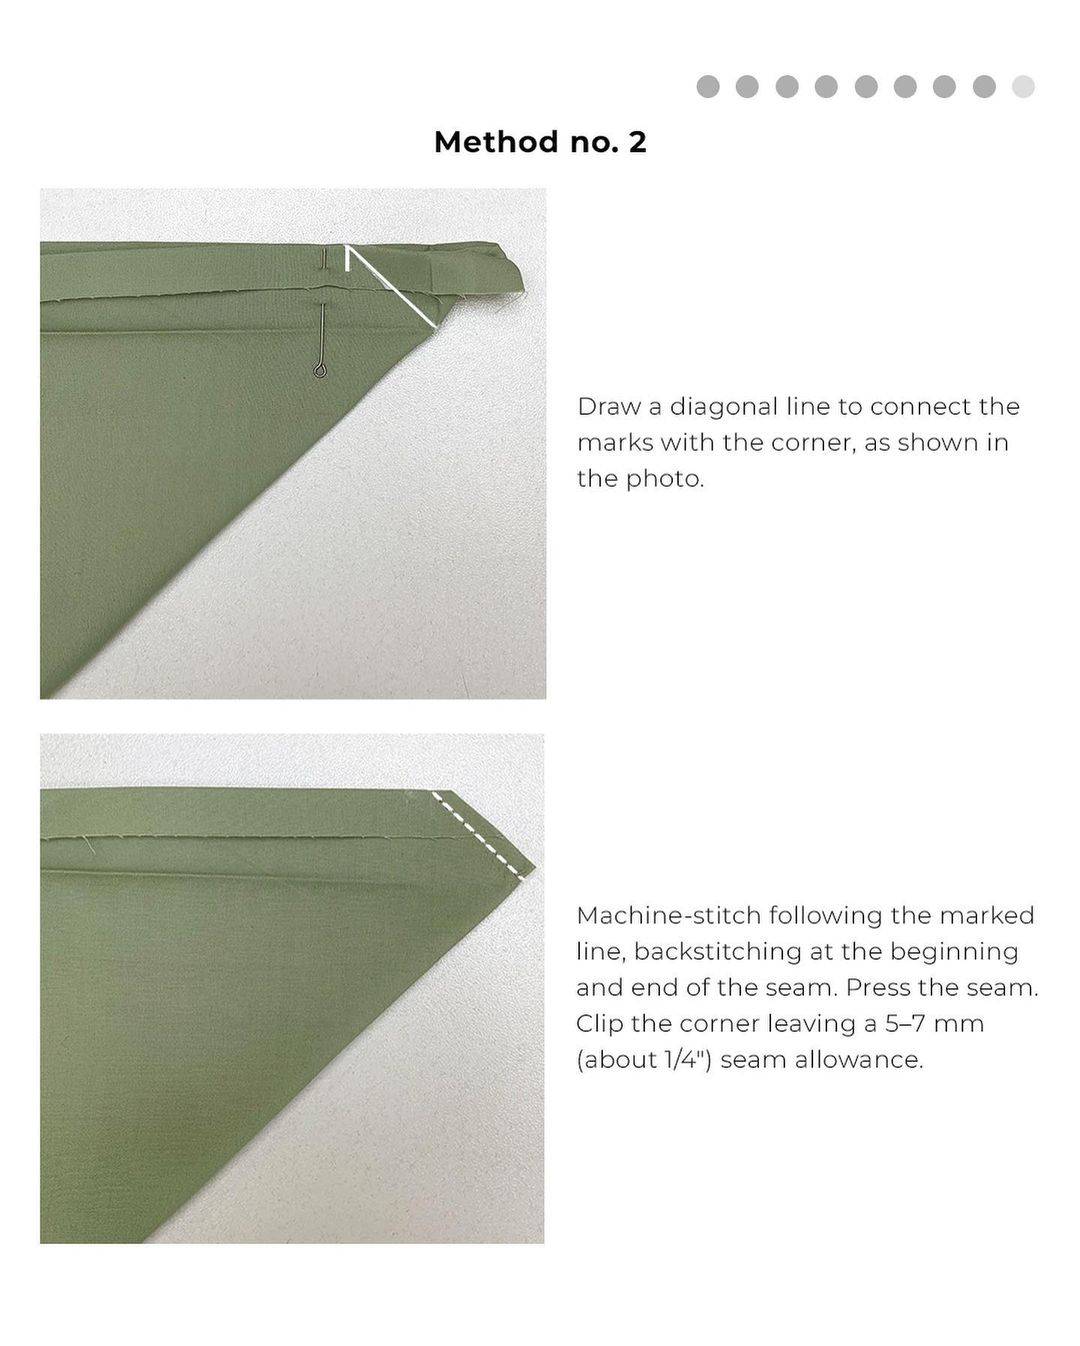
- Draw a diagonal line to connect the marks with the corner, as shown in the photo.
- Machine-stitch following the marked line, backstitching at the beginning and end of the seam. Press the seam.
- Clip the corner leaving a 5–7 mm (about 1/4") seam allowance.
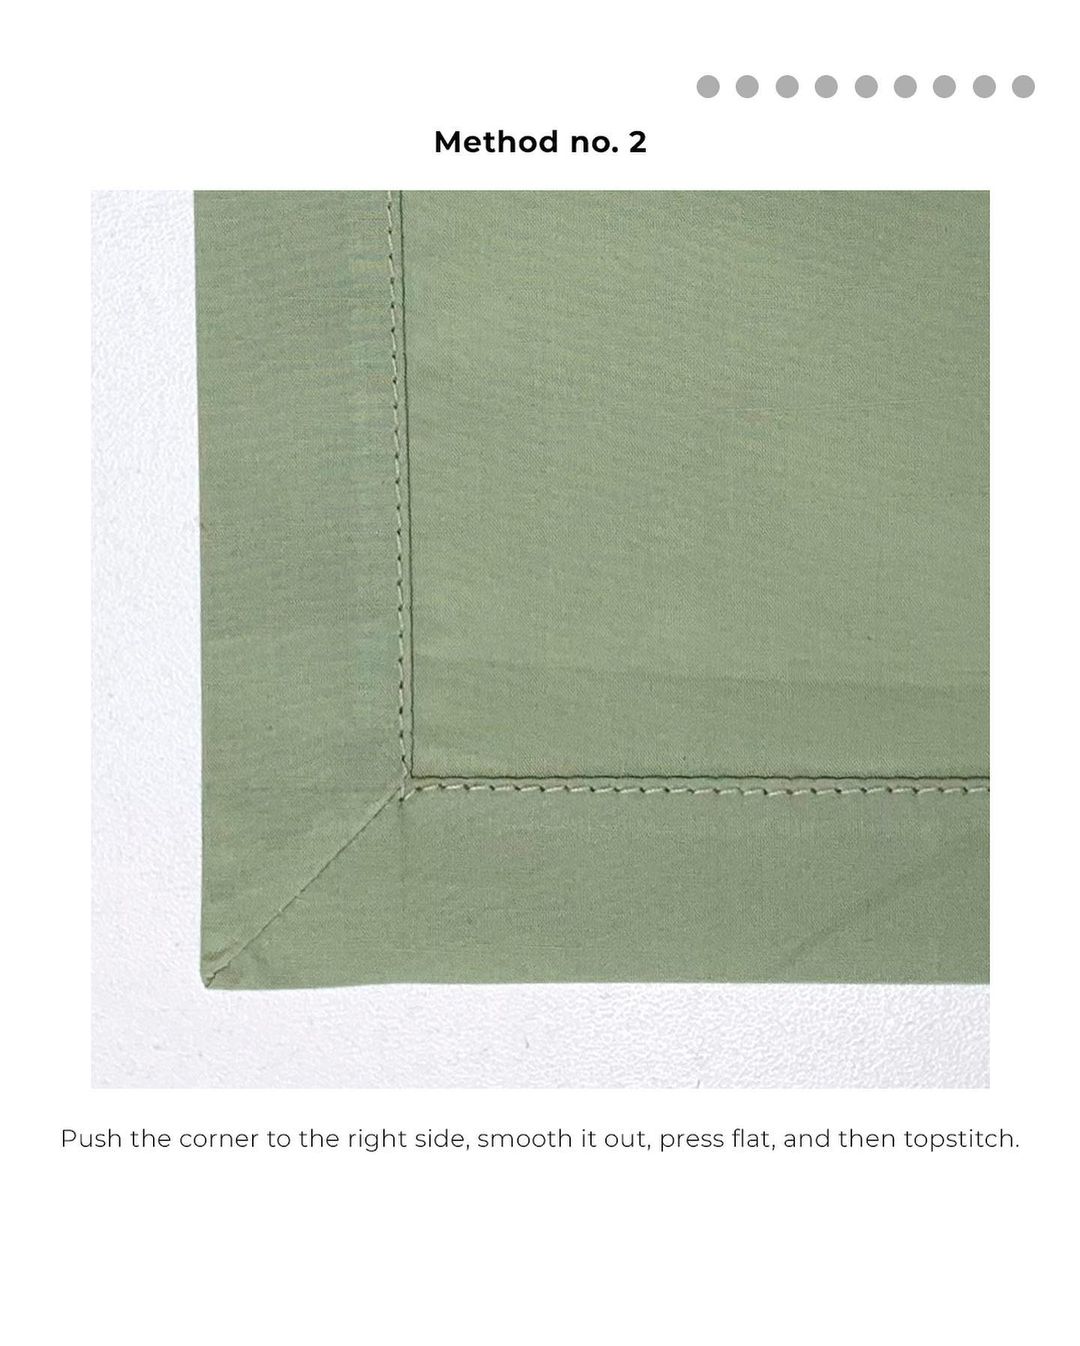
- Push the corner to the right side, smooth it out, press flat, and then topstitch.
Cool, right?
Find more sewing hacks from Vikisews here:
How to figure out how much fabric you’re going to need
How to finish paired darts at the same level


Здесь пока нет комментариев