
Willing to re-use one of the purchased patterns? Here is a way to hack the front on the Eliza dress. The step-by-step alteration instructions are below.
For this modeling example, we took a size 36 pattern in height 2.
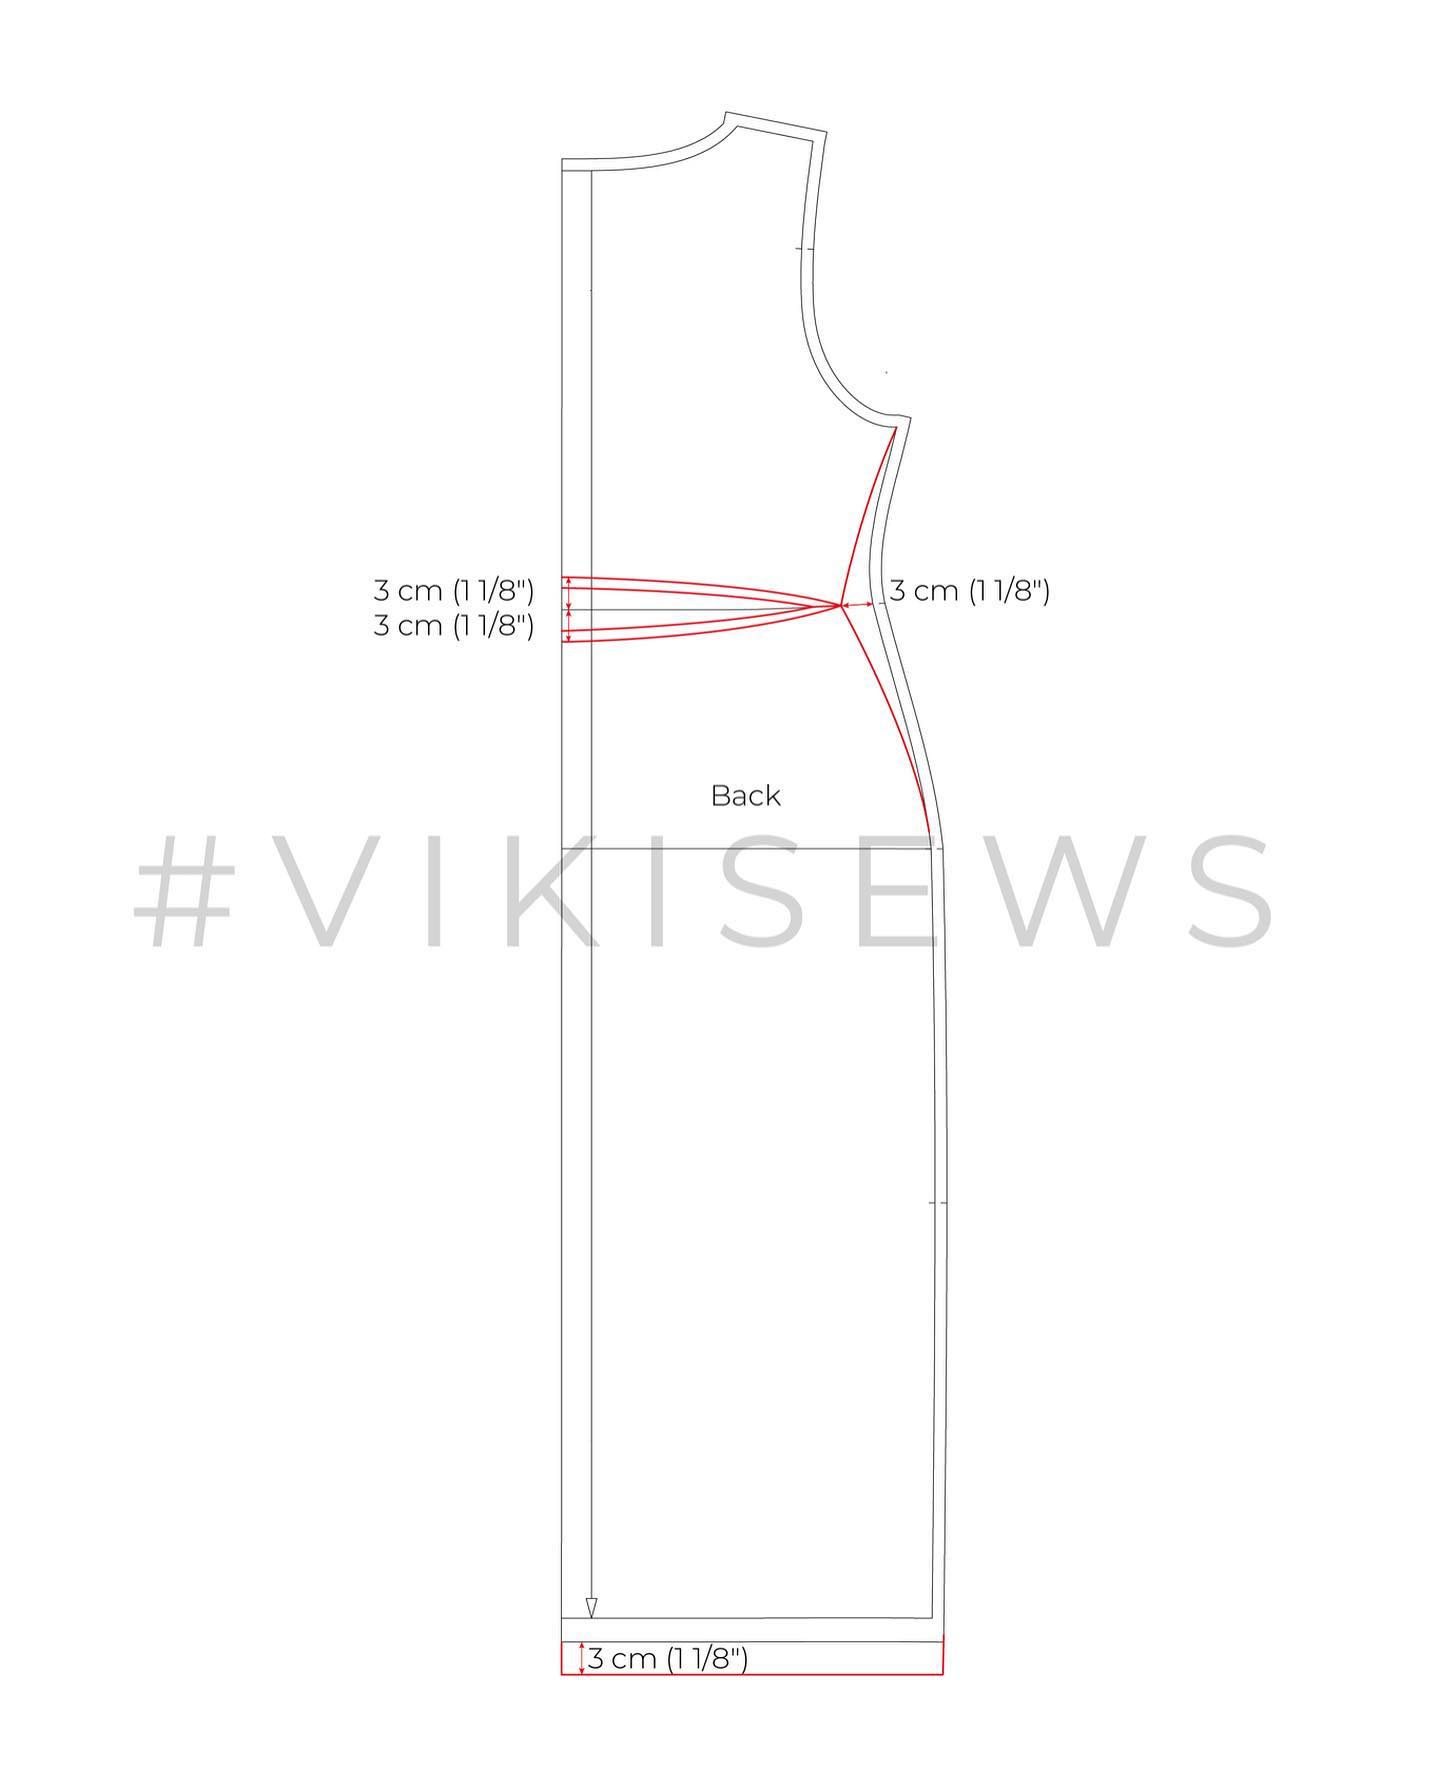
- Take 3 cm (1 1/8") in at the waist on the back piece and re-draw the side edge. Along the center line, mark at 3 cm (1 1/8") above and below the waistline to separate the back piece into two: the back bodice and the back skirt. Add a 1 cm (3/8") seam allowance. Lengthen the back skirt by 3 cm (1 1/8").
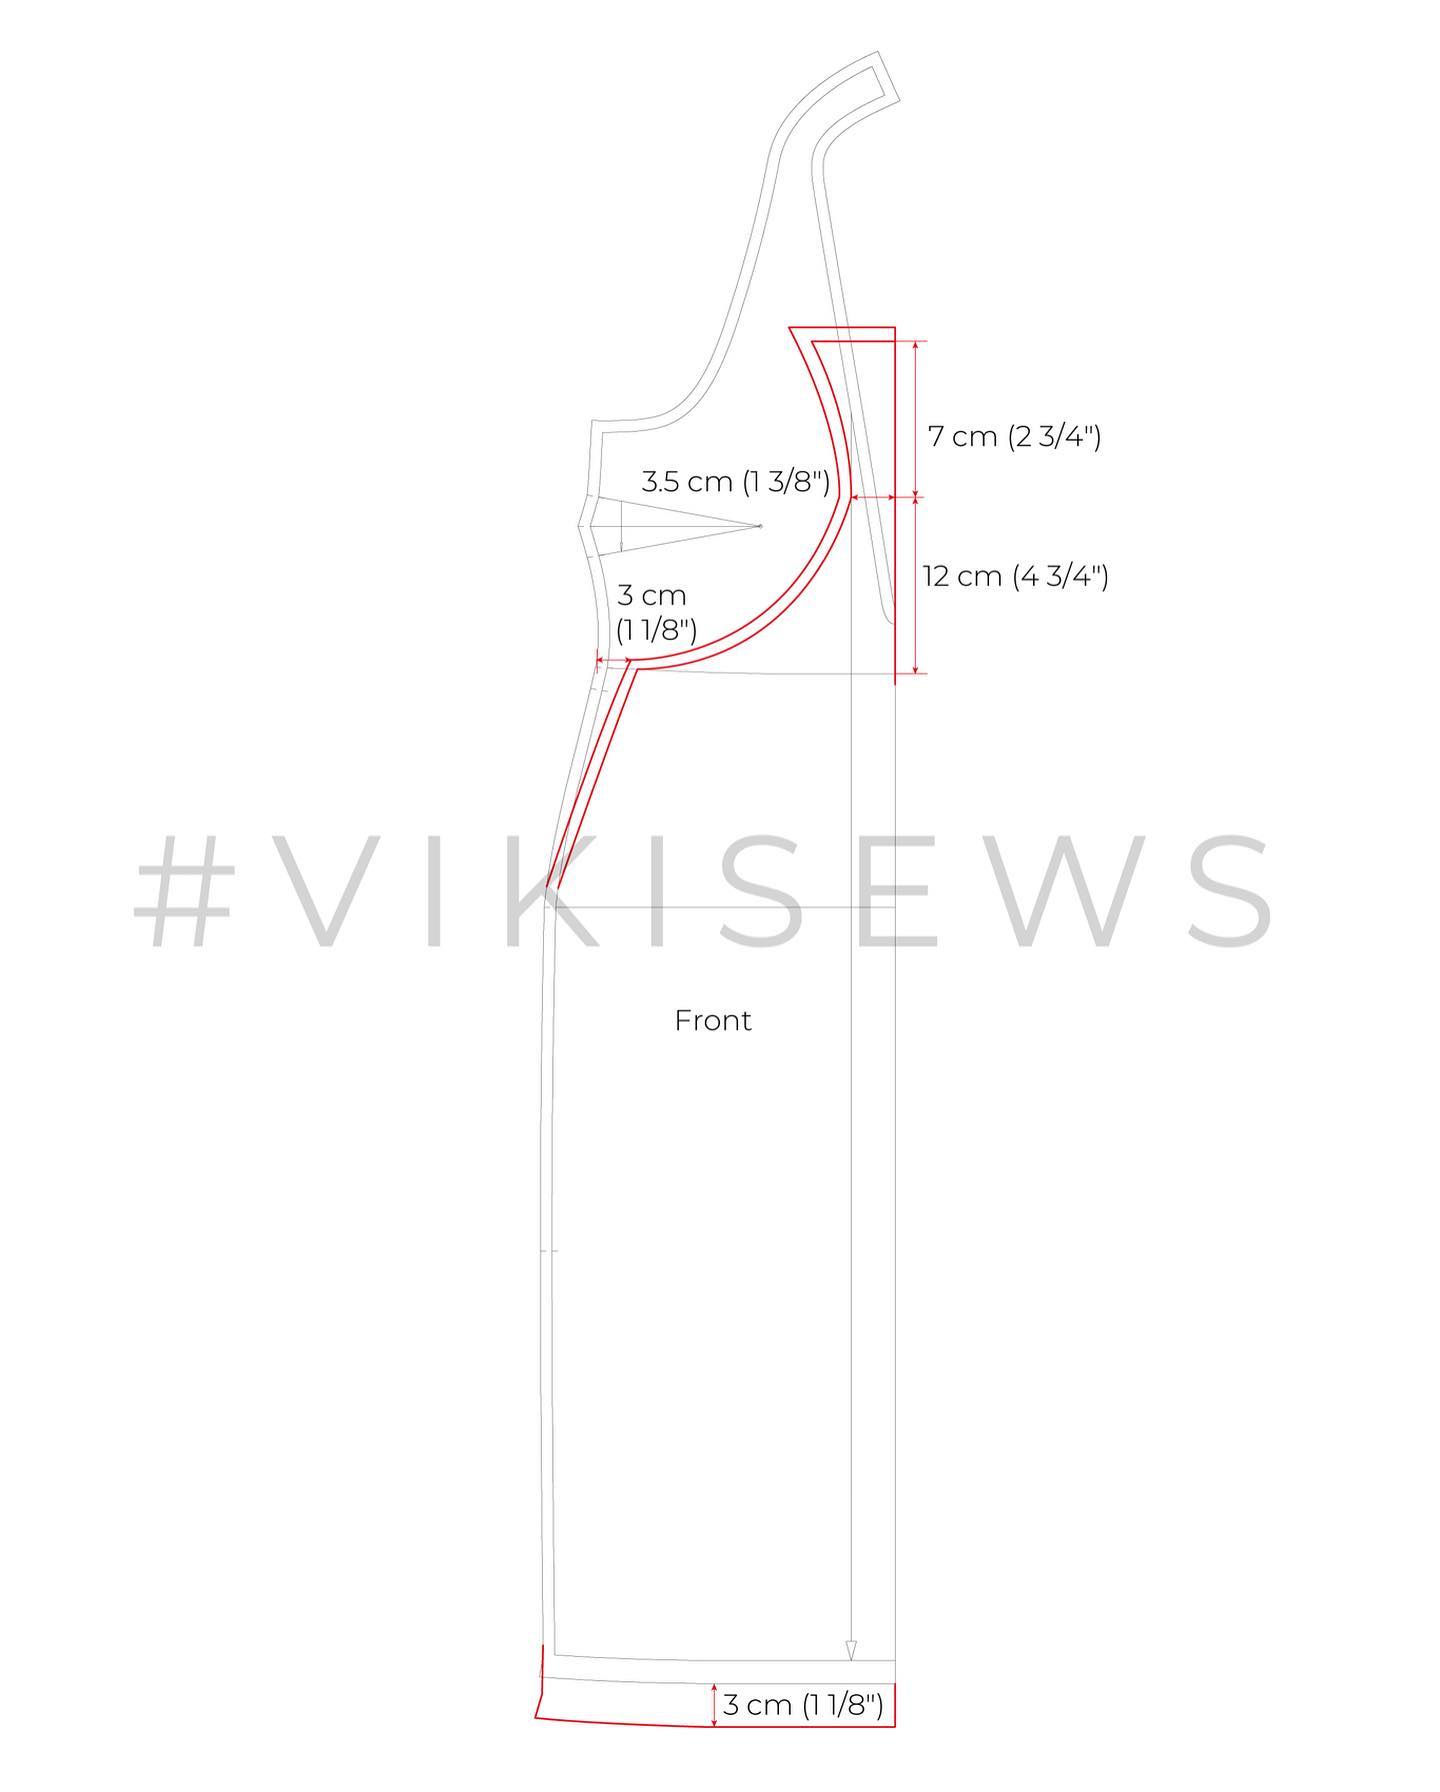
- Take 3 cm (1 1/8") in at the waist on the front piece and re-draw the side edge. Mark two reference points: first at 12 cm (4 3/4") above the waistline along the centerline; and the second at 3.5 cm (1 3/8") perpendicular to the first one (towards the side edge). Join the first marking with the waistline with a straight line. Join the second marking with the apex of the side edge by drawing a curved line. Additionally, mark a third reference point at 7 cm (2 3/4") above the first one, and then join the markings with a straight line. Mirror the curved line to the upper part of the front skirt piece. Add a 1 cm (3/8") seam allowance. Lengthen the front skirt by 3 cm.
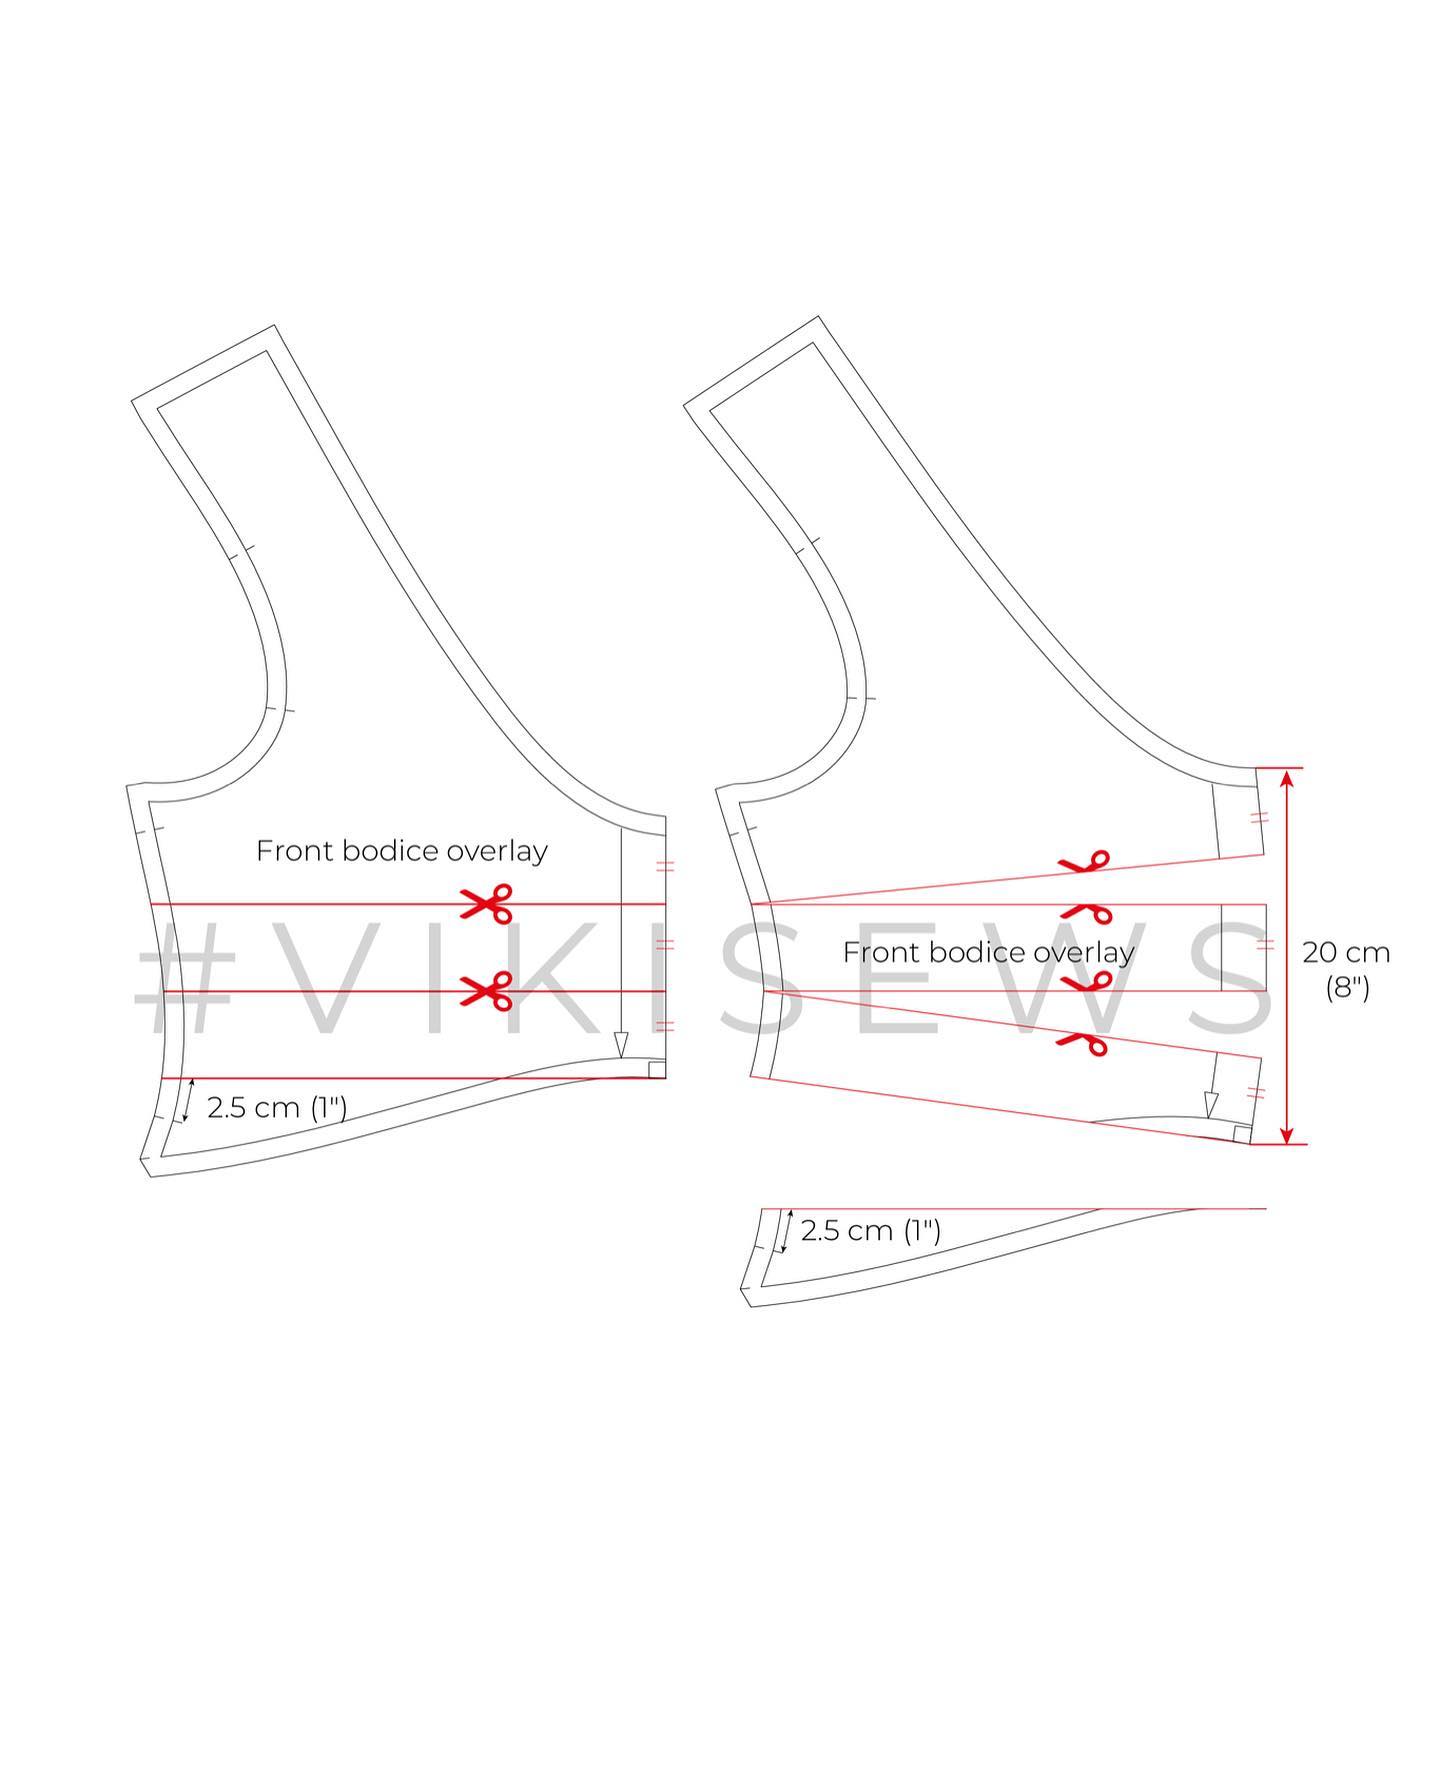
- At the bottom edge of the front bodice overlay piece, shorten the side edge by 2.5 cm (1"). Divide the center line into three equal parts, and draw parallel lines toward the side edge. Cut toward the side edge, following the marked lines and then spread the parts equally, so that the center edge is not longer than 20 cm (8"). Trim the bottom part.
- True the side edges on the front and back bodice pieces.
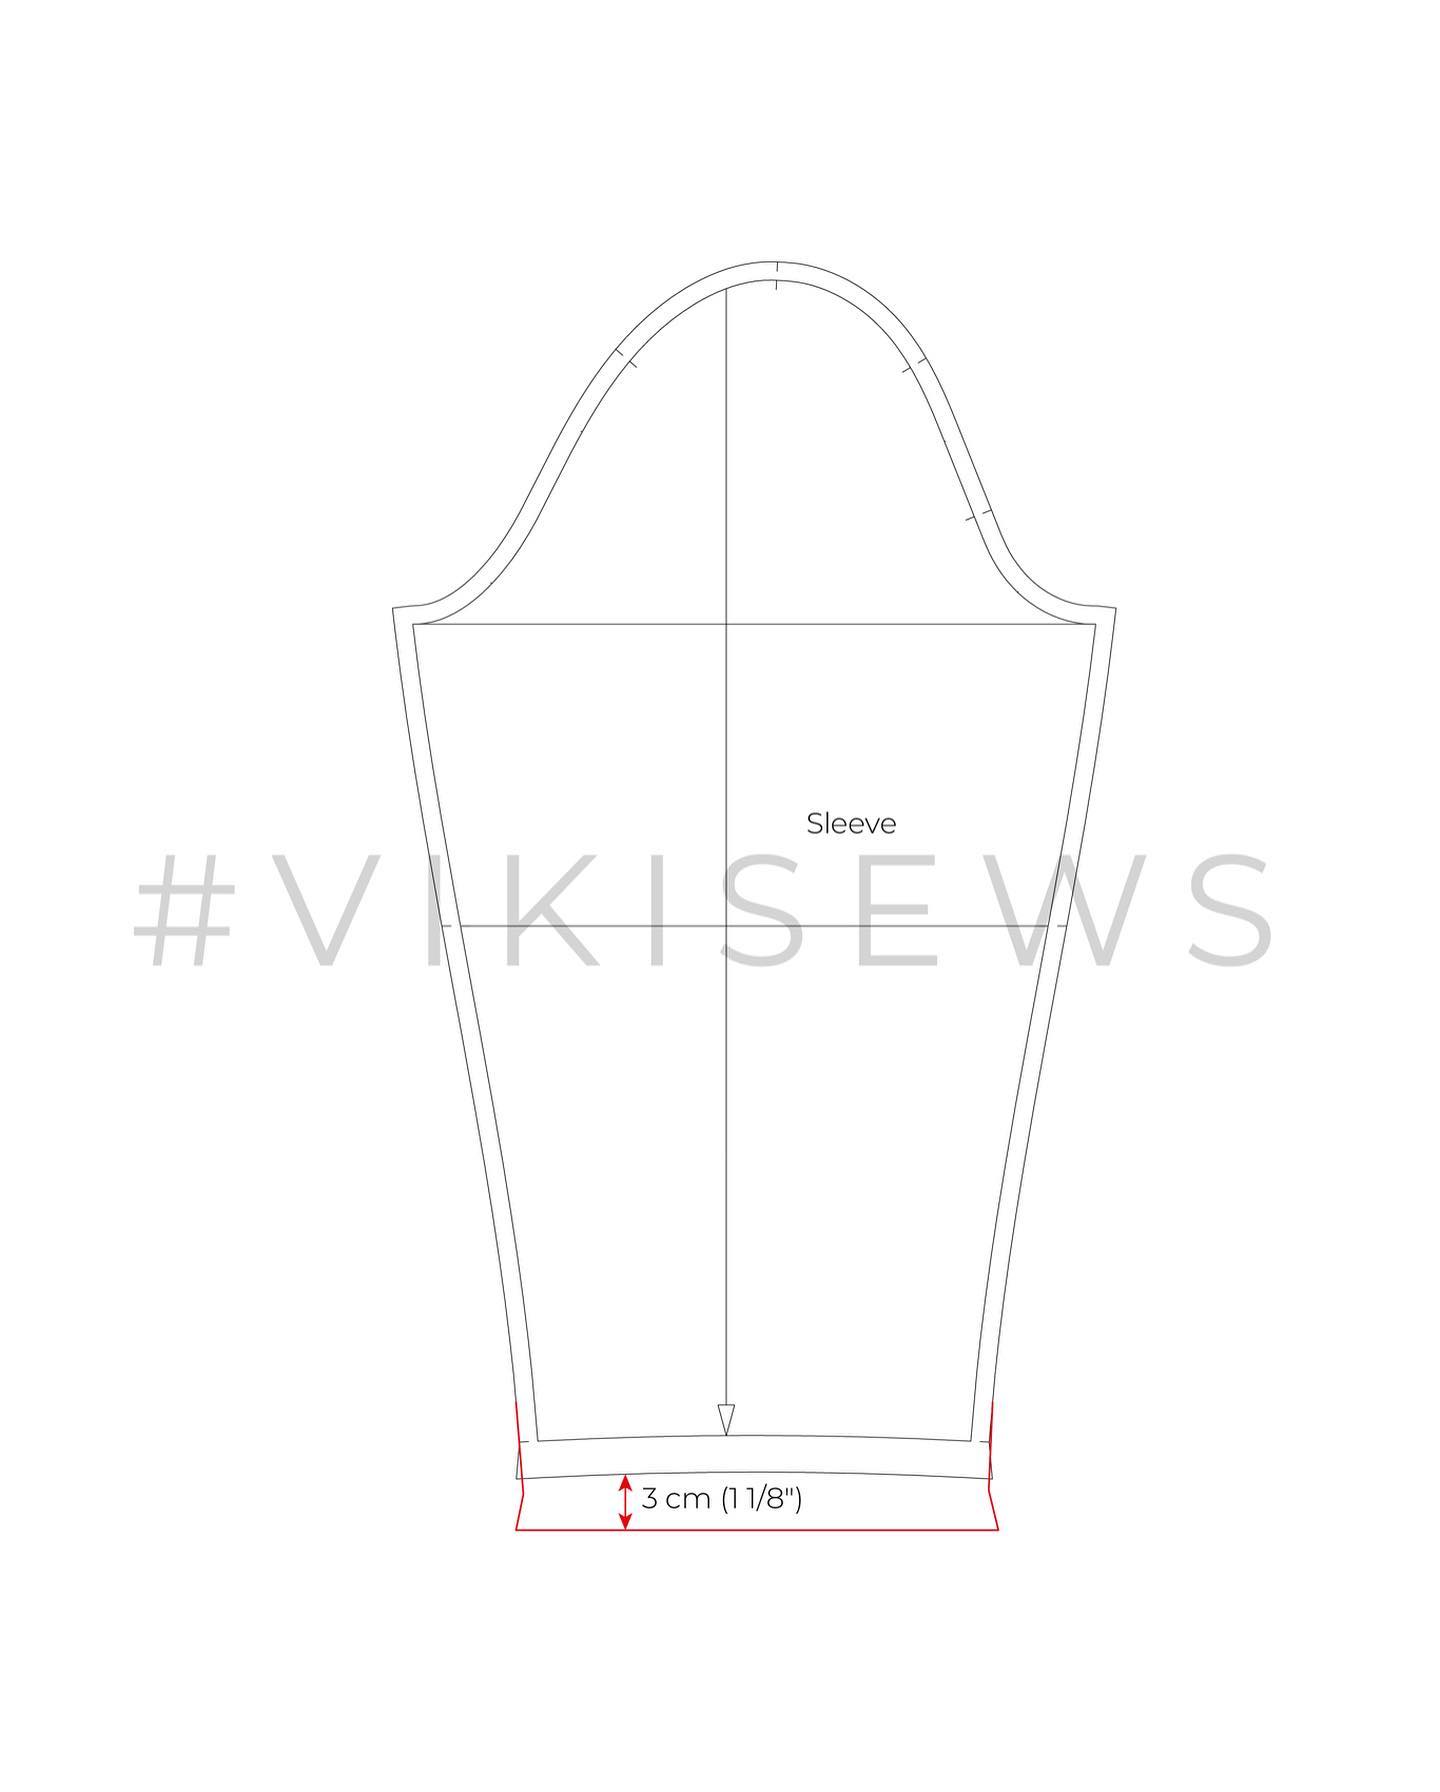
- Optionally, lengthen the sleeve by 3 cm (1 1/8").
Interesting enough to give it a try? Get the Eliza dress pattern in the “Dresses” section.
Read more about Vikisews patterns modeling:
Long-sleeve top Kendall redesign tutorial


Здесь пока нет комментариев